
STANDARD NECROPSY PROCEDURE
PRE-NECROPSY EVALUATION:
1. Identify the animal to ensure that the correct animal is being necropsied.
2. Read the clinical history carefully.
3. Examine the necropsy request form for the following:
a. Special organs or systems clinicians may want examined.
b. Whether or not this is a cosmetic necropsy.
c. Special requests (cultures, photos, etc).
4. Fill container 75% full with 10% phosphate buffered formalin.
5. Label container with necropsy number, species and initials of pathologist on
duty.
6. Weigh the animal - if possible.
NOTE:
procedural detail may vary, but a consistent technique aids in a thorough
observation. To the beginner, necropsy techniques appear unreasonably
cumbersome (
ﺗﻌب ﺑﺷﻛل ﻏﯾر ﻣﻌﻘولُﻣ)and regimented (مﱠظَﻧُﻣ). The purpose is to
methodically expose all organs and tissues to minimize the chance of missing
or "destroying" a lesion.

NECROPSY EVALUATION
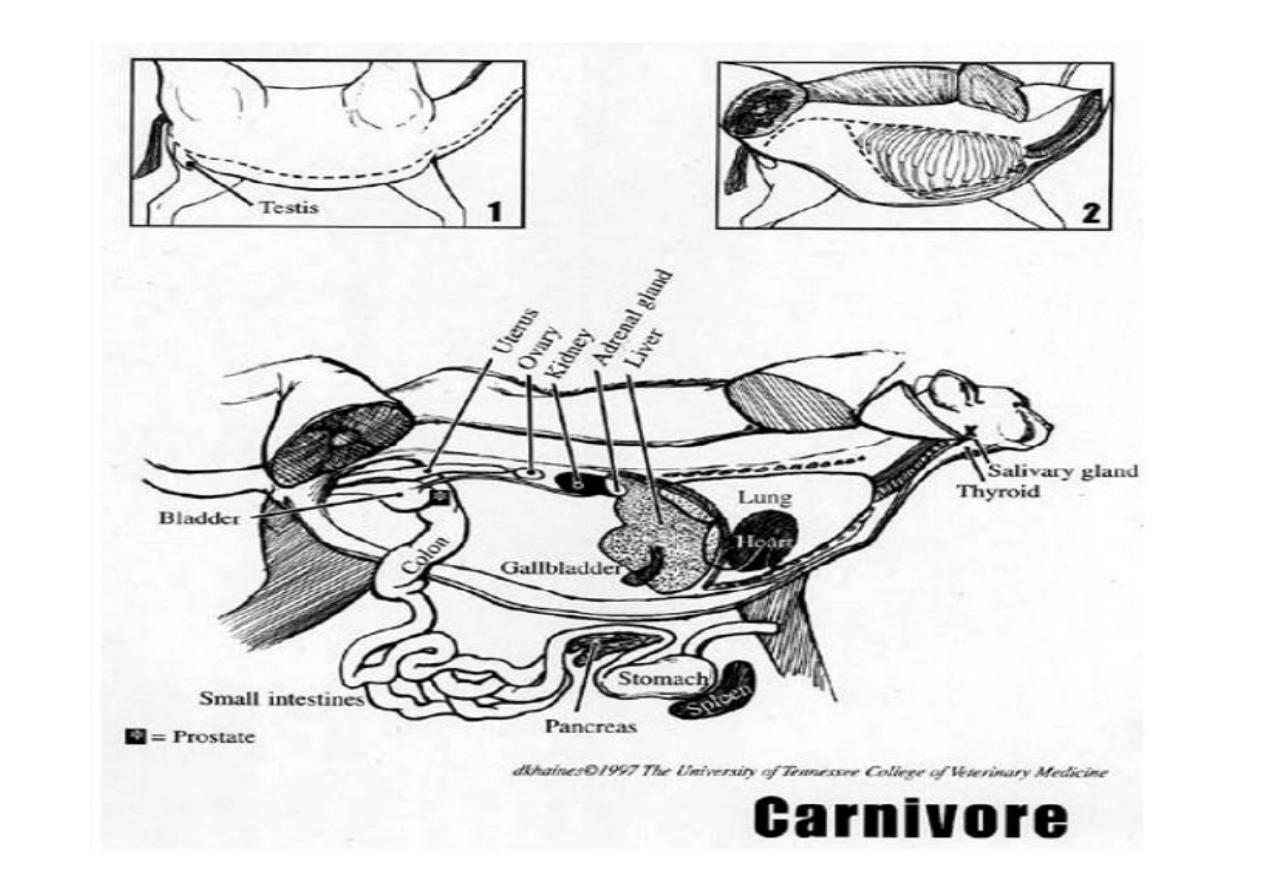
1. EXTERNAL EXAMINATION:
a) note any abnormal external findings, egs;
• Body Condition: muscle mass / fat stores, decomposition, rigor mortis.
• Skin and hair coat: parasites, dehydration, tumours, wounds, scars.
• Discharges from body orifices: hemorrhage, nasal exudate, diarrhetic feces.
• Eyes: corneal opacities, unequal dilated pupils, exudates, ulcers,
hemorrhages.
• Ears: parasites, tumours, discharges.
• Mucous membranes: colour, ulcers.
b) take appropriate samples for culture, histology, cytology, etc.
NECROPSY EVALUATION
1. EXTERNAL EXAMINATION:
a) note any abnormal external findings, egs;
• Body Condition: muscle mass / fat stores, decomposition, rigor mortis.
• Skin and hair coat: parasites, dehydration, tumours, wounds, scars.
• Discharges from body orifices: hemorrhage, nasal exudate, diarrhetic feces.
• Eyes: corneal opacities, unequal dilated pupils, exudates, ulcers,
hemorrhages.
• Ears: parasites, tumours, discharges.
• Mucous membranes: colour, ulcers.
b) take appropriate samples for culture, histology, cytology, etc.

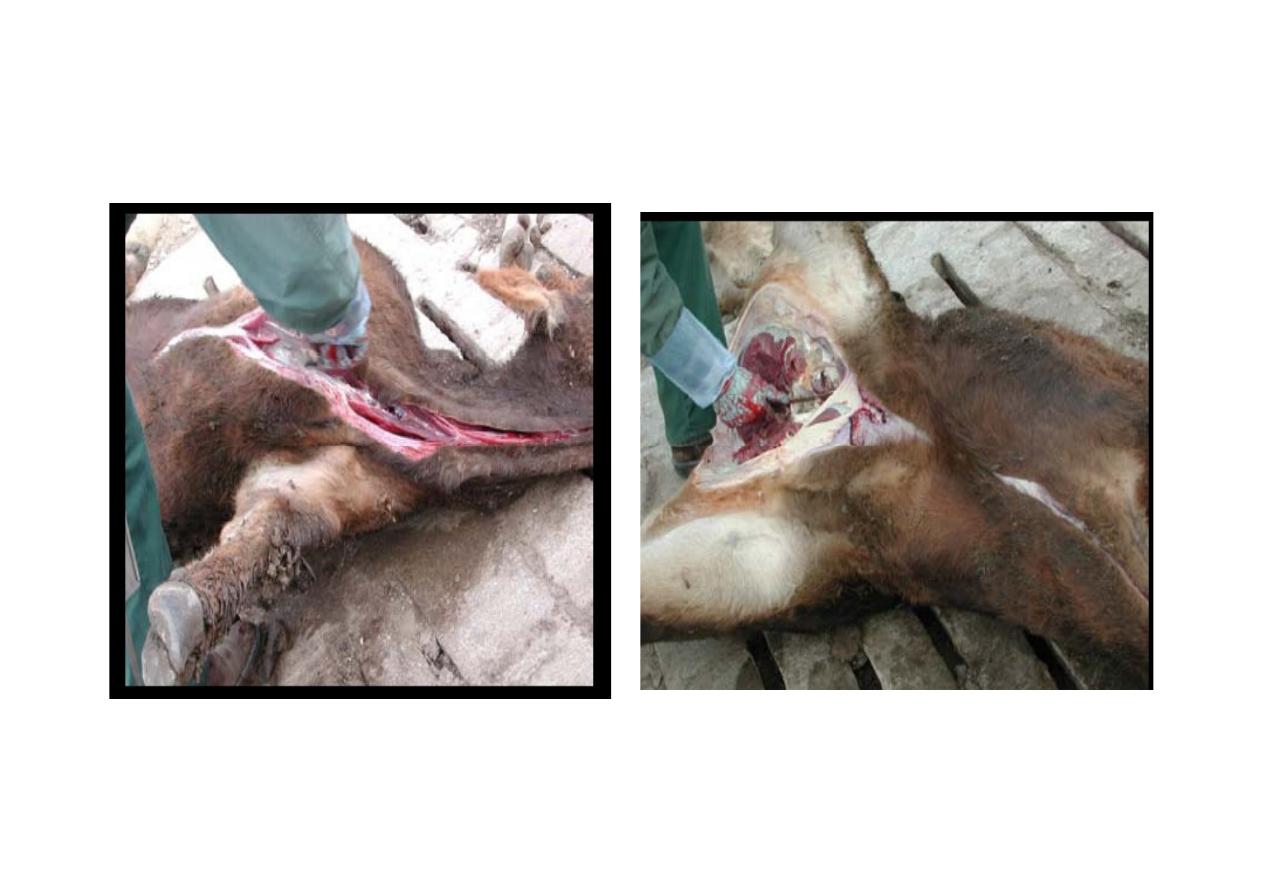
2. POSITIONING AND OPENING THE CARCASS:
[may vary from pathologist to pathologist and from animal to animal]
a) Position the animal on its left side down in ruminates while in horse in right
side.
b) Reflect the left front and left rear legs.
• - to save the cutting edge of knife, insert knife through skin and cut the skin
by pulling out(
ﺣﺎبِﺳﻧﻹا )
• - the femoral head should be removed from the acetabulum by cutting the
ligament of the head of femur.
c) Connect the two incisions with an incision along the ventral midline extending
from mandibular symphysis to anus.
d) Reflect skin dorsally.
e) Open abdominal cavity by incising through the dorsal abdominal musculature
and extending your incision downward following the rib cage.
f) Puncture a hole through the diaphragm and listen for air to enter the thoracic
cavity (if air enters - pneumothorax).
g) Make an incision in diaphragm from the sternum dorsally.
h) Remove the ribs with pruning shears, or a smaller instrument, depending on
animal size.
i) Examine viscera. At this time sample organs for microbes (eg bacteria, viruses,
parasites)

First- opening of the carcass:
N.B: before starting the p.m we should send samples to the lab. for confirm
diagnosis
- The carcass should be in left position in ruminates while in horse in write
position (the abdomen)
- Separation both of for limbs and hind limbs by cutting the pectoral and
medial muscles
- Skinning of the skin over the whole the carcass and looking for:
1- subcutaneous tissues
2- muscle
3- Thyroid, parathyroid gland
4- superficial inguinal and prescapular lymph node (size, shape, color)
5- state of blood under the skin eg. Like :
A- Deep in color and clotted after death
B- pale to slight in in case of leukemia
C- pink in case of poisoning with CO
D – Deep black in case of anthrax
F- if clotting in not complete indicate the case of asphyxia or poisoning with
oxalate
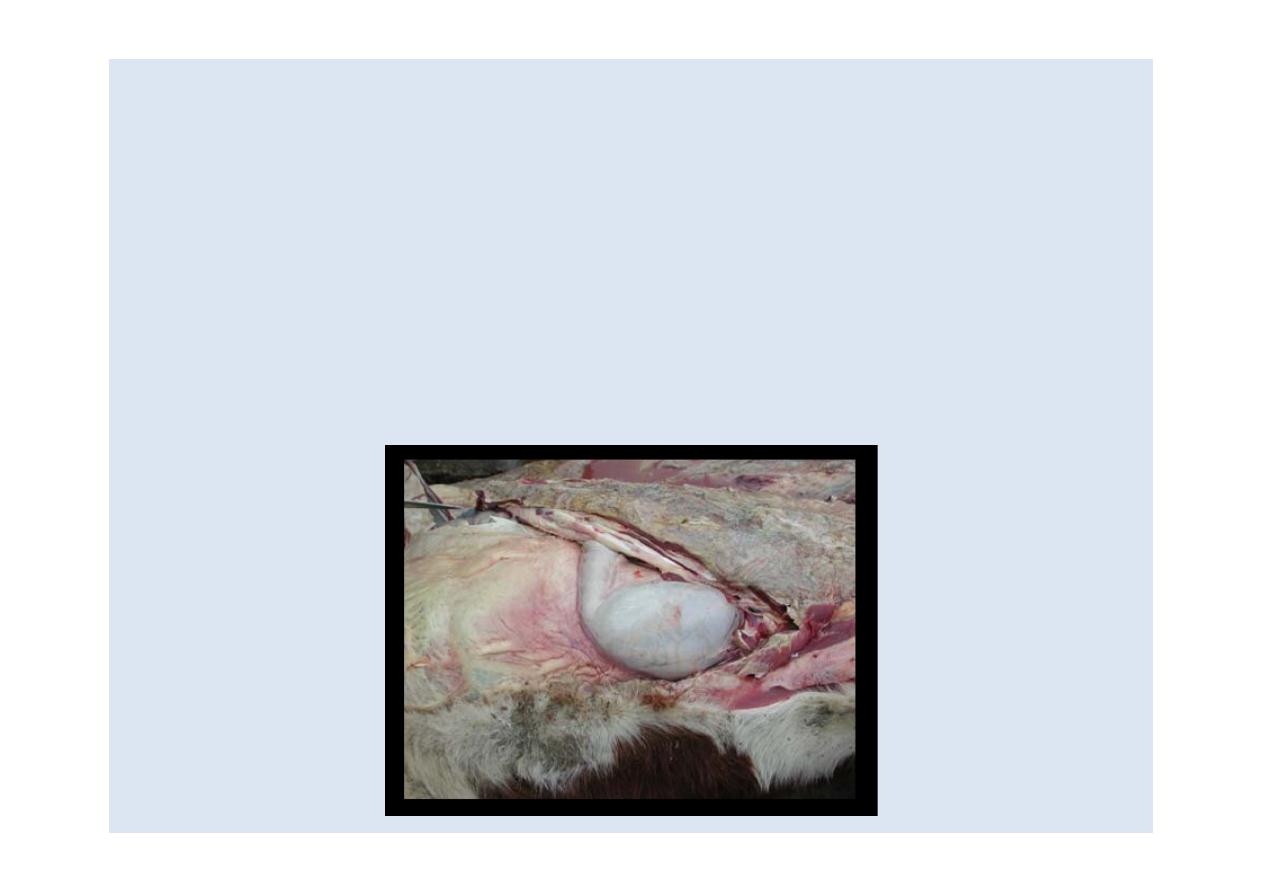
Separation of limbs

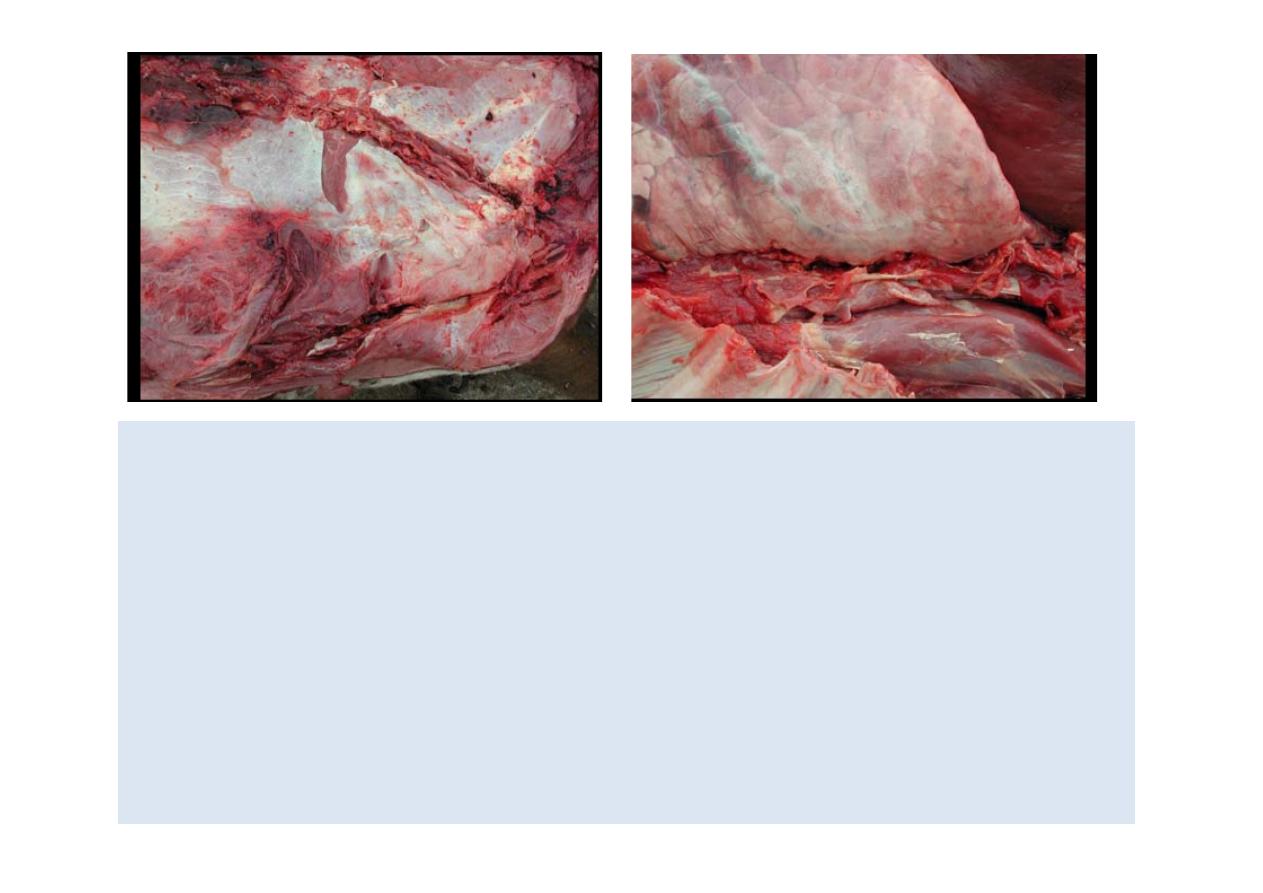
Second - opening the cavities:
Four cavities should open and examine all its contains with consideration of following
points : normal position, color, membrane if its covered like omentum, pleura,
adhesion, fluids, size….
1- Thoracic cavity
2- Abdominal cavity
4- Pelvic cavity
4- Occipital cavity
Opening of thoracic cavity:
1- Cut and removal of ribs by using of axe or bone scissor , first look for diaphragm if its
toward thoracic wall that means its normal, while if there is fluid or gas the need to
make hole in upper side
2- After removal of chest exam the pleura (normal its smooth, glassing, transparent)
and fluids in the chest ( normal small and very clear)
3- Before remove all organs should looking for fluids, tumor, adhesions and changes in
positions
4- Remove all organs of thoracic cavity and examine separately via cutting all its
attachments of muscles and tissues with vertebra, diaphragm and chest bone
5- heart, trachea, lung and diaphragm are checking and record all changes with palpation
and cutting
Examine and opening of cervico- thoracic organs:
Also the tongue, pharynx, larynx and esophagus are examine after separation of its
Attachments with other organs
Examine of head and collecting of brain:
Consideration:
1- contamination
2- Do I need the brain completely in tact?
3- Be sure to try to go low on the back of the head-near occipital junction (Flex atlanto-
occipital articulation) to express cerebellum
4- alternatives need the saw, cleaver which are more controlled
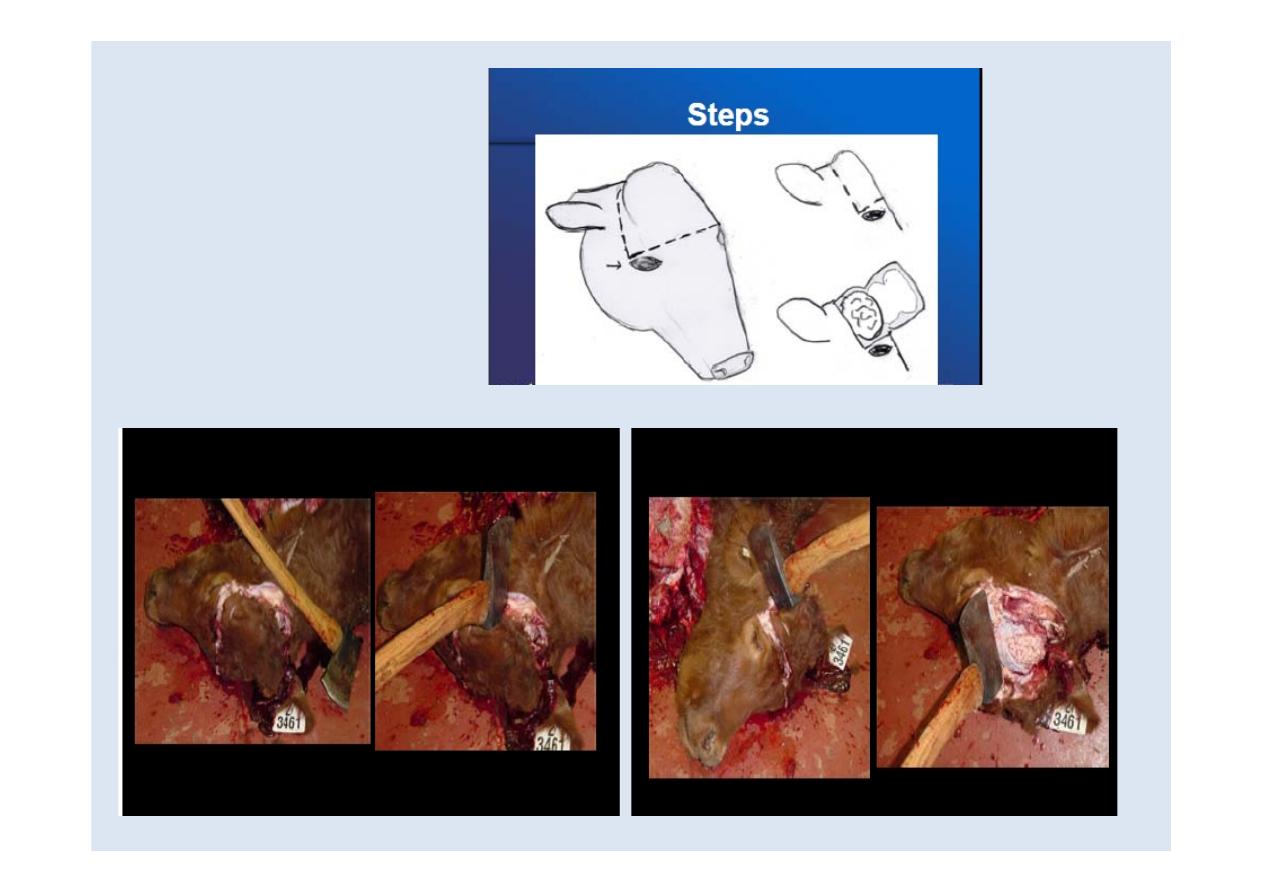
Examine of Brain
Opening of abdominal cavity:
1-This cavity is open by cutting of abdominal muscle from last rib to linea alba and lift to up
and exam all organs in its position
2-Befor remove of organs we should exam in its place and looking for membrane which
covered the internal organs like mesentery, omentum… , amount of fluid in this cavity
3- Removal of organs via cutting of all its attachments with other organs and exam it
separately
4- Both small and large intestine are exam and without washing because making confusing
with pathological changes
5- kidney, liver, four stomach, spleen and gall bladder

EXAMINATION OF JOINTS AND MUSCULATURE:
a) open and examine as many joints as are necessary.
b) examine several large muscle masses.
TISSUE PRESERVATION FOR HISTOLOGIC EVALUATION
1. 10% buffered neutral formalin (10% BNF)
Probably the best routine fixative, though penetrates tissue slowly (~5 mm/24 hours).
Commercial Formaldehyde (37-40%) 100 mls Distilled water 900 mls
sodium phosphate monobasic 4.0 g sodium phosphate dibasic (anhydrous) 6.5 g (pH should
be 7.2 ± 0.5) Fix tissue slices 24 - 48 hours at room temperature.
2. Bouins fluid - picric acid base
USES: Endocrine tissues (especially pancreas and pituitary)
Viral Diseases - Demonstrate viral inclusion bodies
Eyes, uterine biopsies - rapid fixation
DISADVANTAGES: Tissues become brittle(fragile) after 24 hours (tissues need to be washed
to remove picric acid and then placed in 50% ethanol).