
University of Technology
Biomedical Engineering Department
Computer Lab.
First Year
1
st
Semester
(2017-1016)
Laboratory Staff
1. Amar A. Mahawish
2. Asseel N. Abdullah
3. Asmaa S. Zamil
Microsoft
Word 2013
1.
Overview
Microsoft Word is one of the most popular word processing programs supported by PC
platforms. Microsoft Word can be used to create documents, reports, brochures, leaflets,
outlines, resumes, lists, and simple web pages.
2.
CREATING A NEW DOCUMENT
Opening Microsoft Word on a Pc
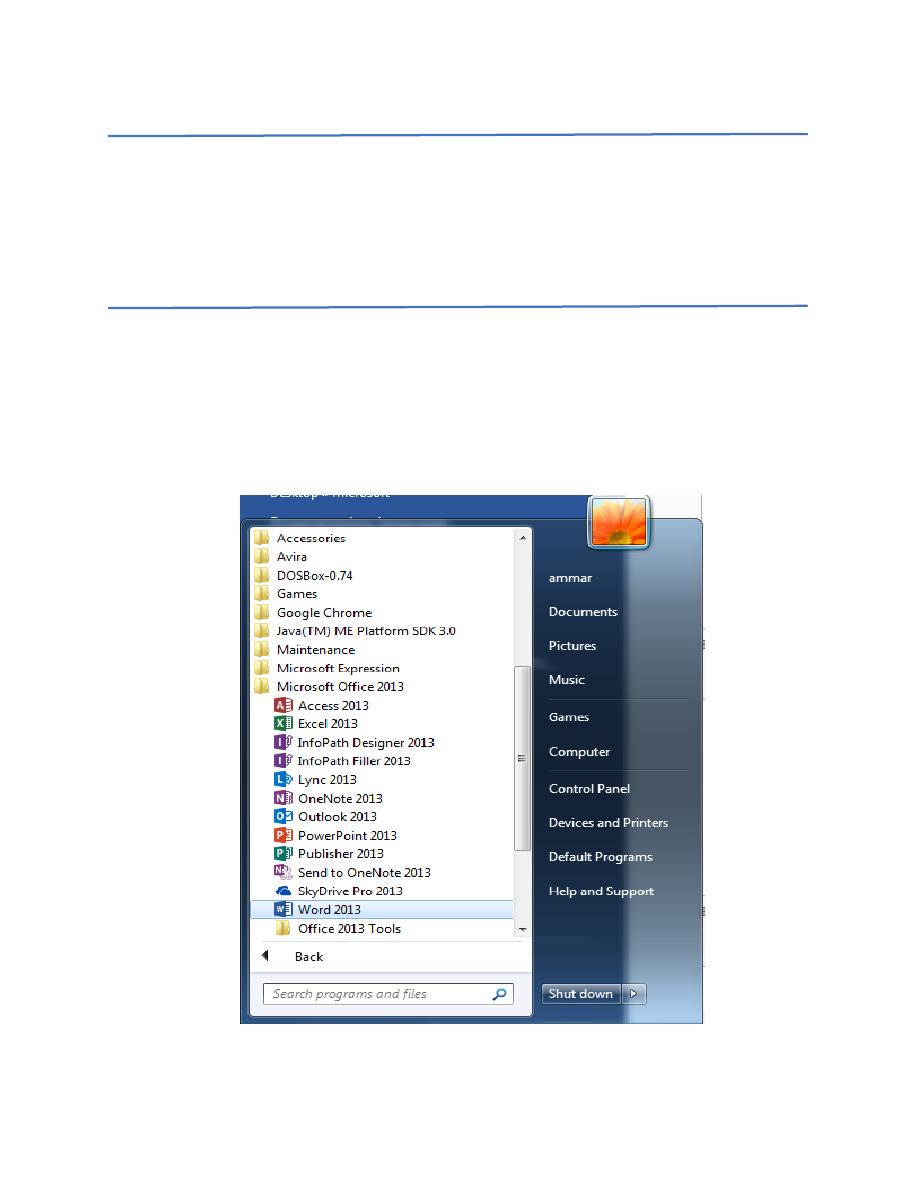
1. Begin by opening Microsoft Word.
To launch Microsoft Word, go to
Start
>
All Programs
>
Microsoft Office 2013
>
Word
2013
(Figure 1).
Figure 1. Navigation to Microsoft Word on a PC.
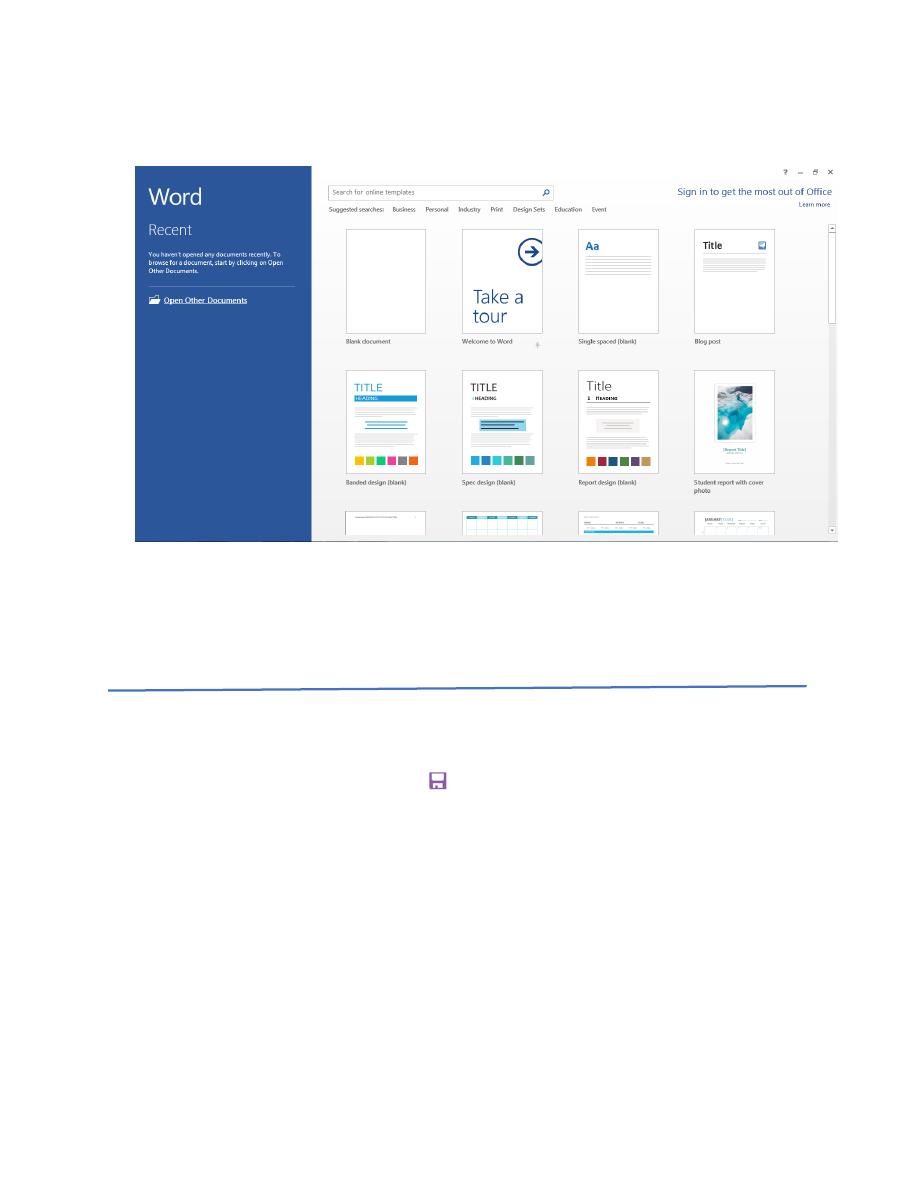
2. When opened a new Blank document will select and open. (Figure 2)
Figure 2. Opening a new document.
3.
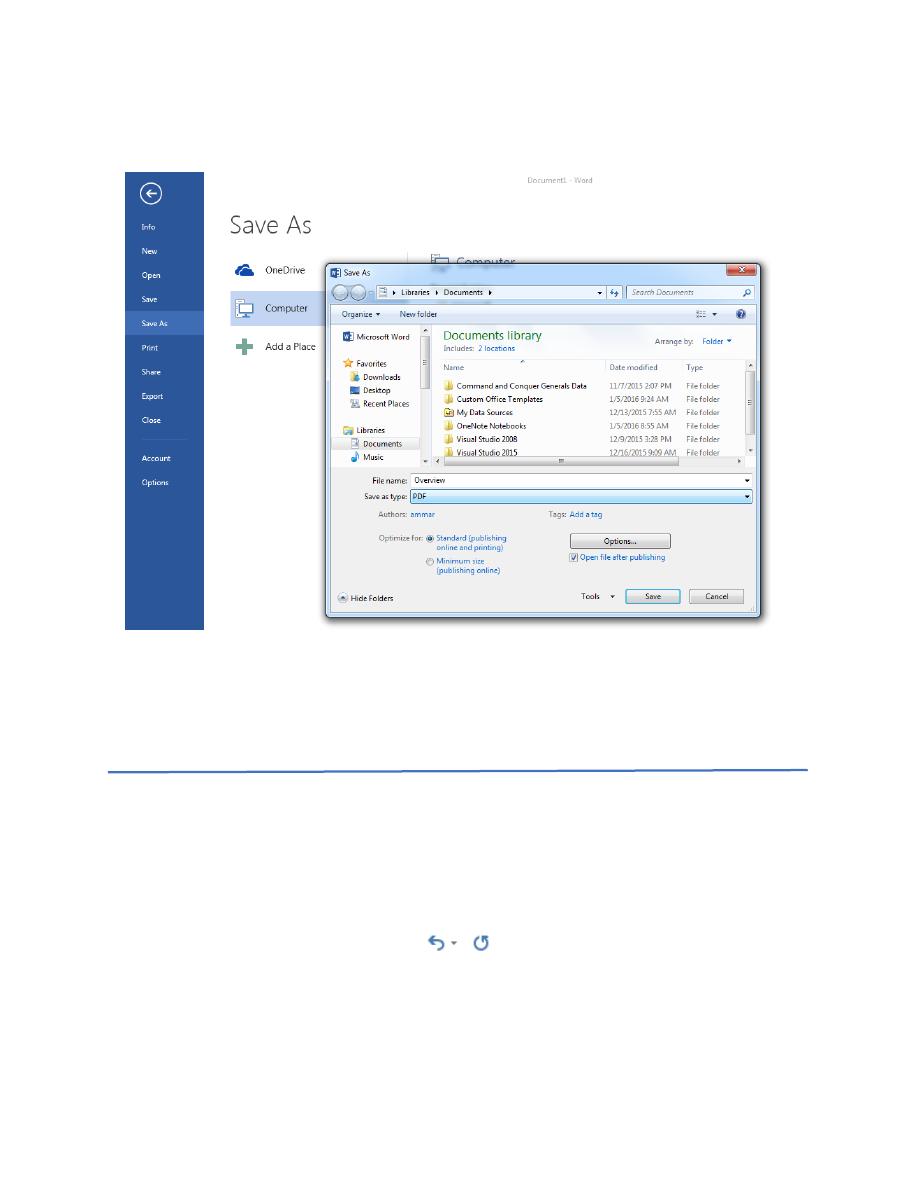
SAVING YOUR DOCUMENT
Computers crash and documents are lost all the time, so it is best to save often. It is
also recommended that you save your document before you begin working on it.
Click on the
File tab
>
Save As
or .
Microsoft Word will open a dialog box where you will be prompted to select a
save location for your file. If your desired location is not apparent in this box,
press the
Browse
icon and a new window will appear allowing you to input the
name of your document, where you want it saved, as well as the format of the
document. (Figure 3)
Once you have specified a name, place, and format for your new file, press the
save button.
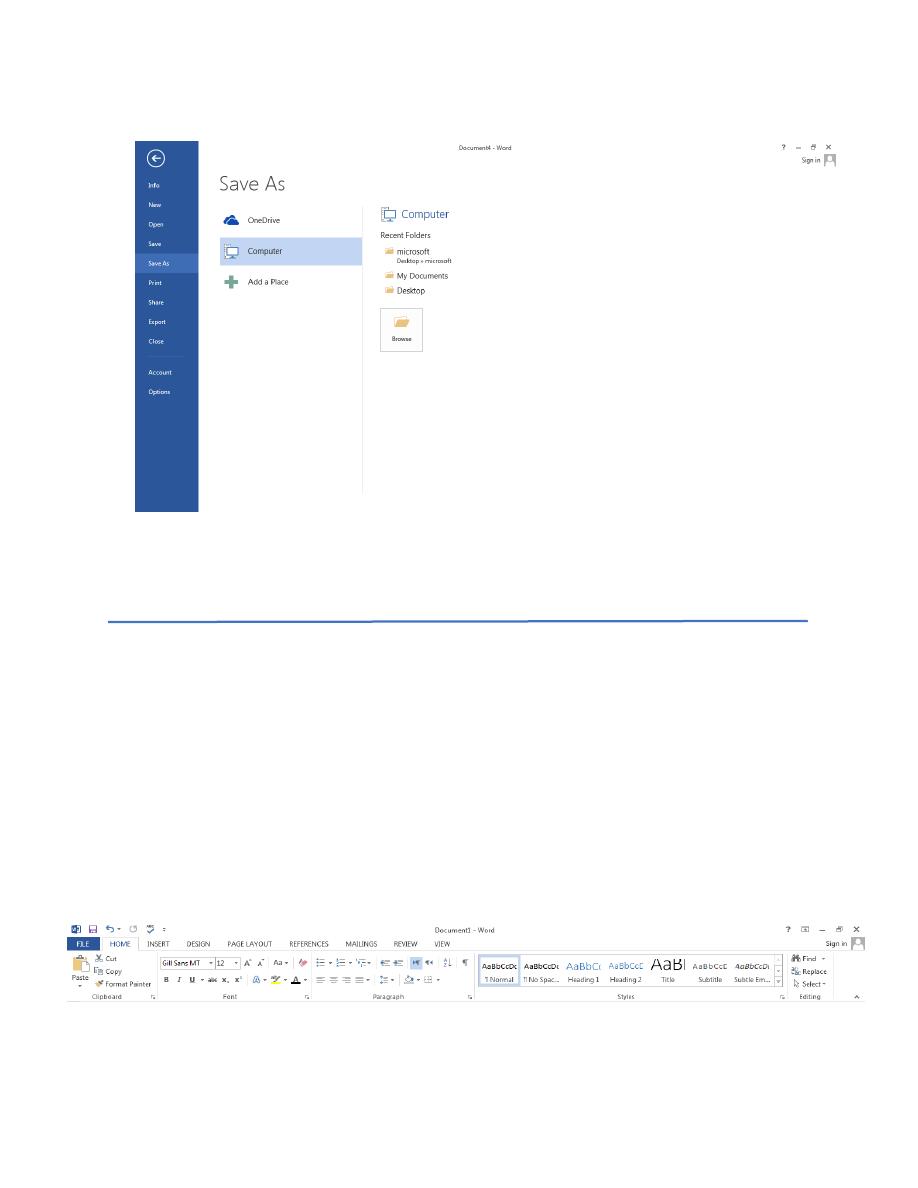
Figure 3. Saving dialog box.
4.
TOOLBARS
The new Microsoft Word uses one main toolbar to allow you to modify your document.
Within this toolbar, you can switch between tabs to determine what you would like to do.
The
Main Toolbar
contains all the options available to you in Microsoft Word. The
File
tab
(see figure 3) allows you to
Save
,
Save
As
,
Save
as Adobe PDF
,
Open
,
Close
,
,
Export
, and
Share
.
The
Home Tab
(Figure 4) is Microsoft Words standard view. This is the view most
widely used and allows you to format text by
Font Style
,
Font Size
,
Bold
,
Italic
,
Underline
,
Alignment
,
Numbered List
,
Bulleted List
,
Indentation
,
Spacing
, and
Font
Color
.
Figure 4. Home Tab
The
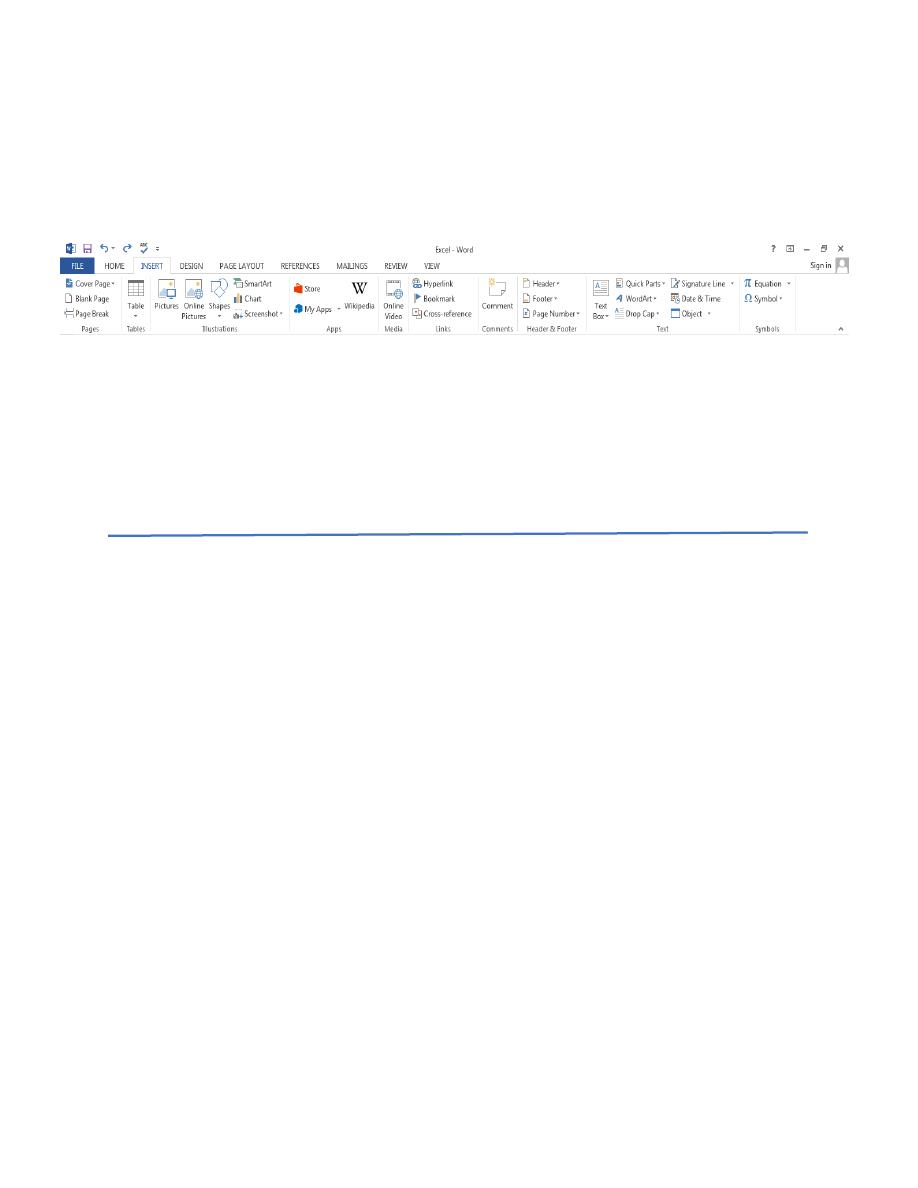
Insert Tab
(Figure 5) contains any additives you want to place in your document,
including but not limited to:
Tables
,
Online Picture/Clip Art searches
,
Headers
, and
Footers
. These icons are convenient and will bring up a dialogue box to give you further
options when clicked.
Figure 5. Insert Tab
5.
FORMATTING
Cut, Copy, and Paste
You can use the
Cut
,
Copy
and
Paste
features of Excel to change the data within your
spreadsheet, to move data from other spreadsheets into new spreadsheets, and to save
yourself the time of re-entering information in a spreadsheet.
Cut
will actually remove
the selection from the original location and allow it to be placed somewhere else.
Copy
allows you to leave the original selection where it is and insert a copy elsewhere.
Paste
is used to insert data that has been cut or copied.
1. Highlight the data or text by selecting the cells that they are held within.
2. Go to the
Home Tab
>
Copy
(CTRL + C) or
Home Tab
>
Cut
(CTRL + X).
3. Click the location where the information should be placed.
4. Go to
Home Tab
>
Paste
(CTRL + V) to be able to paste your information.
Font format
To change the font theme, size, font background color, font color, font style (bold, italic
or/and underline) go to
Home Tab
. (Figure 6)
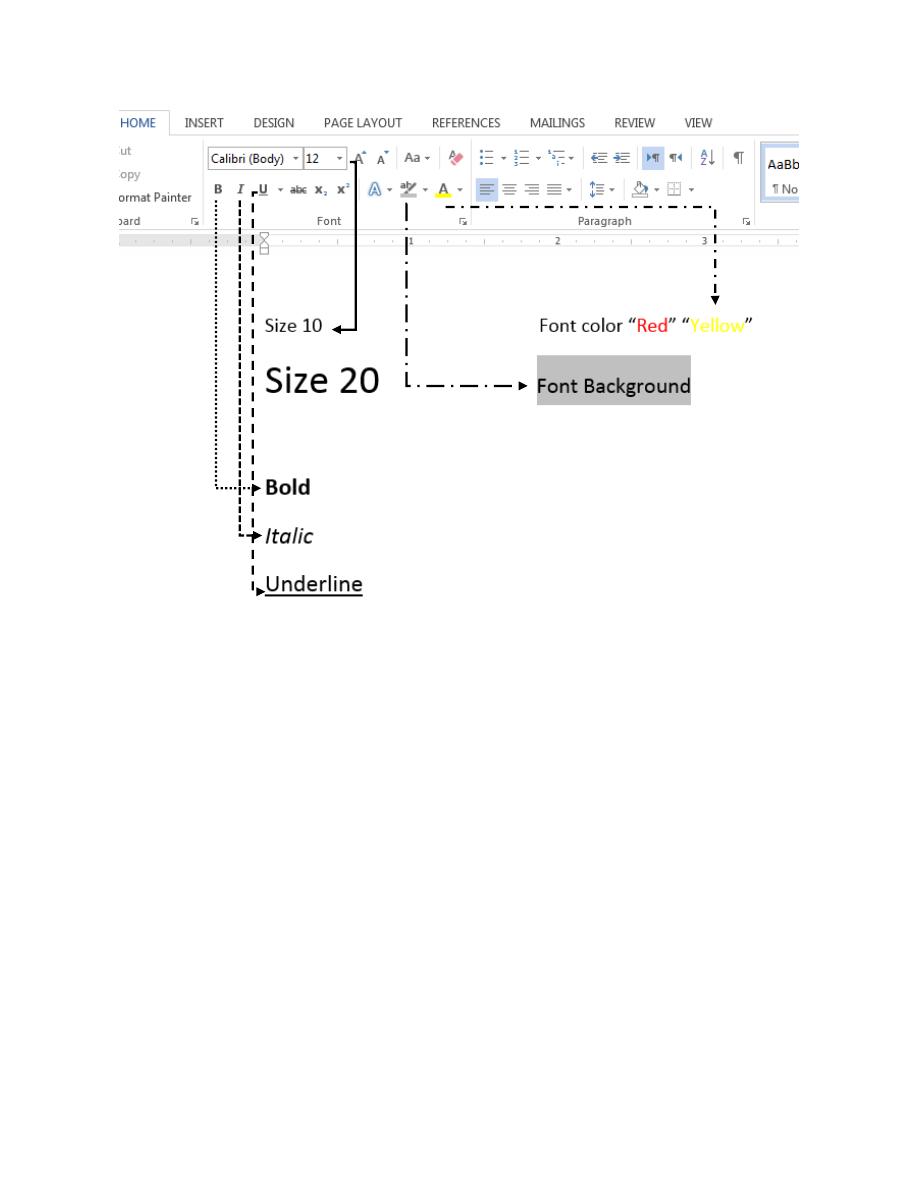
Figure 6. Font format
Formatting Paragraphs
Go to
Home
Tab
to format your paragraph (Figure 7), first highlight the paragraph you
wish to format. To highlight more than one paragraph, click at the beginning of the
paragraph and drag the mouse over the text. To apply changes to the entire document,
select all by hitting
Ctrl + A
.
The
Alignment
option allows you to choose how you want your paragraph to look (i.e.
justified, right, center, or left). The
Line Spacing
option allows you to set the desired
spacing, such as single or double. The
Indentation
option allows you to tab/push the
line(s) in your paragraph either left or right.
Numbered and Bulleted Lists
option allow
you create a simple numbered or bulleted list, click on the Numbering or Bullet button
on the Paragraph toolbar in the Home Tab. To have more control over the format of
your list, click the down arrows beside each style of list.
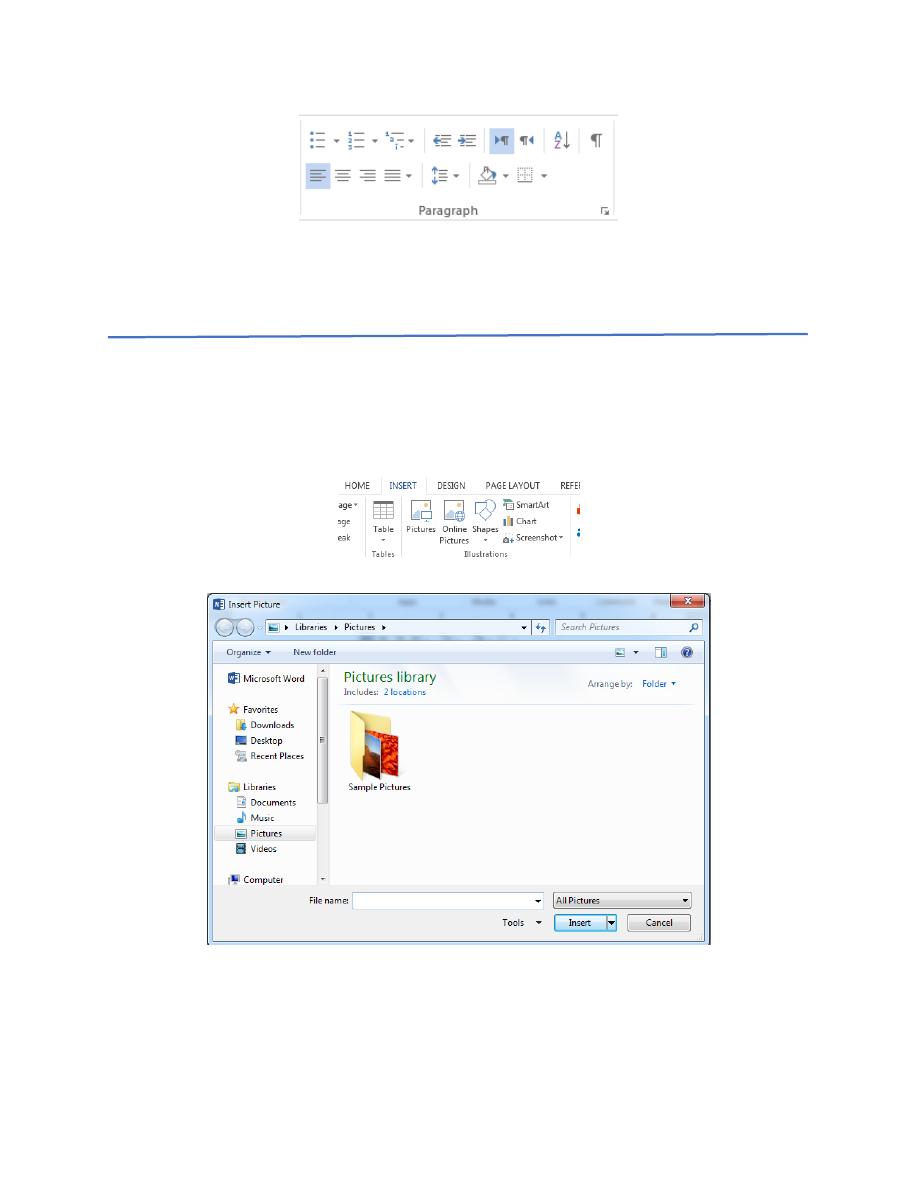
Figure 7. Paragraph Formatting
6.
INSERTING AND ADDING OBJECTS
Insert Picture:
Go to
Insert Tab
>
Illustrations box
>
Pictures
. A dialogue box will appear (Figure 8),
find the location of picture you want to insert and the press insert.
Figure 8. Dialogue box for picture location
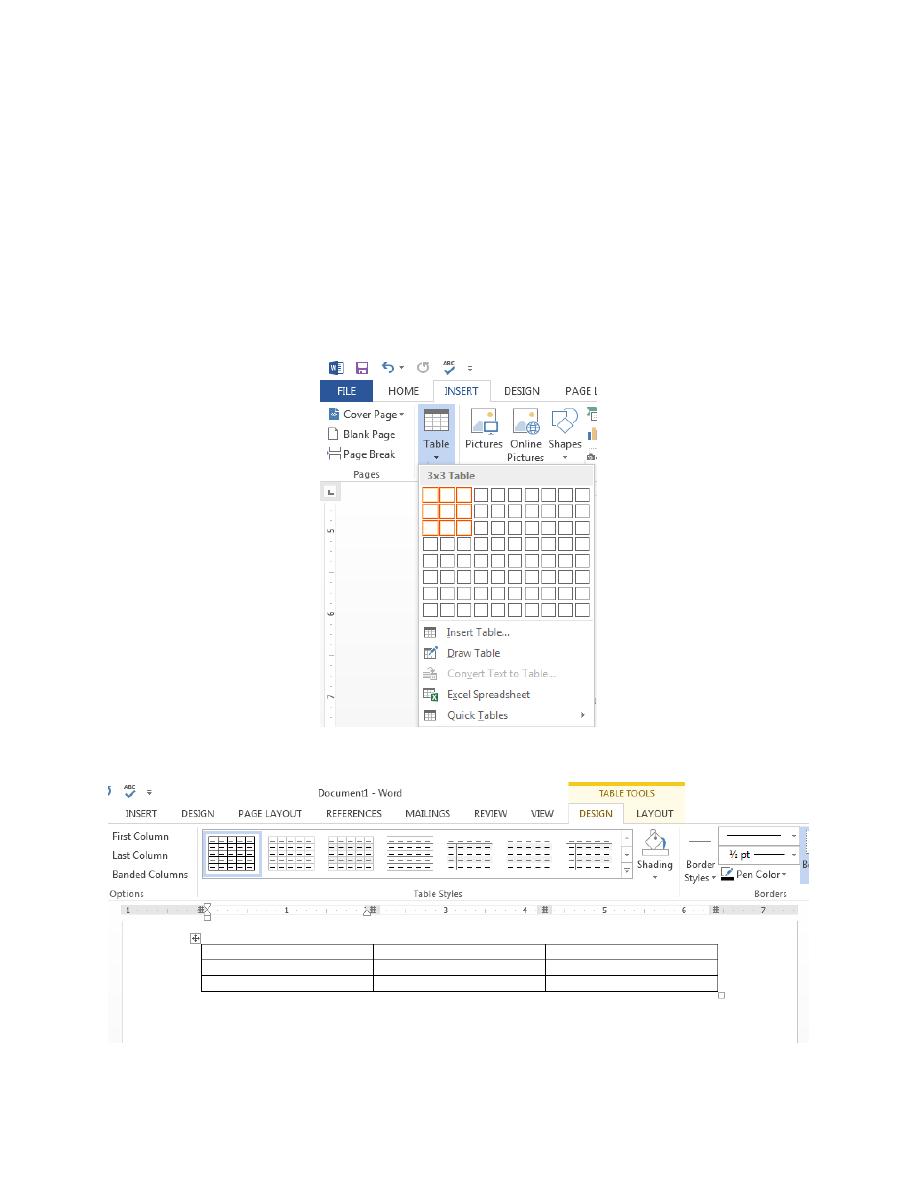
Creating a Table
To create a table within your document, go to
Insert Tab
>
Tables box
>
Table button
.
Choose the desired table size and format by hovering over the boxes, and press Enter
on the keyboard (Figure 9). The table will be inserted at the cursor’s location within your
document. To navigate within your table, use the arrow keys. To modify your table,
when your table is selected, a
Design
Tab
and
Layout
Tab
will appear in the
Toolbar
(Figure 10). From here, you can add cells, columns or rows, merge or split cells, and
further modify your table. To exit the table, click outside of it.
Figure 9. Insert Table
Figure 10. Table options from the Toolbar.
Saving As A Pdf
Go to
File Tab
>
Save As
Adobe PDF
. (Figure 11)
Figure 11. Saving as PDF type
7.
Undo and Redo
The easiest way to undo an action is with the key commands Ctrl + Z and to redo an
action with Ctrl + Y. It is important to note that not all actions are undoable, thus it is
important to save before you make any major changes in your document so you can
revert back to your saved document. There are also two icons (Figure 12) above the
Main Toolbar near the Save Icon. The left icon is Undo and the right icon is Redo.
Figure 25: Undo and Redo
Quitting: Before you quit, it’s a good idea to save your document one final time
and good idea to save as pdf format to avoid any change when you printout you
work.
1. Overview
Microsoft Excel is one of the most popular spreadsheet applications that helps you
manage data, create visually persuasive charts, and thought-provoking graphs. Excel is
supported by both Mac and PC platforms. Microsoft Excel can also be used to balance a
checkbook, create an expense report, build formulas, and edit them.
2. CREATING A NEW DOCUMENT
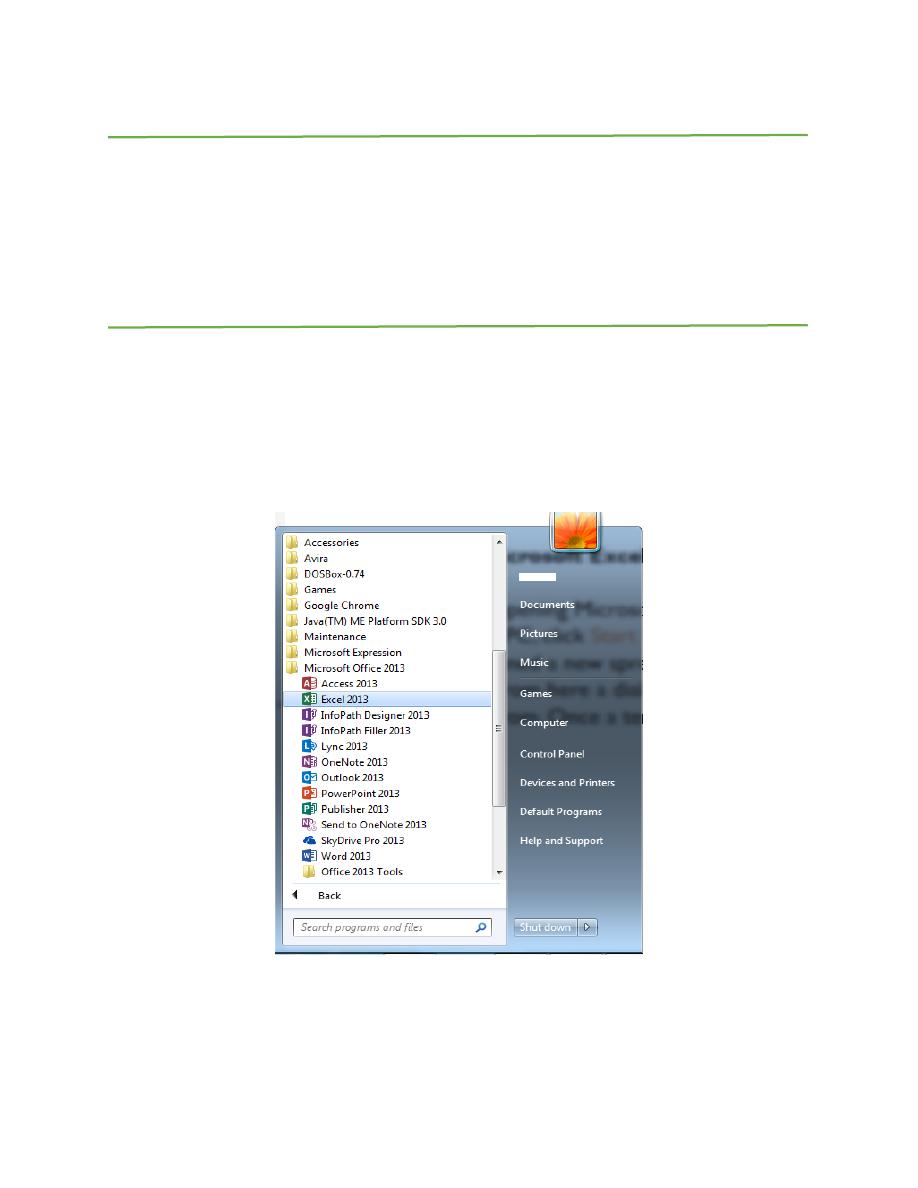
Opening Microsoft Excel on a PC
1. Begin by opening Microsoft Excel.
On a PC, click
Start
>
All
Programs
>
Microsoft
Office
2013
>
Excel
2013
. (Figure 1)
Figure 1. Navigation to Microsoft Excel on a PC.
2. When opened a new spreadsheet will pop up on the screen. If this does not happen
click on the
File tab
>
New
. From here a dialog box with various different templates will
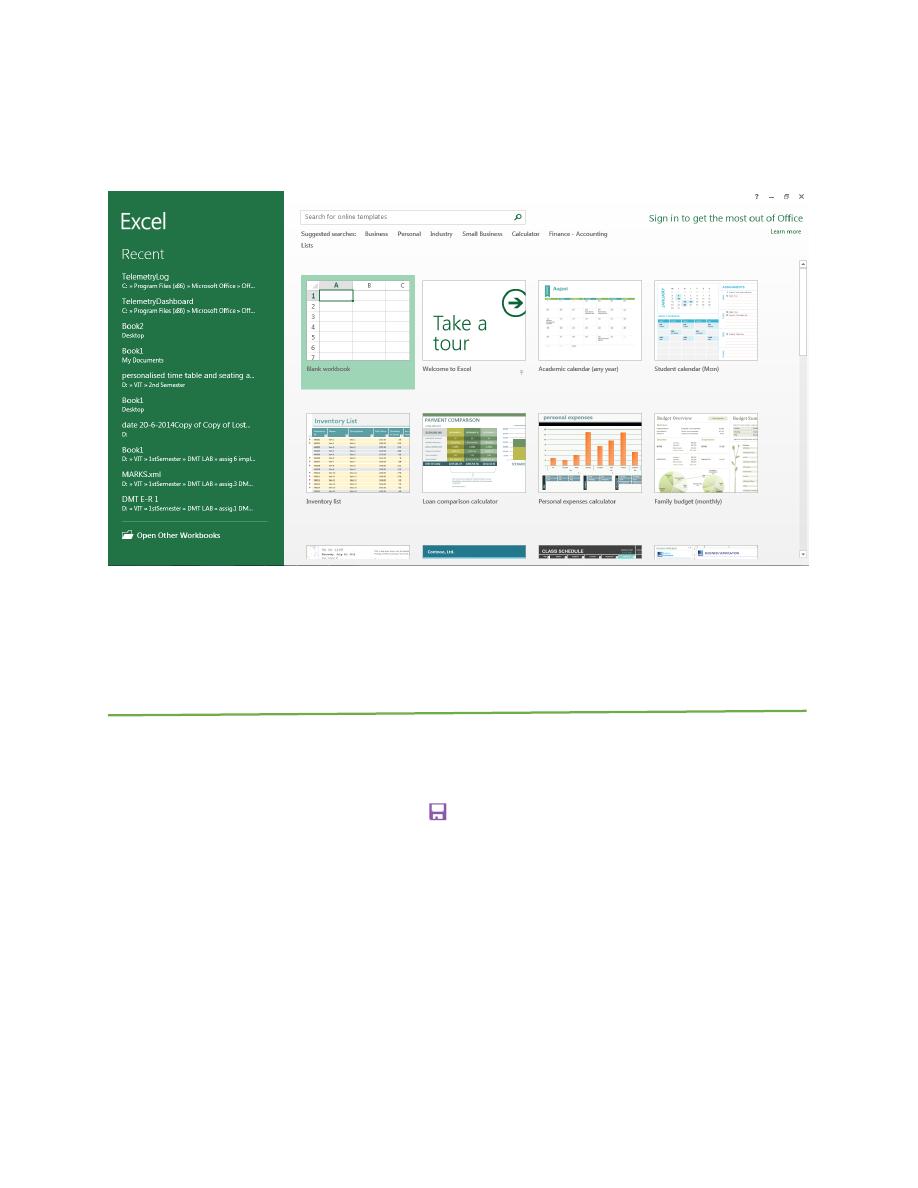
appear on the screen that you can choose from. Once a template is chosen, click
Create
.
(Figure 2)
Figure 2. Opening a new workbook
3. SAVING YOUR DOCUMENT
Computers crash and documents are lost all the time, so it is best to save often. It is also
recommended that you save your document before you begin working on it.
Click on the
File tab > Save As
or .
Microsoft Excel will open a dialog box where you will be prompted to select a
save location for your file. If your desired location is not apparent in this box,
press the
Browse
icon and a new window will appear allowing you to input the
name of your document, where you want it saved, as well as the format of the
document. (Figure 3)
Once you have specified a name, place, and format for your new file, press the
save button.
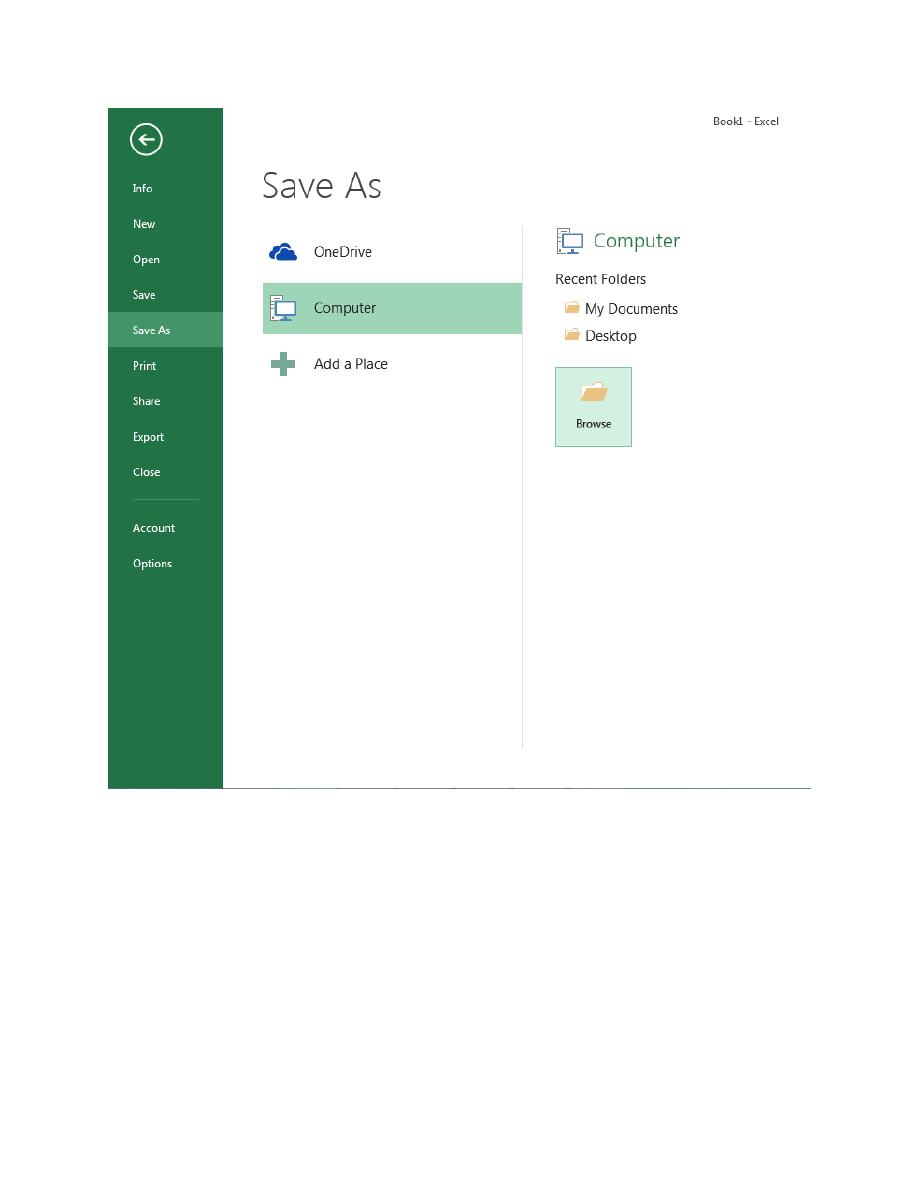
Figure 3. Saving dialog box.
4. TOOLBARS
In Microsoft Excel 2013 for a PC, the toolbars are automatically placed as tabs at the
top of the screen. Within these tabs you will find all of your options to change text, data,
page layout, and more. To be able access all of the certain toolbars you need to click on
a certain tab that is located towards the top of the screen.
Two Commonly Used Toolbars
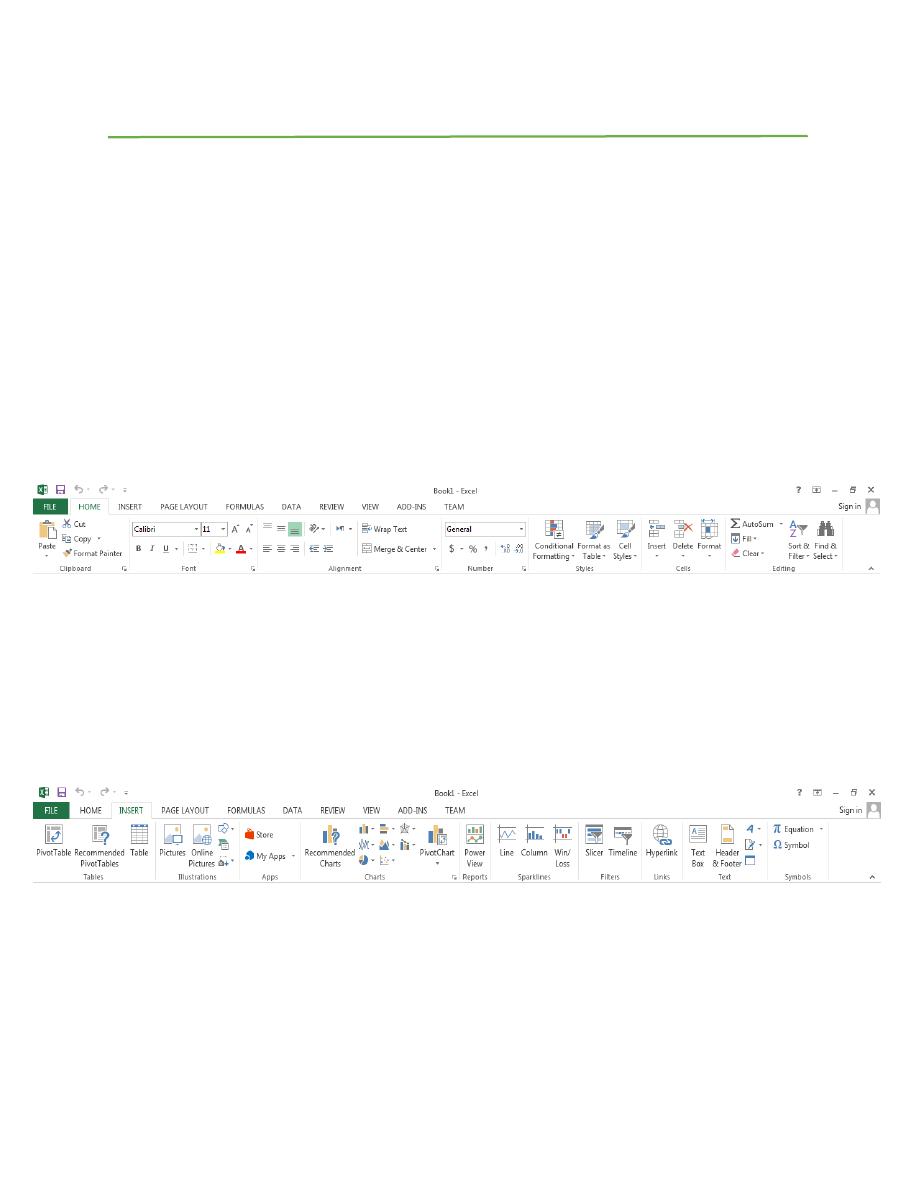
The
Home
Tab: This is one of the most common tabs used in Excel. You are
able to format the text in your document, cut, copy, and paste information.
Change the alignment of your data, insert, delete, and format cells. (Figure 4)
Figure 4. Home Tab.
The
Insert
Tab: This tab is mainly used for inserting visuals and graphics into
your document. There are various different things that can be inserted from this
tab such as pictures, clip art, charts, links, headers and footers, and word art.
(Figure 5)
Figure 5. Insert Tab.
5. FORMATTING
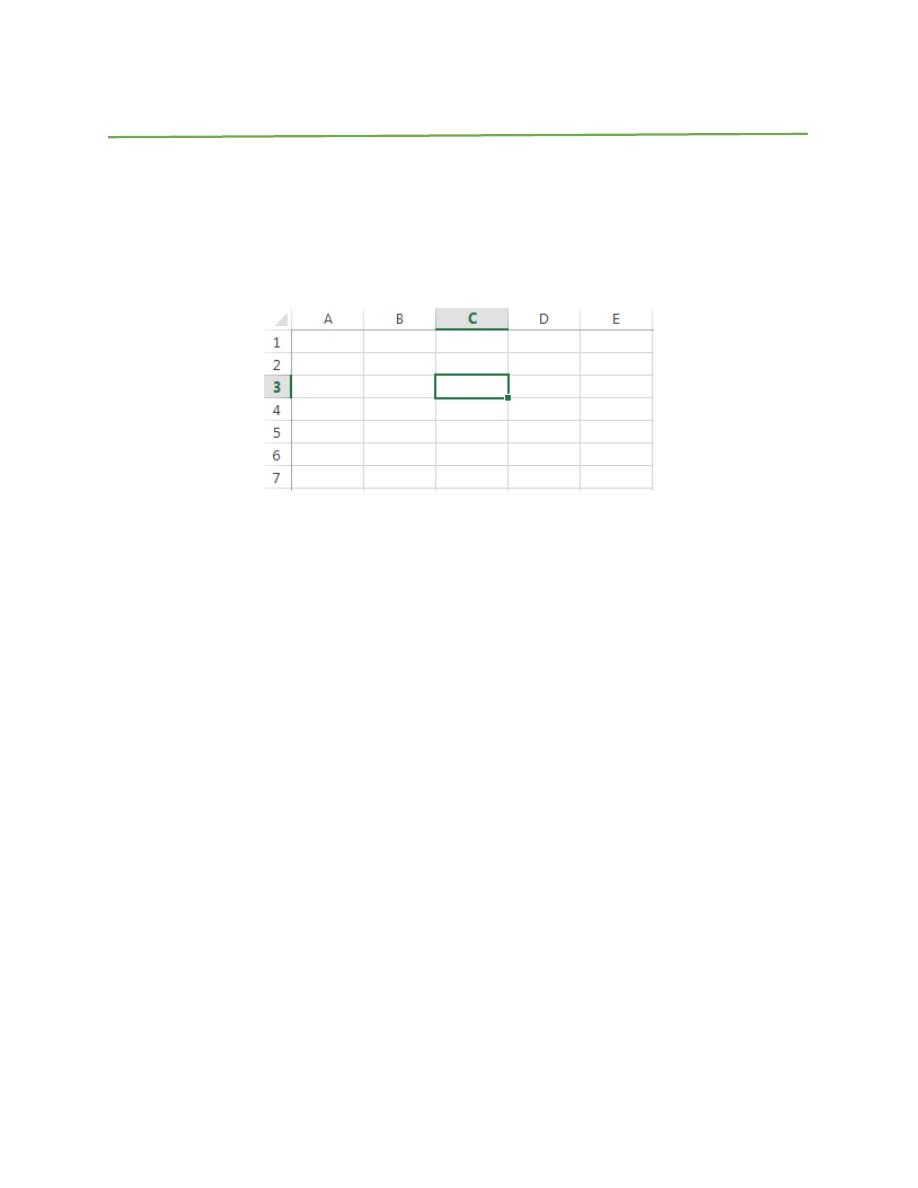
Working with Cells
Cells are an important part of any project being used in
Microsoft Excel
. Cells hold all of
the data that is being used to create the spreadsheet or workbook. To enter data into a
cell you simply click once inside of the desired cell, a green border will appear around
the cell. (Figure 6) This border indicates that it is a selected cell. You may then begin
typing in the data for that cell.
Figure 6. Entering Data.
Changing an Entry within a Cell
You may change an entry within a cell two different ways:
1. Click the cell one time and begin typing. The new information will replace any
information that was previously entered.
2. Double click the cell and a cursor will appear inside. This allows you to edit certain
pieces of information within the cells instead of replacing all of the data.
Cut, Copy, and Paste
You can use the
Cut
,
Copy
and
Paste
features of Excel to change the data within your
spreadsheet, to move data from other spreadsheets into new spreadsheets, and to save
yourself the time of re-entering information in a spreadsheet.
Cut
will actually remove
the selection from the original location and allow it to be placed somewhere else.
Copy
allows you to leave the original selection where it is and insert a copy elsewhere.
Paste
is used to insert data that has been cut or copied.
1. Highlight the data or text by selecting the cells that they are held within.
2. Go to the
Home Tab
>
Copy
(CTRL + C) or
Home Tab
>
Cut
(CTRL + X).
3. Click the location where the information should be placed.
4. Go to
Home Tab
>
Paste
(CTRL + V) to be able to paste your information.
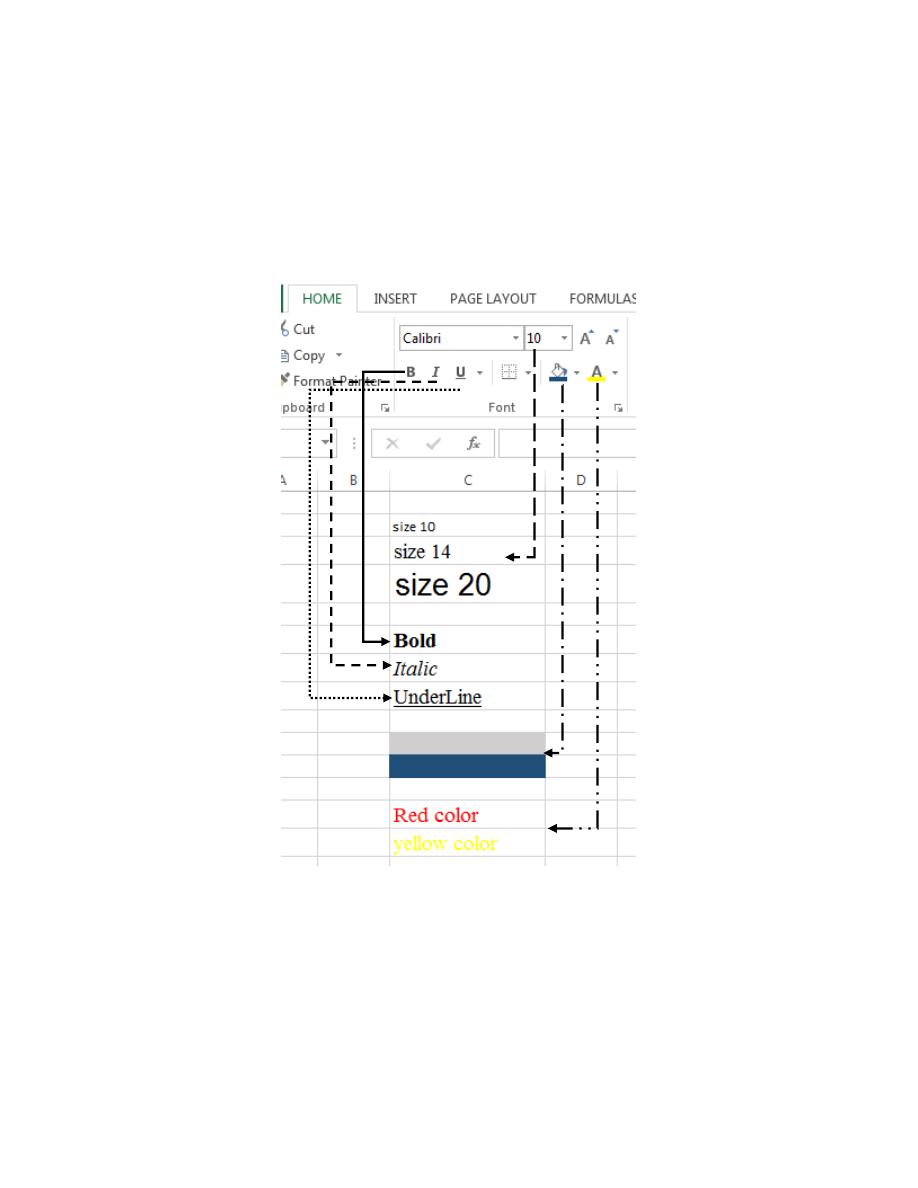
Font format
To change the font theme, size, cell background color, font color, font style (bold, italic or/and
underline) go to
Home Tab
. (Figure 7)
Figure 7. Font format
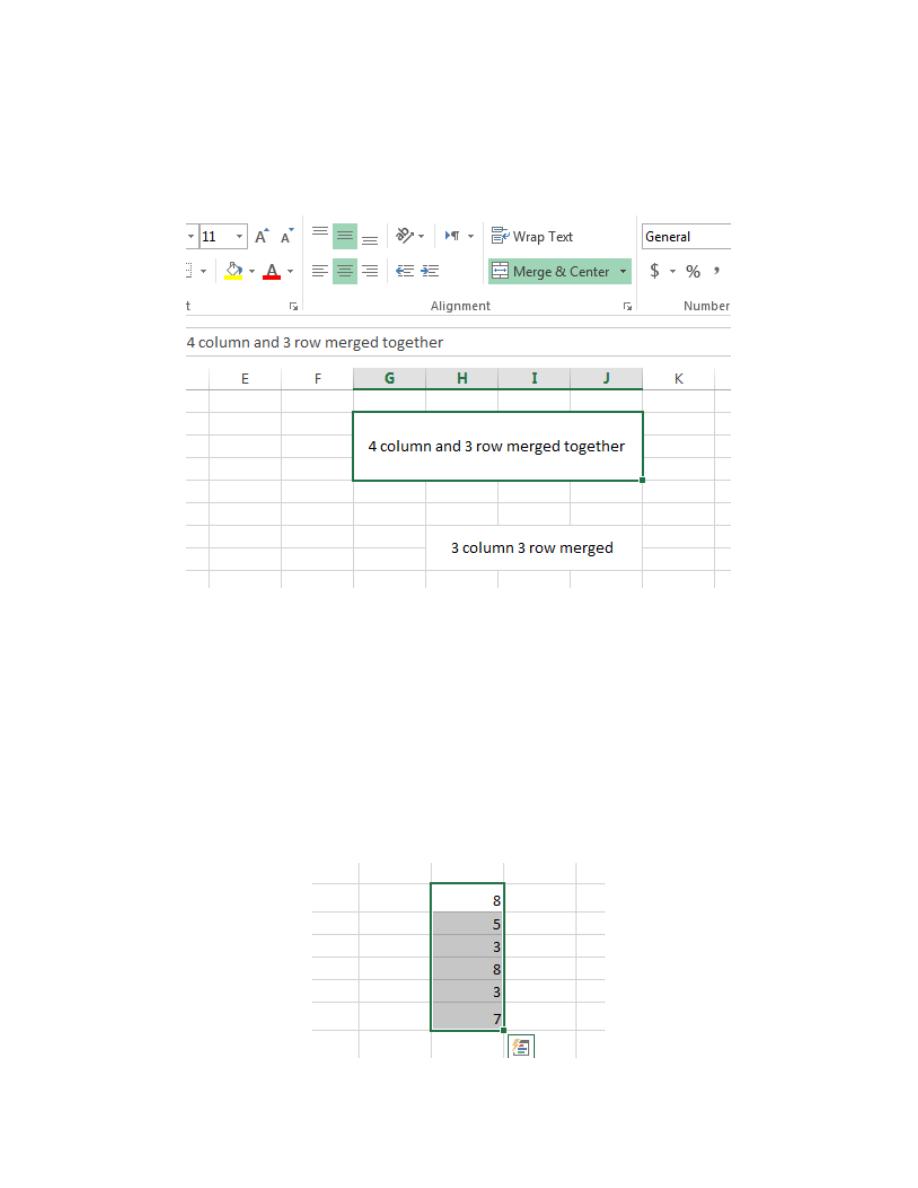
Cells merge
1. Select the cells which will to be merged.
2. Go to
Home Tab
>
Merge & Center
.
(Figure 8)
Figure 8. Cells Merge.
Working with Charts
Charts are an important part to being able to create a visual for spreadsheet data.
1. In order to create a chart within Excel the data that is going to be used for it needs to
be entered already into the spreadsheet document. Once the data is entered, the cells
that are going to be used for the chart need to be highlighted (Figure 9) so that the
software knows what to include. Next, click on the
Insert Tab
that is located at the top of
the screen. (Figure 10)
Figure 9. Select cell for create chart
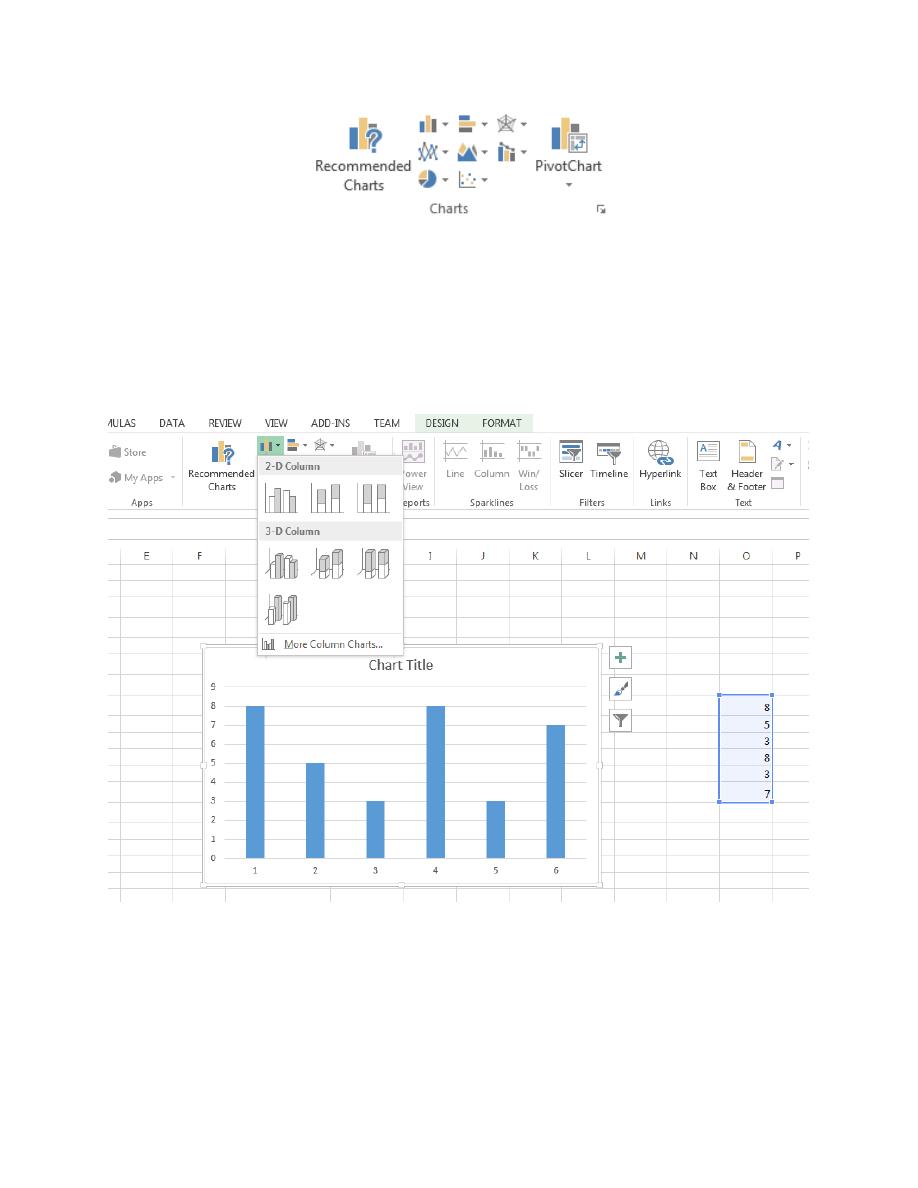
Figure 10. Charts Tab.
2. You may choose the chart that is desired by clicking the category of the chart you will
use. Once the category is chosen the charts will appear as small graphics within a drop
down menu. To choose a particular chart just click on its icon and it will be placed within
the spreadsheet you are working on. (Figure 11)
Figure 11. Chart
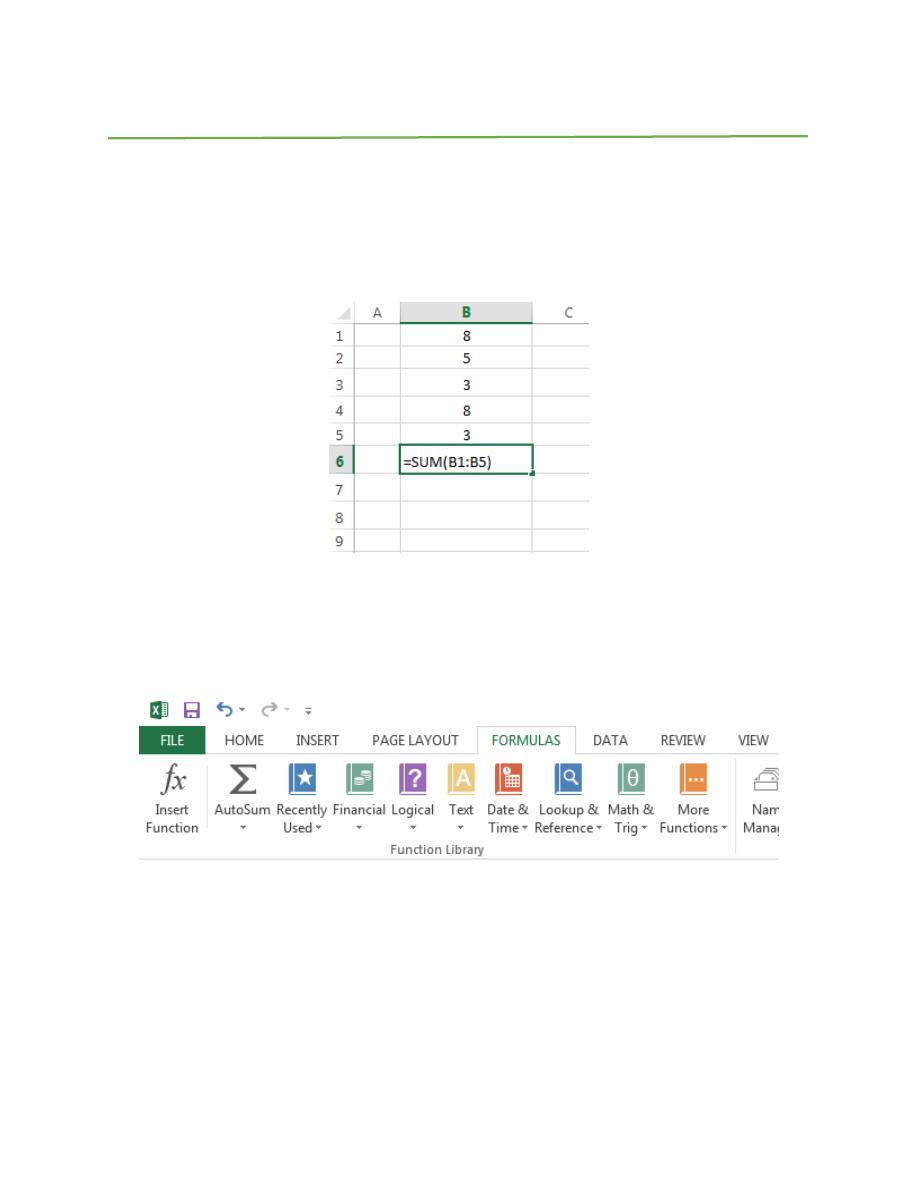
6. Creating Functions
When creating a function in Excel you must first have the data that you wish to perform
the function with selected.
1. Select the cell that you wish for the calculation to be entered in (i.e.: if I want to know
the sum of B1:B5 I will highlight cell B6 for my sum to be entered into). (Figure 12)
Figure 12. Choosing calculation cell
2. Once you have done this you will need to select the
Formulas Tab
located at the top
of the screen. (Figure 13)
Figure 13. Formulas Tab
3. A list of Most Recently Used, Financial, Logical, Text, Date and Time, Math and Trig
formulas will appear. To choose one of the formulas click the icon that holds the formula
you are looking for.
4. Once you have clicked your formula this will display a dialog box on your screen.
(Figure 14)
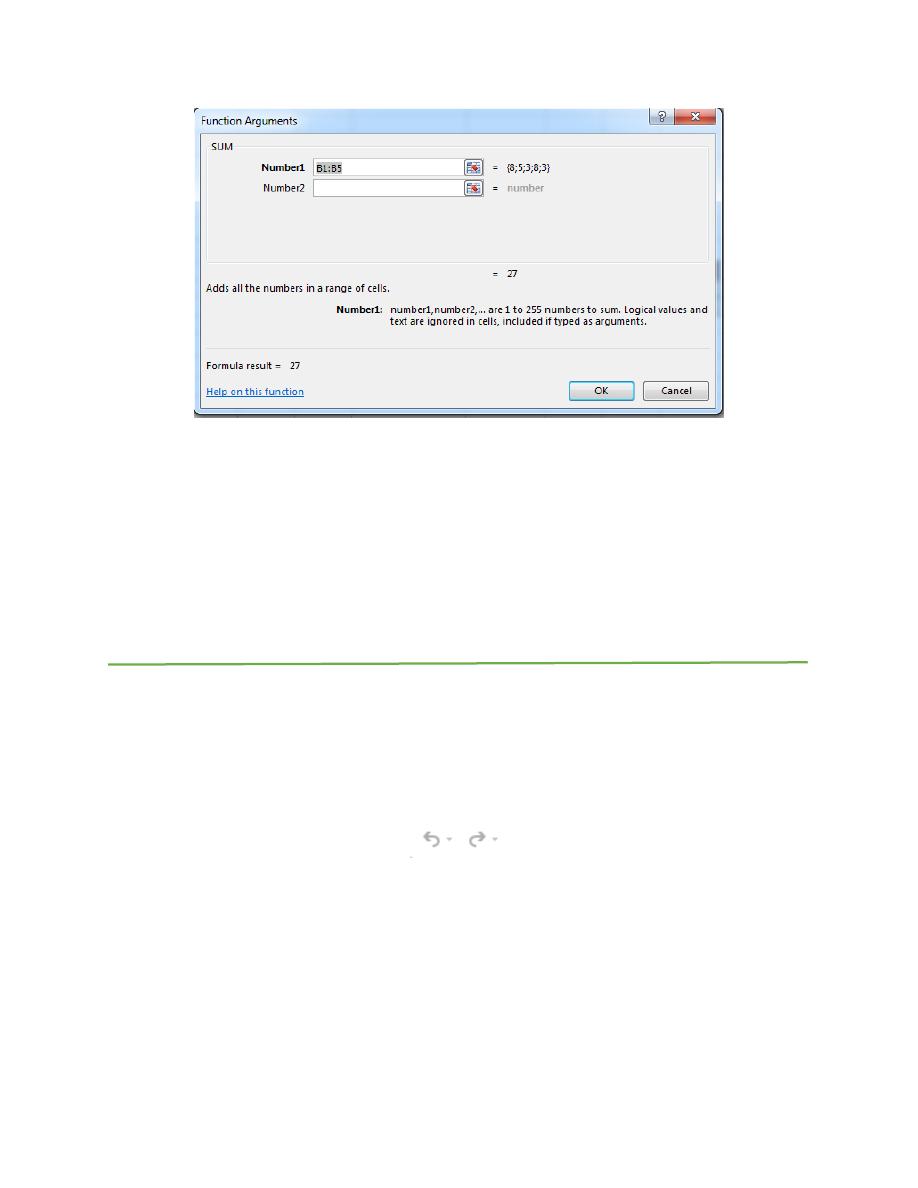
Figure 14. First calculation display
In this screen it lists the cells that are being calculated, the values within the cells, and
the end result.
5. To accept that calculation you can press
OK
and the result will show up in the
selected cell “B6”.
7. Undo and Redo
In order to undo an action, you can click on the
blue arrow icon
that is pointing to the left
at the top of the screen. To redo an action, you can click on the
blue arrow icon
pointing
to the right. It is important to note that not all actions are undoable, thus it is important to
save before you make any major changes in your document so you can revert back to
your saved document. (Figure 15)
Figure 15. Undo/Redo buttons
Quitting: Before you quit, it’s a good idea to save your document one final time.

Microsoft
PowerPoint 2013
1. Overview
Microsoft PowerPoint is one of the most popular presentation programs supported by PC
platforms. Microsoft PowerPoint can be used to create interactive presentations for classroom,
business, or personal use.
2. CREATING A NEW DOCUMENT
Opening Microsoft Word on a Pc
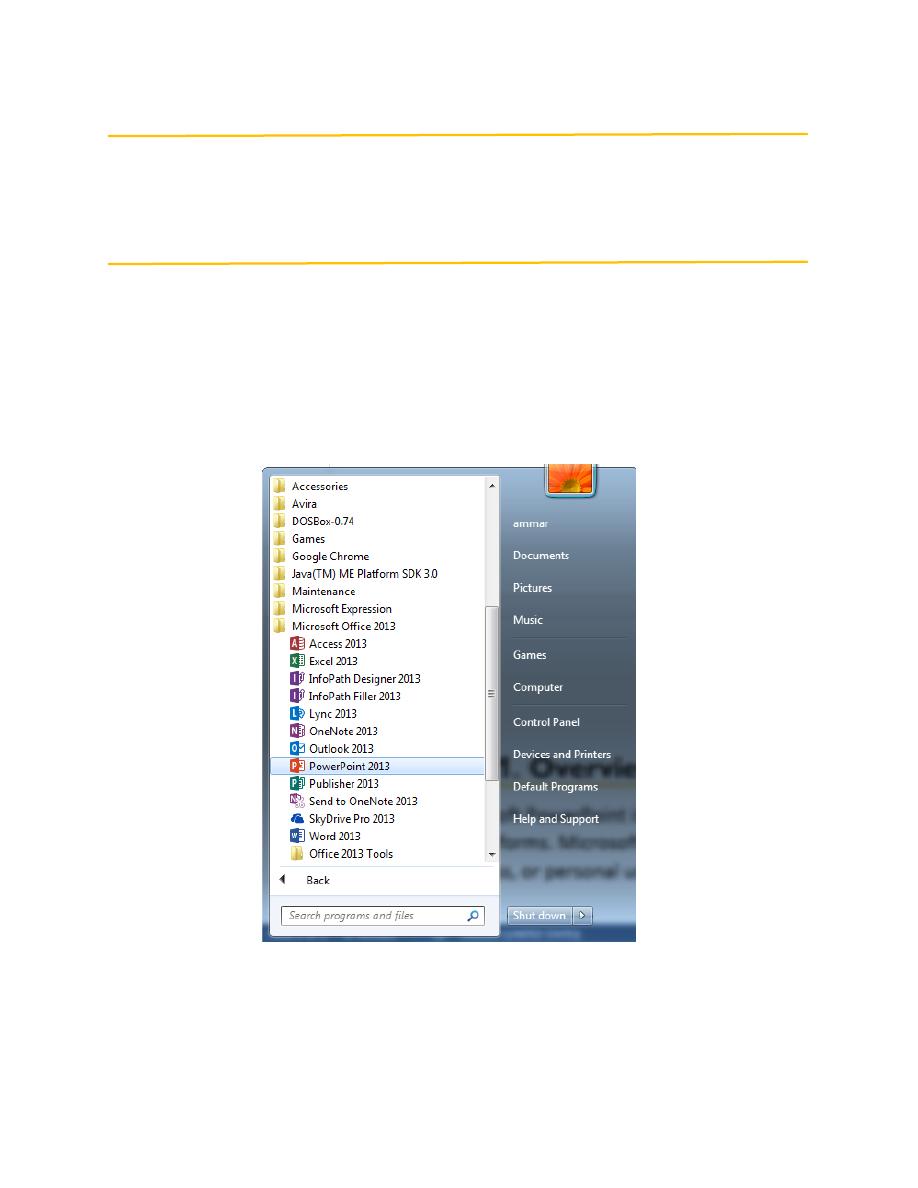
1. Begin by opening Microsoft PowerPoint.
To launch Microsoft PowerPoint, go to
Start
>
All Programs
>
Microsoft Office
2013
>
PowerPoint
2013
(Figure 1).
Figure 1. Navigation to Microsoft PowerPoint on a PC.
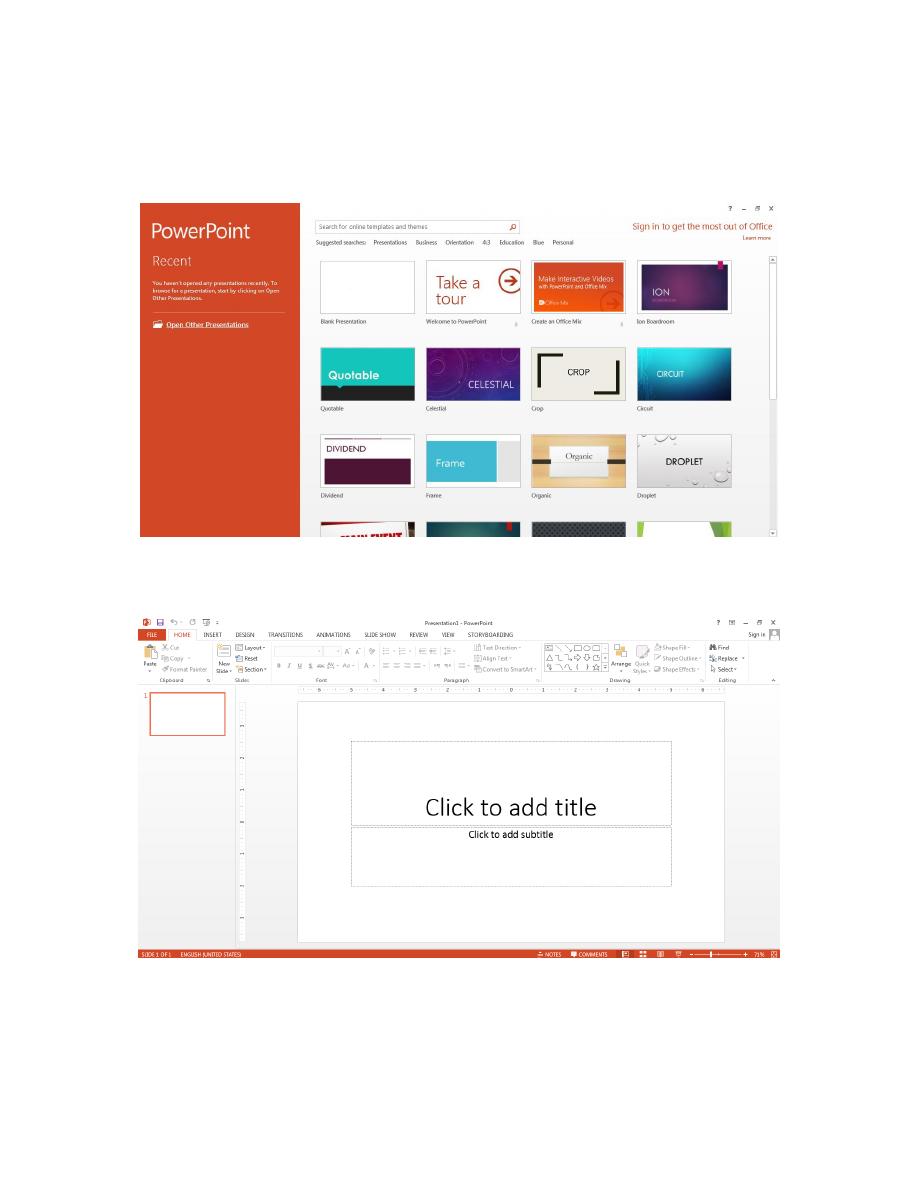
2. When opened a new Blank Presentation will select and open. (Figure 2 a & b)
Figure 2a. Opening a new presentation.
Figure 2b. Opening a new presentation.

3. SAVING YOUR PRESENTATION
Computers crash and presentations are lost all the time, so it is best to save often. It is
also recommended that you save your presentation before you begin working on it.
Click on the
File tab
>
Save As
or .
Microsoft PowerPoint will open a dialog box where you will be prompted to select
a save location for your file. If your desired location is not apparent in this box,
press the
Browse
icon and a new window will appear allowing you to input the
name of your presentation, where you want it saved, as well as the format of the
presentation. (Figure 3)
Once you have specified a name, place, and format for your new file, press the
save button.
Figure 3. Saving dialog box.
4. TOOLBARS
The
Design Ribbon
toolbar contains several categories for formatting the design and elements
of your presentation. These include:
Home
,
Insert
,
Design
,
Transitions
,
Animations
,
Slide
Show
,
Review
and
View
. These icons are convenient but will not bring up dialogue boxes that
allow you to change the settings of these actions. You should use whichever method works the
best for you.

The
Home Tab
: This has features that allow you to edit
Slides
,
Fonts
,
Paragraph
,
Drawing
and
Editing
. (Figure 4)
Figure 4. Home Tab
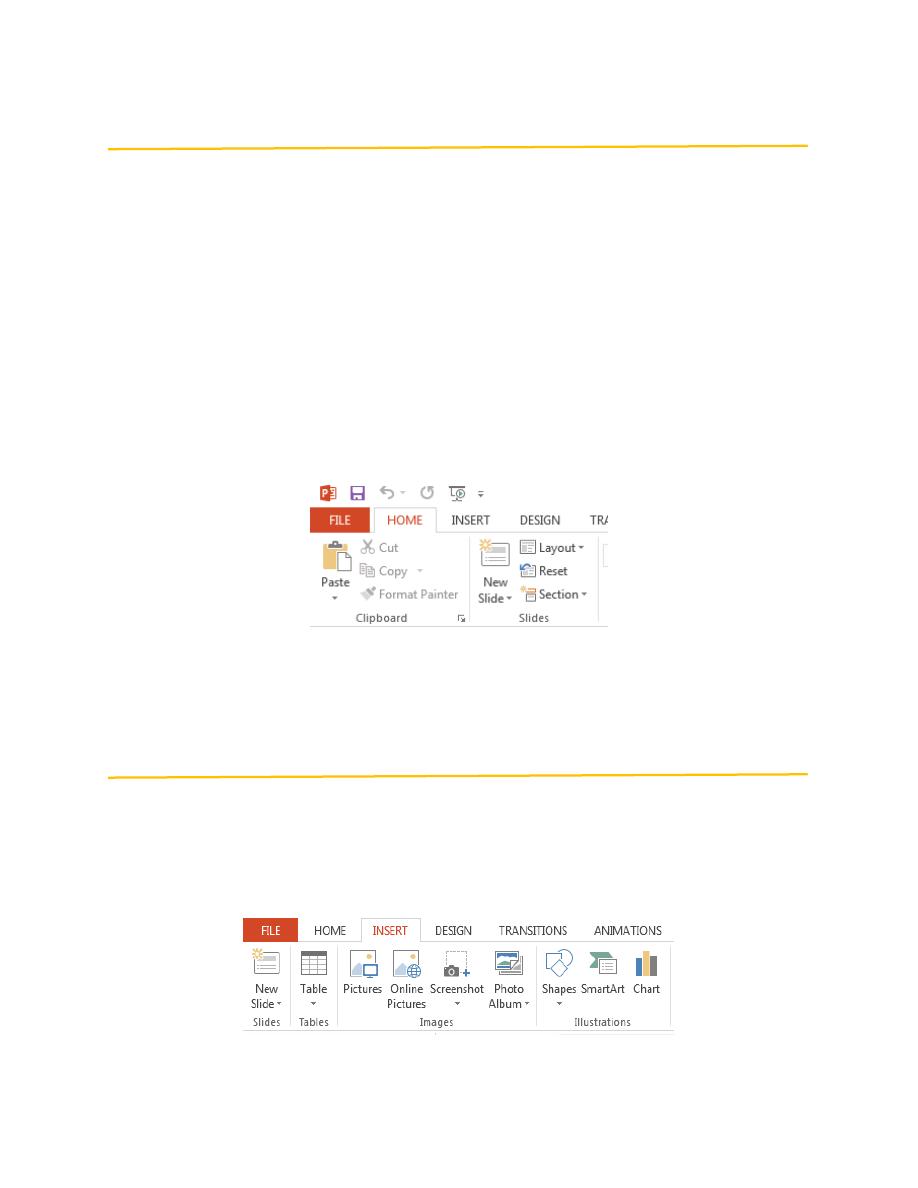
The
Insert
Tab
: This has features that allow you to add
Tables
,
Images
,
Illustrations
,
Links
,
WordArt
, and
Media
Clips
. (Figure 5)
Figure 5. Insert Tab
The
Design Tab
: This allows you to edit how your presentation will look. It
includes features such as
Page
Setup
,
Themes
, and
Background Styles
.
(Figure 6)
Figure 6. Design Tab
The
Transitions Tab
: This allows you to add custom transition between slides. You
can select from
Slide Transitions
,
Effects
, and
Transition
Timing
box
. (
Figure 7
)
Figure 7. Transitions Tab
The
Animations Tab
: This allow you to add custom animations to your presentation.
You can select from
Preview
,
Animations
,
Advance
Animation
, and
Animation
Timing
box
. (
Figure 8
)
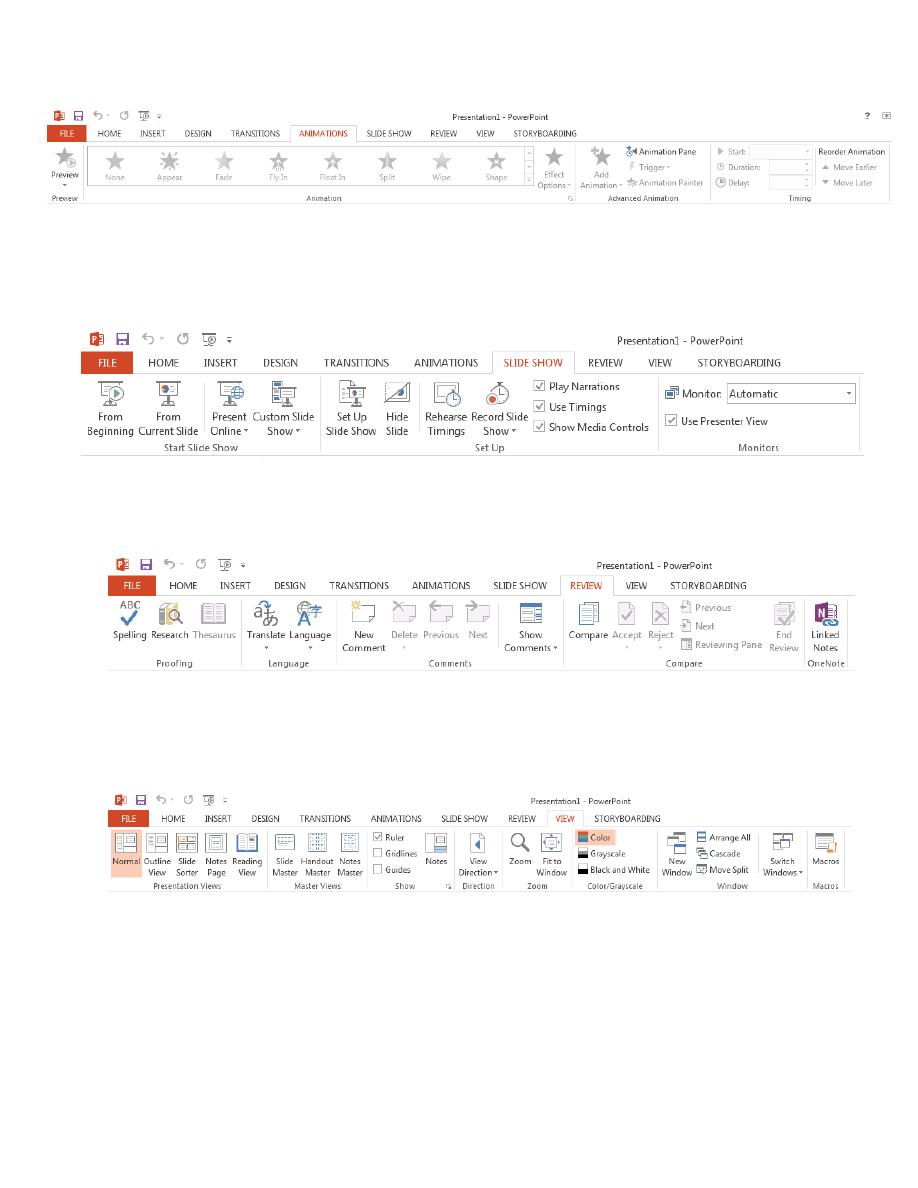
Figure 8. Animations Tab
The
Slide Show Tab
: This has features that allow you to select how your
presentation will be displayed. From here, you can
Start Slide Show
,
Set Up Slide
Show
, and
Adjust
Monitor
Settings
.
(
Figure 9
)
Figure 9. Slid Show Tab
The
Review Tab
: This allows you to
Proofread
,
Translate
Languages
,
Comment
Slides
, and
Compare
your Presentation. (Figure 10)
Figure 10. Review Tab
The
View Tab
: This has features that allow you to set the
View of your Presentation
,
Create
Master
Views
,
Show/Hide
Features
,
Zoom
,
Switch
from
Color
to
Grayscale
,
Adjust
Windows
, and
Add Macros
.
(Figure 11)
Figure 11. View Tab
5. FORMATTING
Formatting Your Presentation
The default slide design for Microsoft PowerPoint documents is a blank slide.
Therefore, if you want your slides to have a specific design, you must add one. To
do this on a PC, go to the
Design Tab
(Figure 6). To change the theme of your
presentation, click on the theme that you like and it will automatically apply to
your slide.
To apply a New Slide Layout, select the
Home Tab
>
Slides box
>
New Slide
or
Layout
(Figure 12). To customize the layout of your document. From here, you
can specify how the content on your slide is displayed. To apply a layout to your
slide click the layout button, and choose your preferred style.
Figure 12. Add New Slide
6. INSERTING AND ADDING OBJECTS
Insert Picture:
Go to
Insert Tab
>
Images box
>
Pictures
(Figure 13)
. A dialogue box will appear
(Figure 14), find the location of picture you want to insert and the press insert.
Figure 13. Add Objects
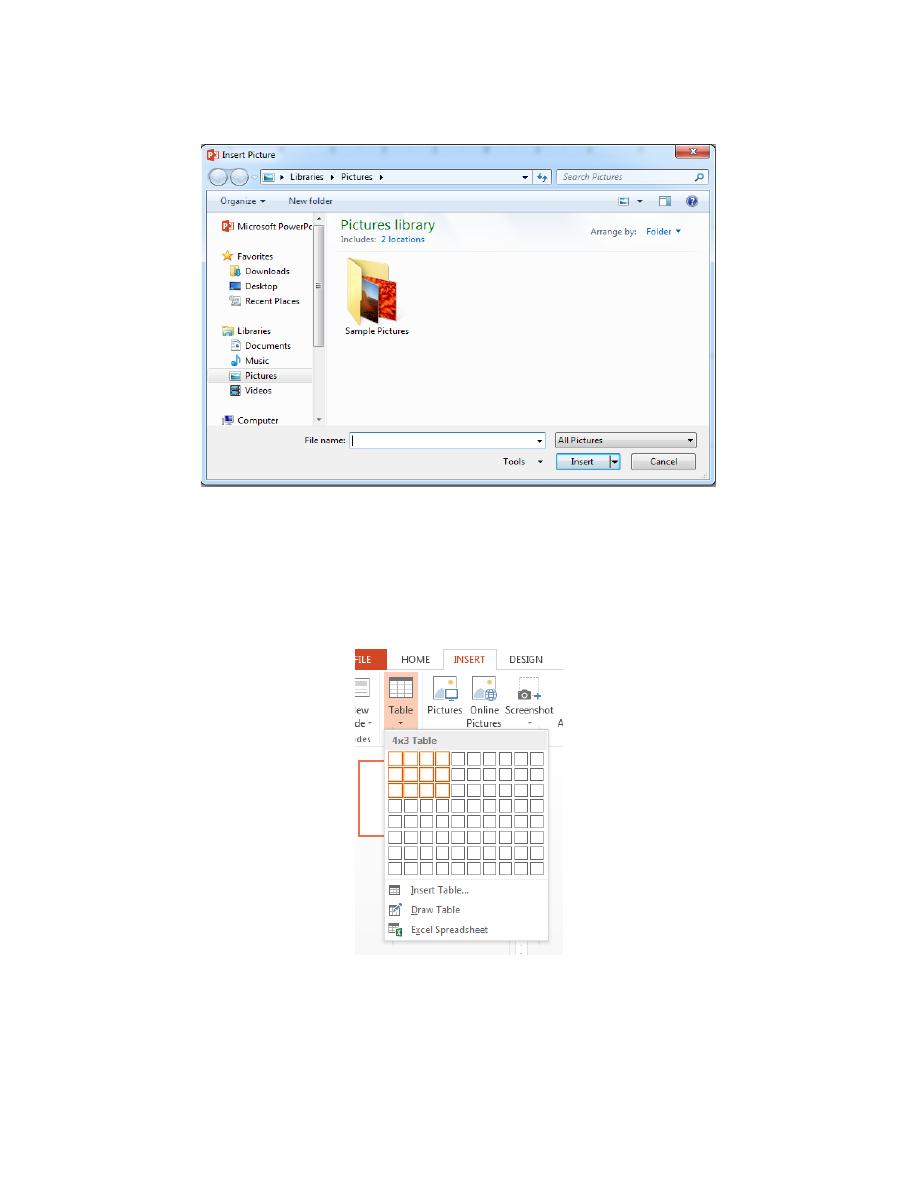
Figure 14. Dialogue box for picture location
Creating a Table
To create a table within your document, go to
Insert Tab
>
Tables box
>
Table button
.
Choose the desired table size and format by hovering over the boxes, and press Enter
on the keyboard (Figure 15).
Figure 15. Insert Table
Quitting: Before you quit, it’s a good idea to save your document one final time.