U N I V E R S I T Y O F M O S U L
C O L L E G E O F D E N T I S T R Y
By: P.h.D. Lec. Maha Anwer Hussein
م
.
د
.
مها
أنور حسين
2020-2021
Department of
Conservative
Dentistry
5 th YEAR
Types of Fixed Bridge
Fixed Fixed Bridge
Cantilever Fixed Bridges
Spring Cantilever Fixed Bridges
Fixed Movable Bridges
Fixed Removable Bridges
Modified Fixed Removable Bridges
All Metal Fixed Bridges
Metal-ceramic Fixed Bridges
All Ceramic Fixed Bridges
All Acrylic Fixed Bridges
Fibre-reinforced Composite Resin Bridges
Resin-bonded Fixed Bridges
Types of Fixed Bridges
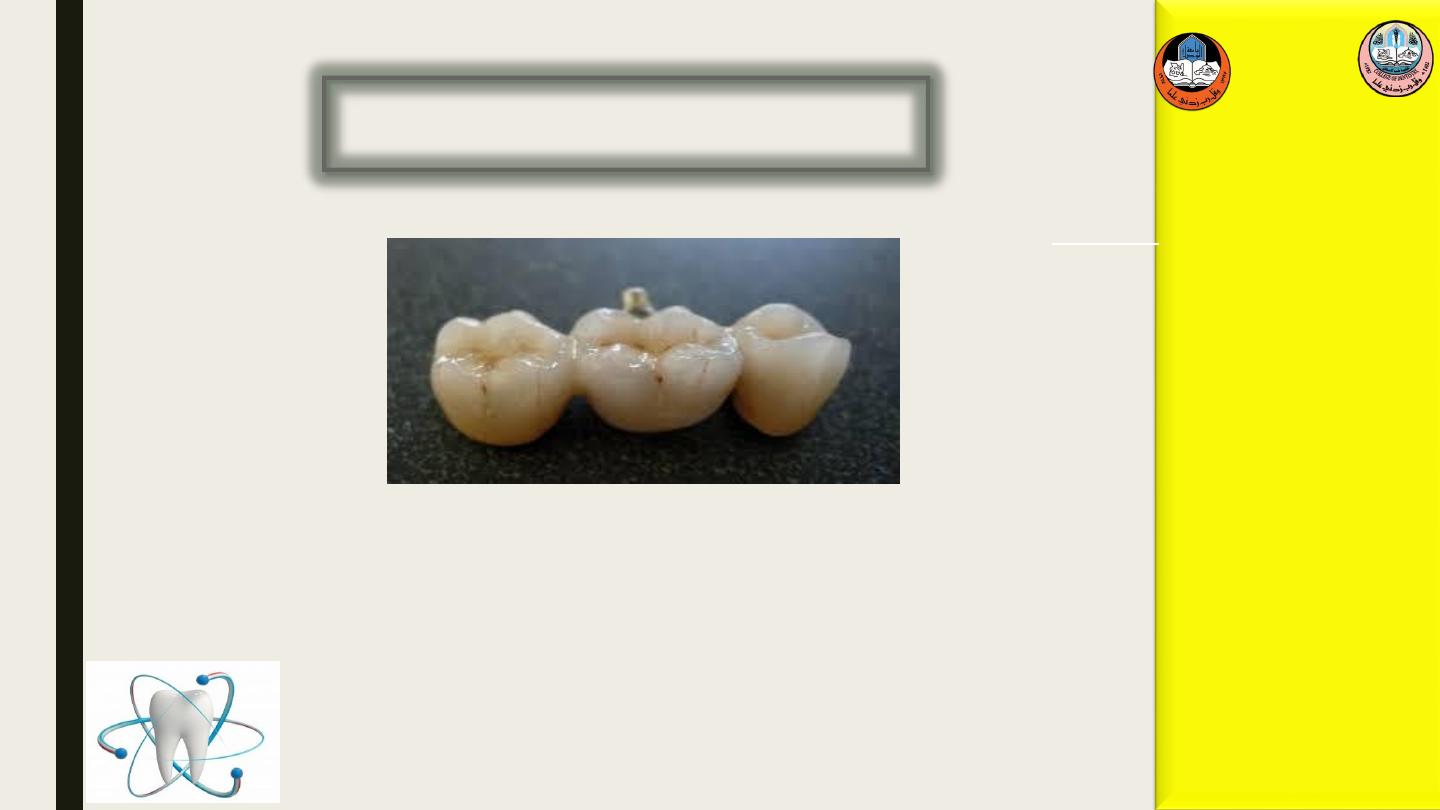
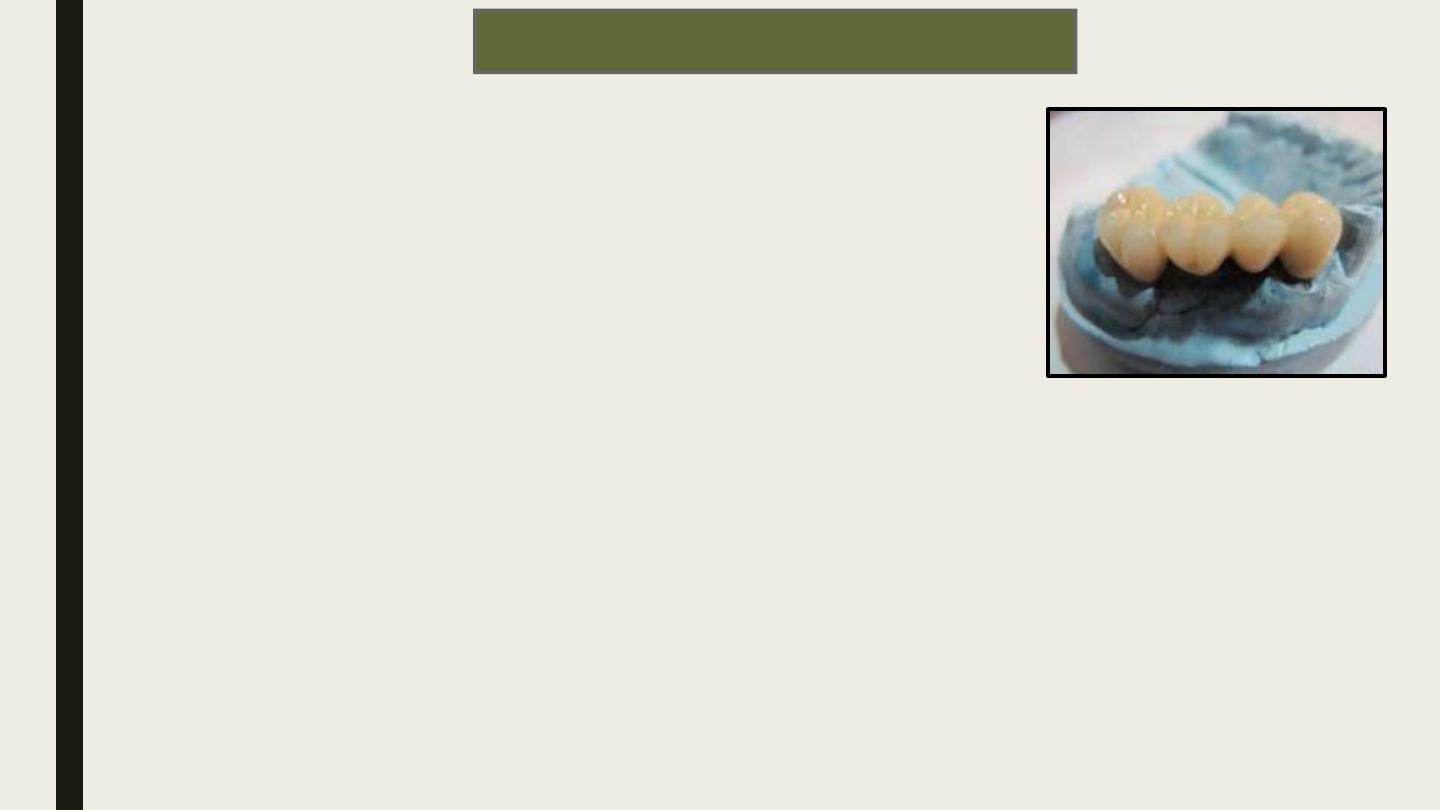
1)Fixed Fixed Bridge
The term represents fixed partial bridge with rigid connectors.
The design of this bridge is more conventional . Since the
connectors are rigid, there can be
no
movement between the
connected components.
Advantages
Easy to fabricate
Economical design
Easy to maintain
Strong design provides maximum retention and strength
Helps to splint mobile abutments
Can be used for long Bridges along with periodontally weak
abutments
.
Disadvantages
Since the connectors are rigid, unwanted stress and lever forces are
directly transferred to the abutment producing considerable damage.
Requires excessive tooth preparation to achieve a single path of
placement.
Difficult to cement on multiple abutments
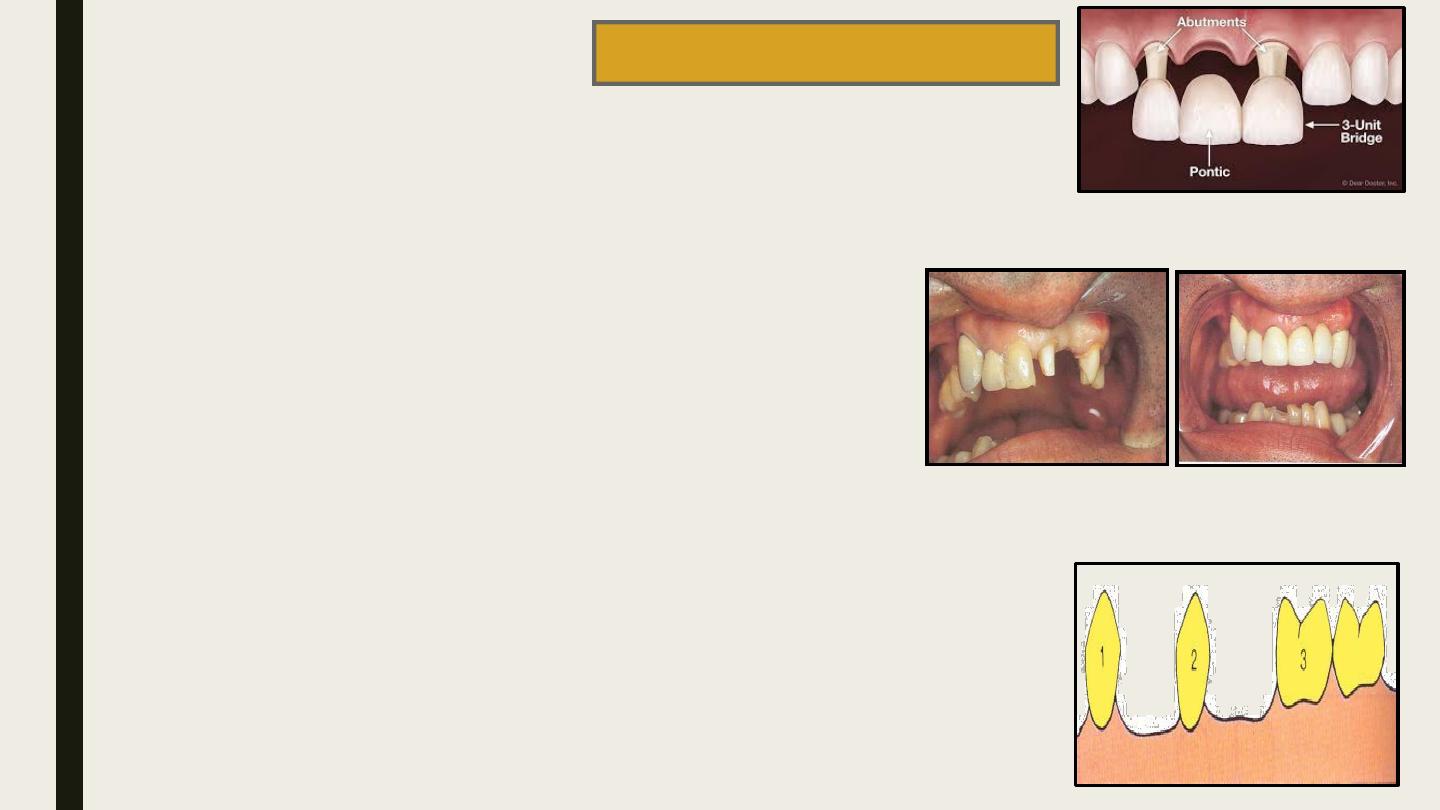
Contraindicated for pier abutments.
1
2
3
pier abutments

Procedure
Casting
The pontics and retainers are fabricated with a connection as a single unit
pattern.
Soldering
Multiunit wax patterns are cast separately.They are approximated against
one another and soldered together using a different soldering alloy.
Sometimes a single unit wax pattern is cast and sectioned using a saw
and then soldered.
Casting is preferred because it avoids
galvanic corrosion
.
Soldered connectors are more
uniform, flat and parallel
because the
flow of the solder alloy is easily controllable.
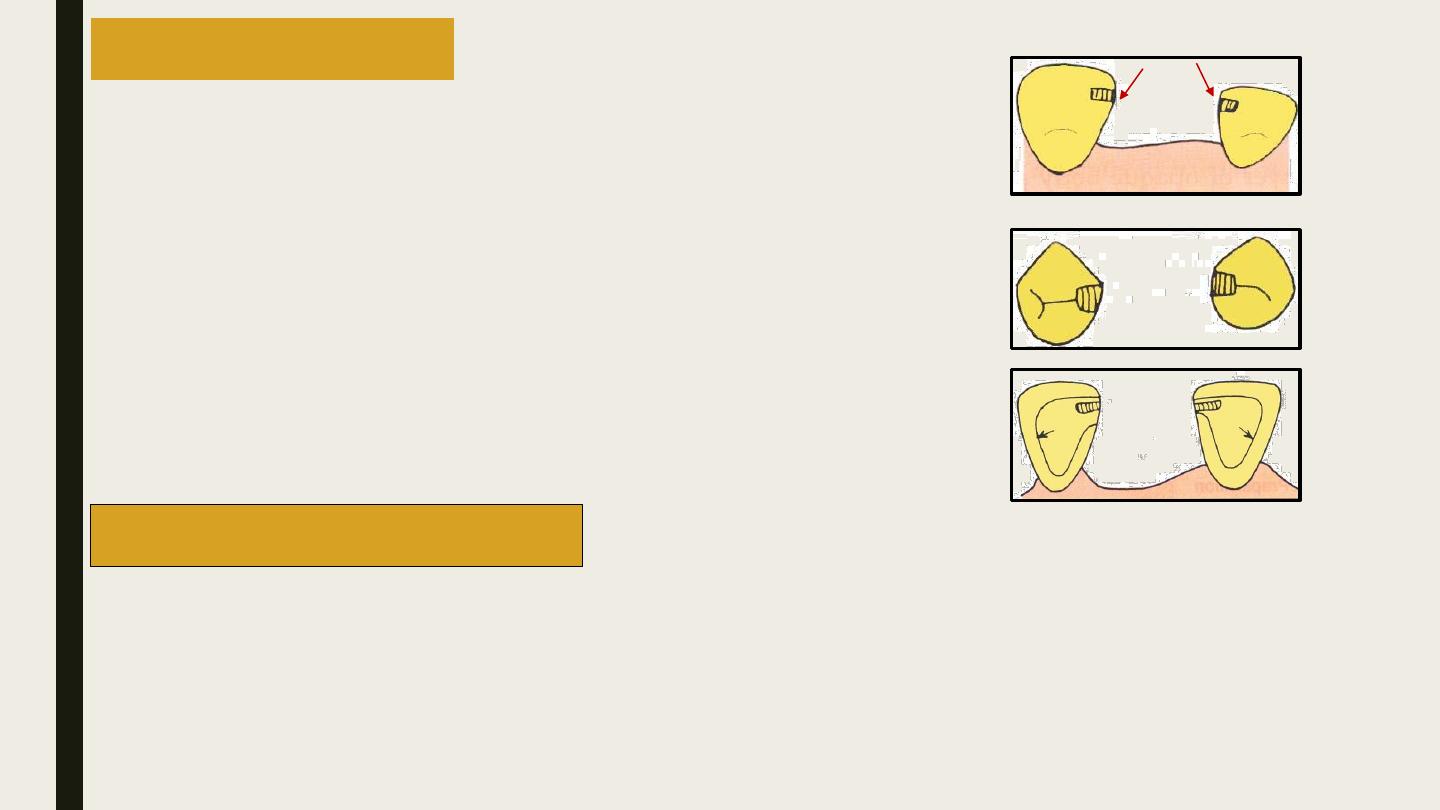
The common non-rigid connectors are
Tenon-Mortise connectors
Loop connectors
Split pontic connectors
Cross pin and wing connectors
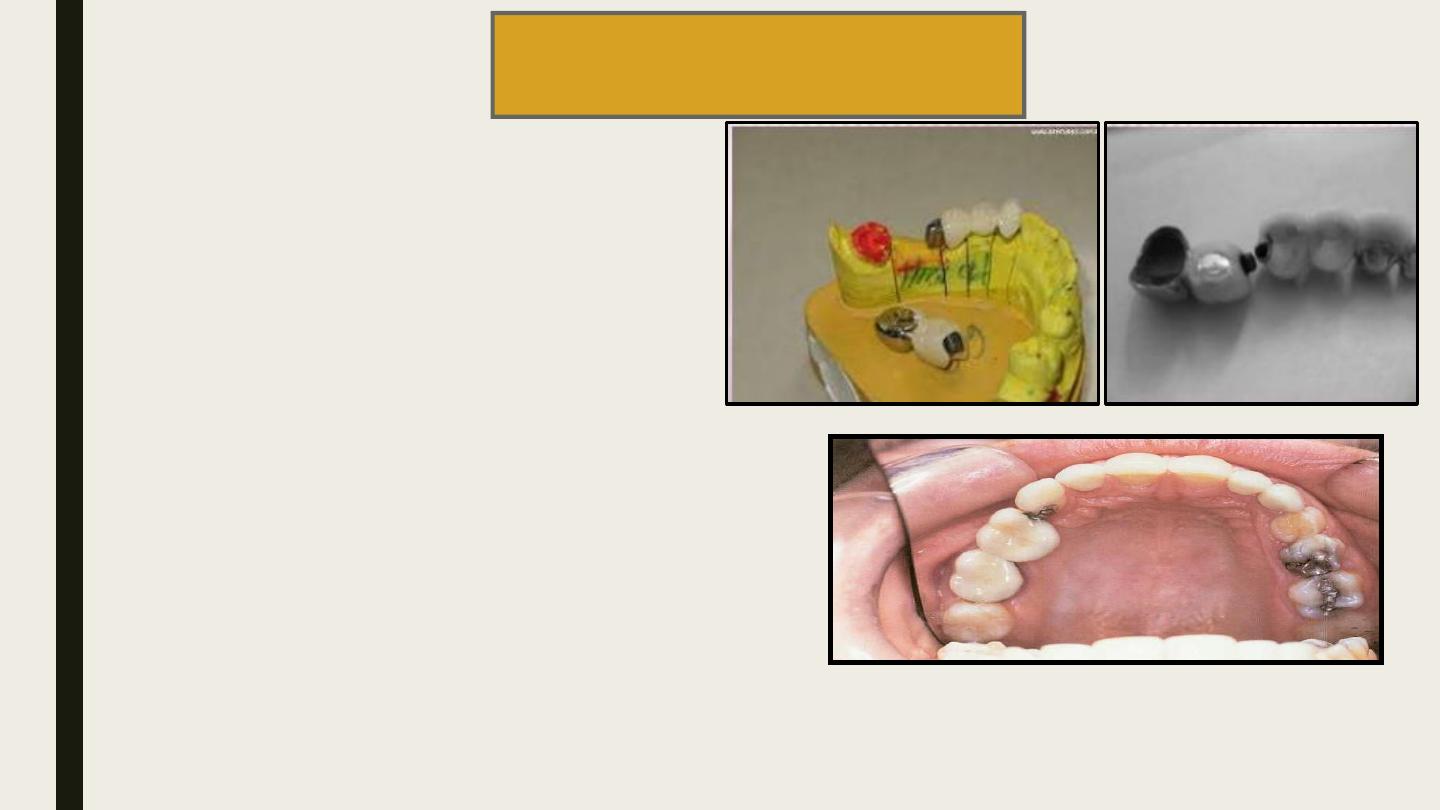
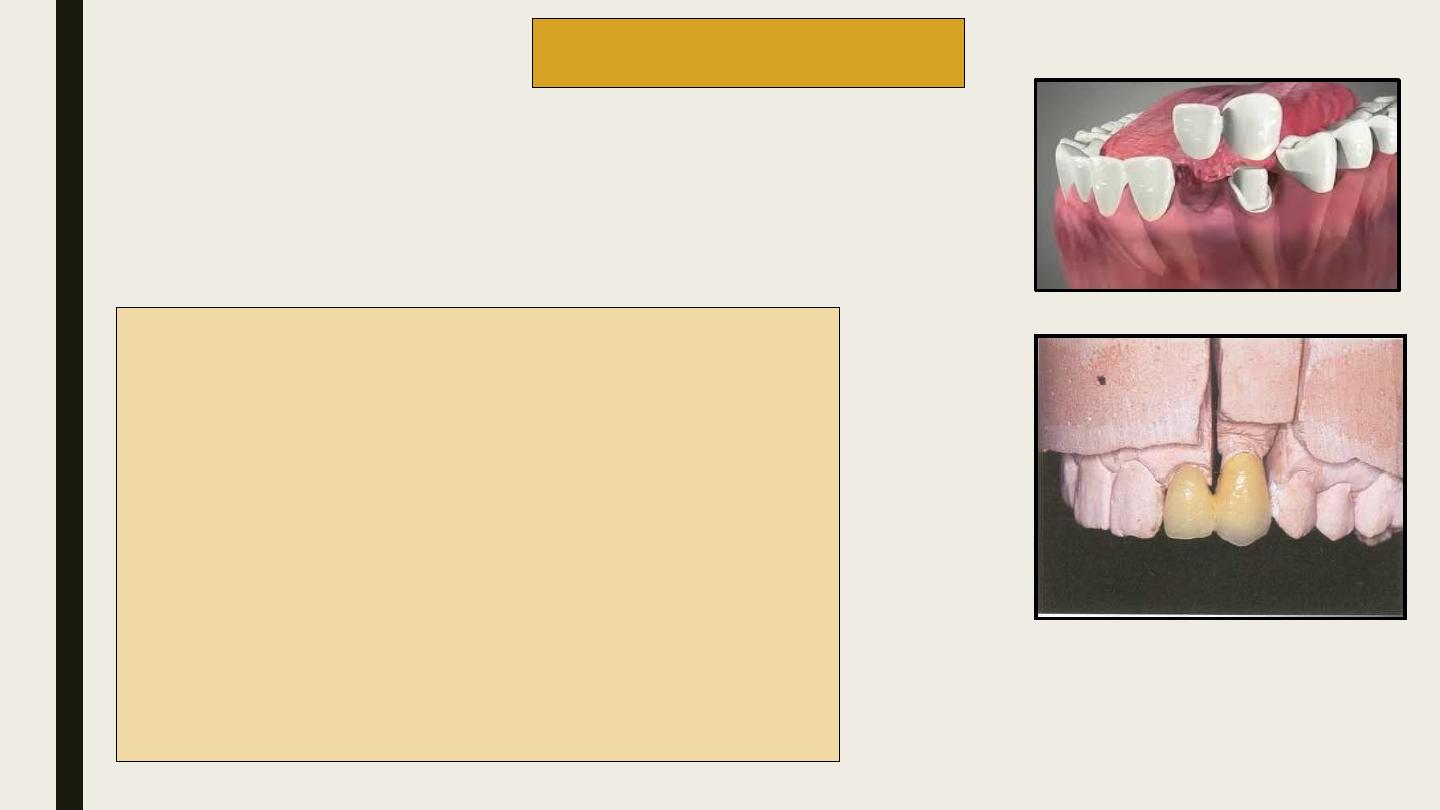
2)Fixed Movable Bridge
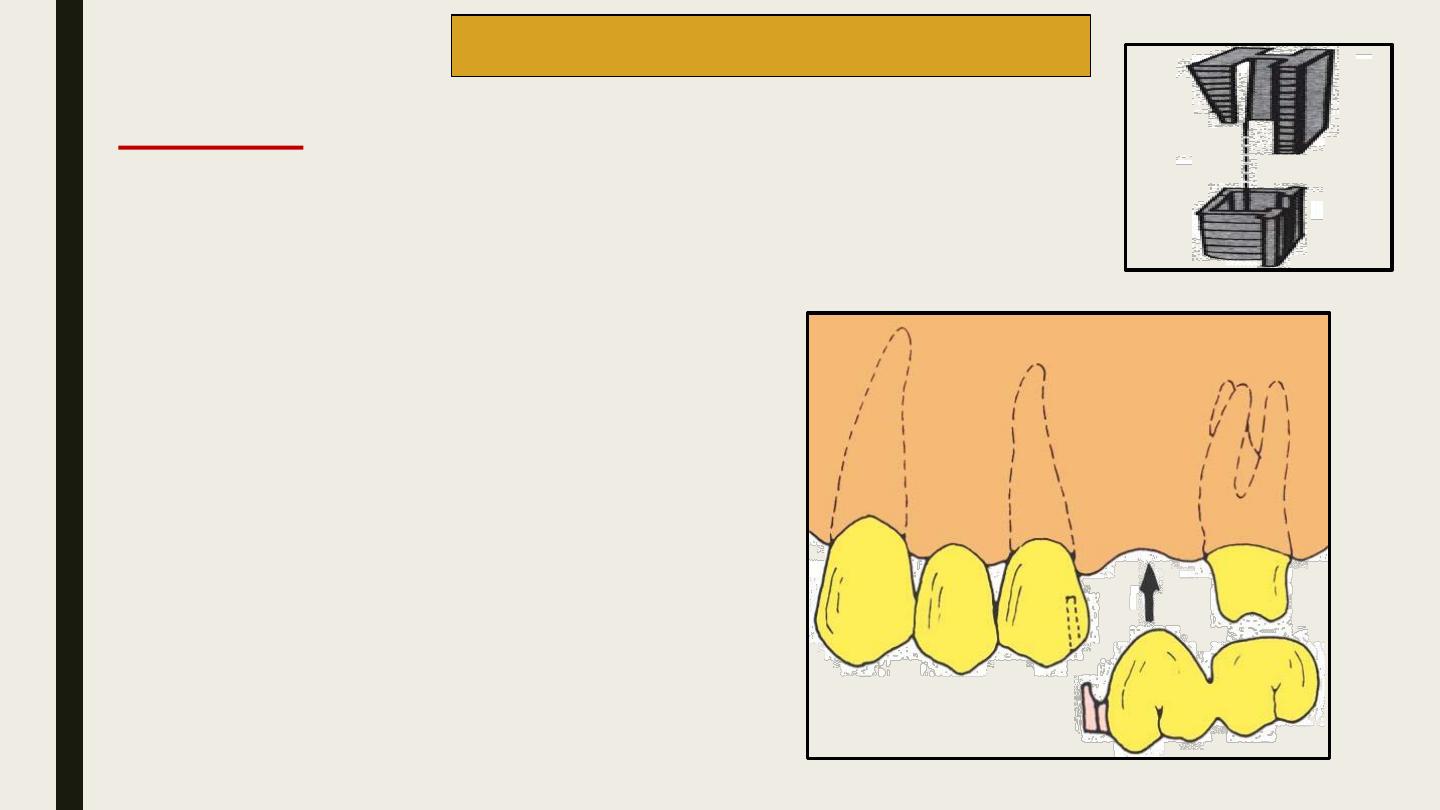
The alignment of this dovetail connection is
critical; it must parallel the path of withdrawal of
the other retainer.
Paralleling is normally accomplished by means of
a dental surveyor.
The female component may be prepared free hand
in the wax pattern or with a precision milling
machine. Alternatively a special mandrel can be
embedded in the wax pattern and the abutment
retainer is cast.
The male key is fabricated with autopolymerising
resin and attached to the pontic.
Use a prefabricated plastic component for the
mortise and Tenon of a non-rigid connector.
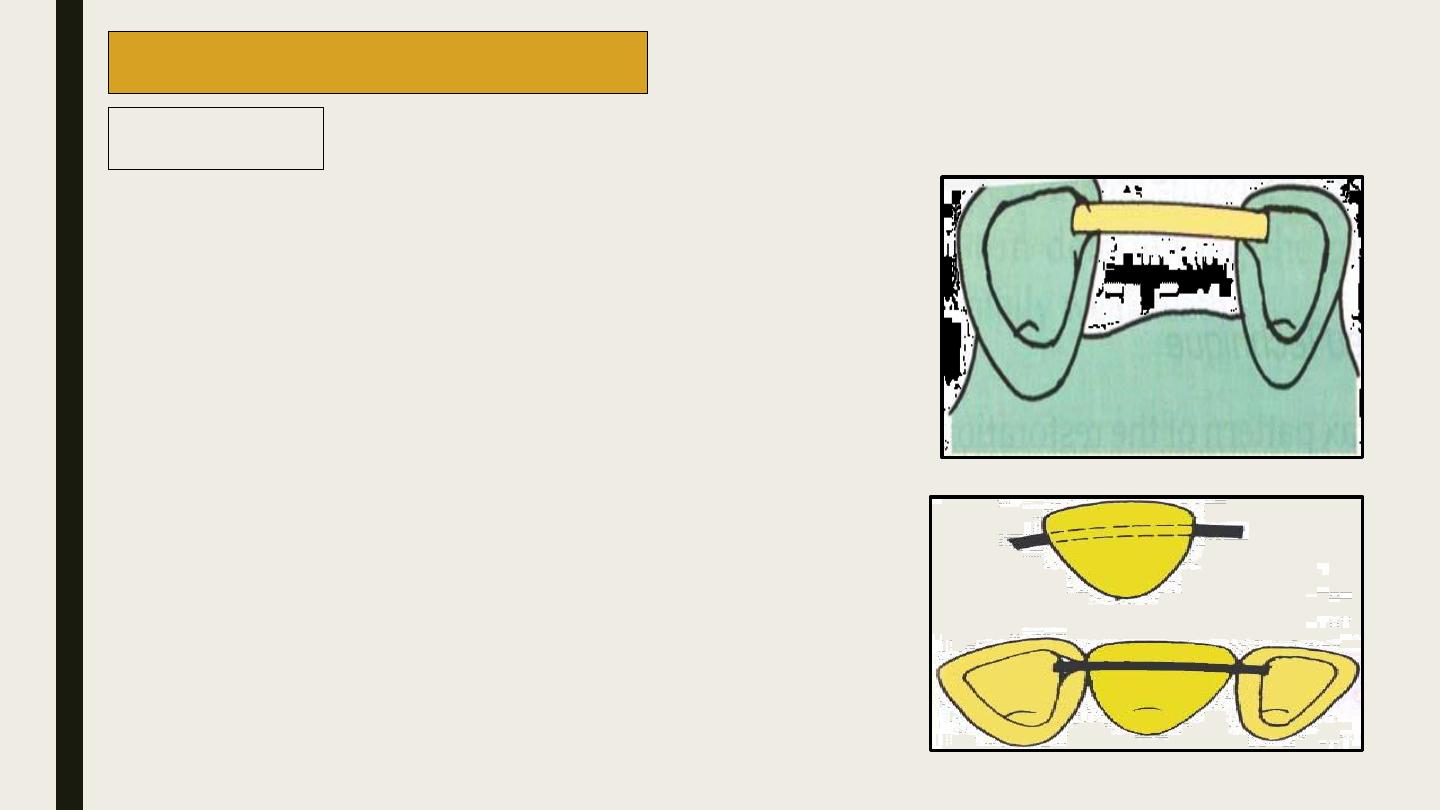
Tenon Mortise connectors (TMC)
Procedure
Tenon (male)
Mortise (female)
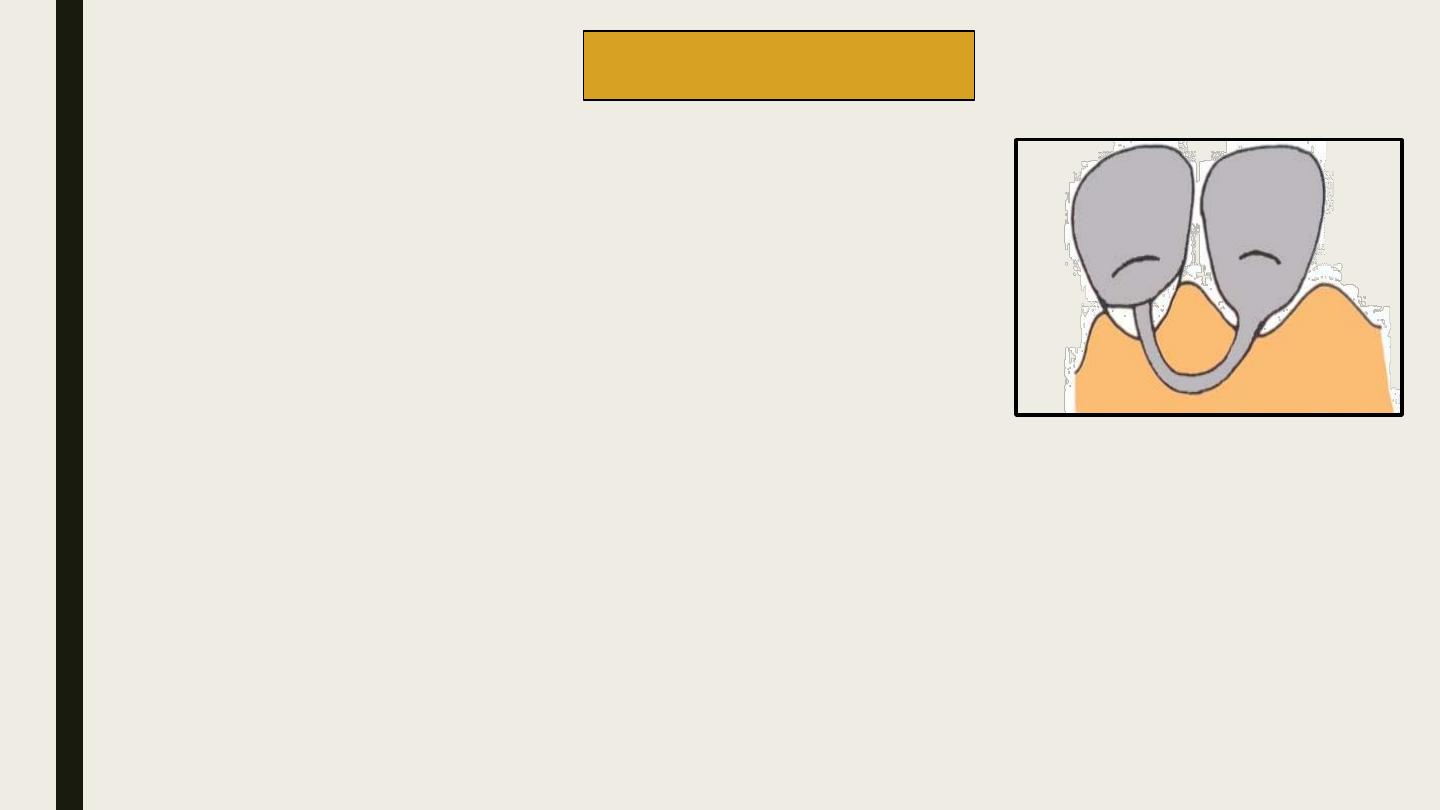
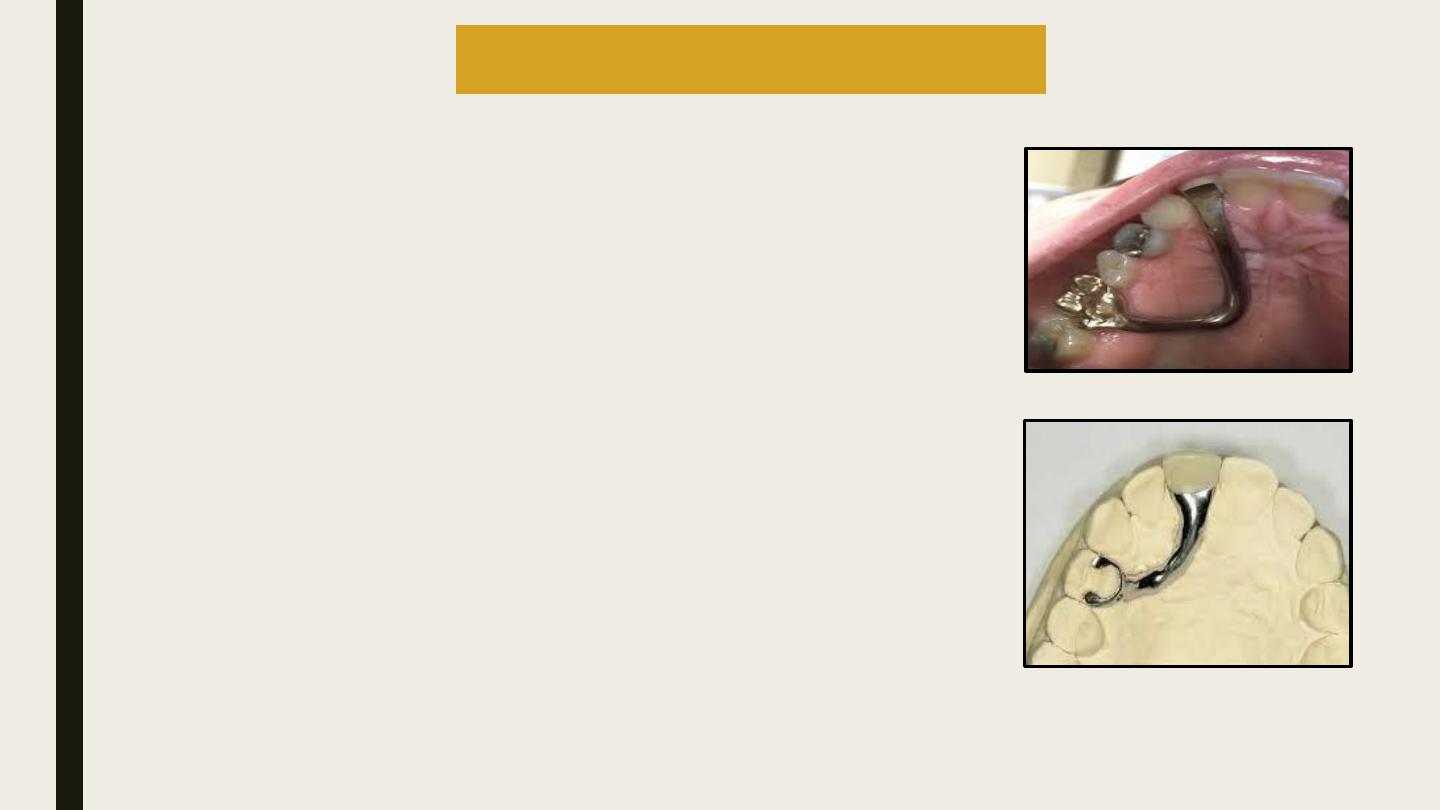
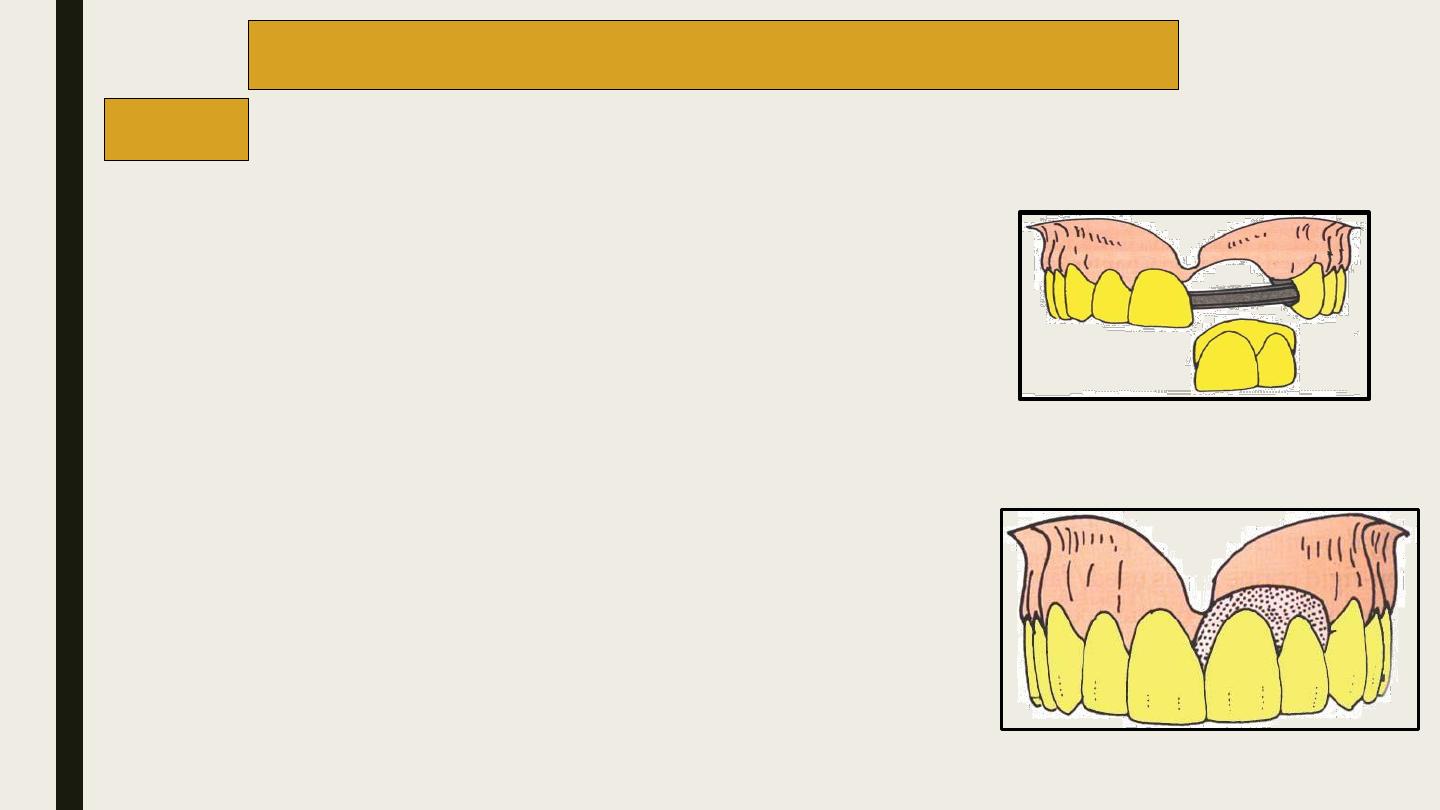
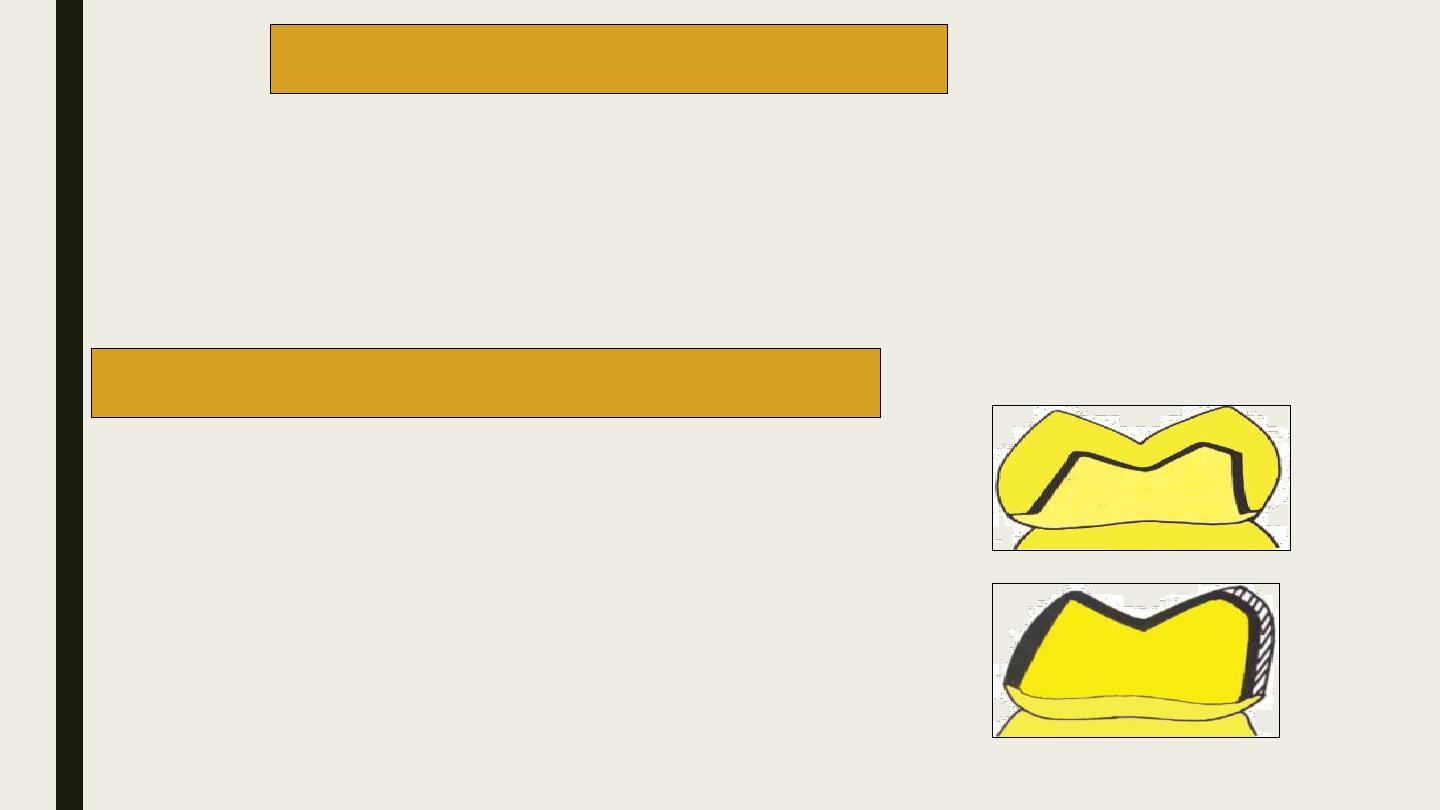
Loop connectors are used when an existing diastema is to
be maintained in a planned fixed prosthesis.
The connector consists of a loop on the lingual aspect of
the prosthesis that connects adjacent retainers and/or
pontics. The loop may be cast from a platinum-gold
palladium alloy wire.
The loop should be carefully designed such that it is easy
to maintain
.
Loop Connectors
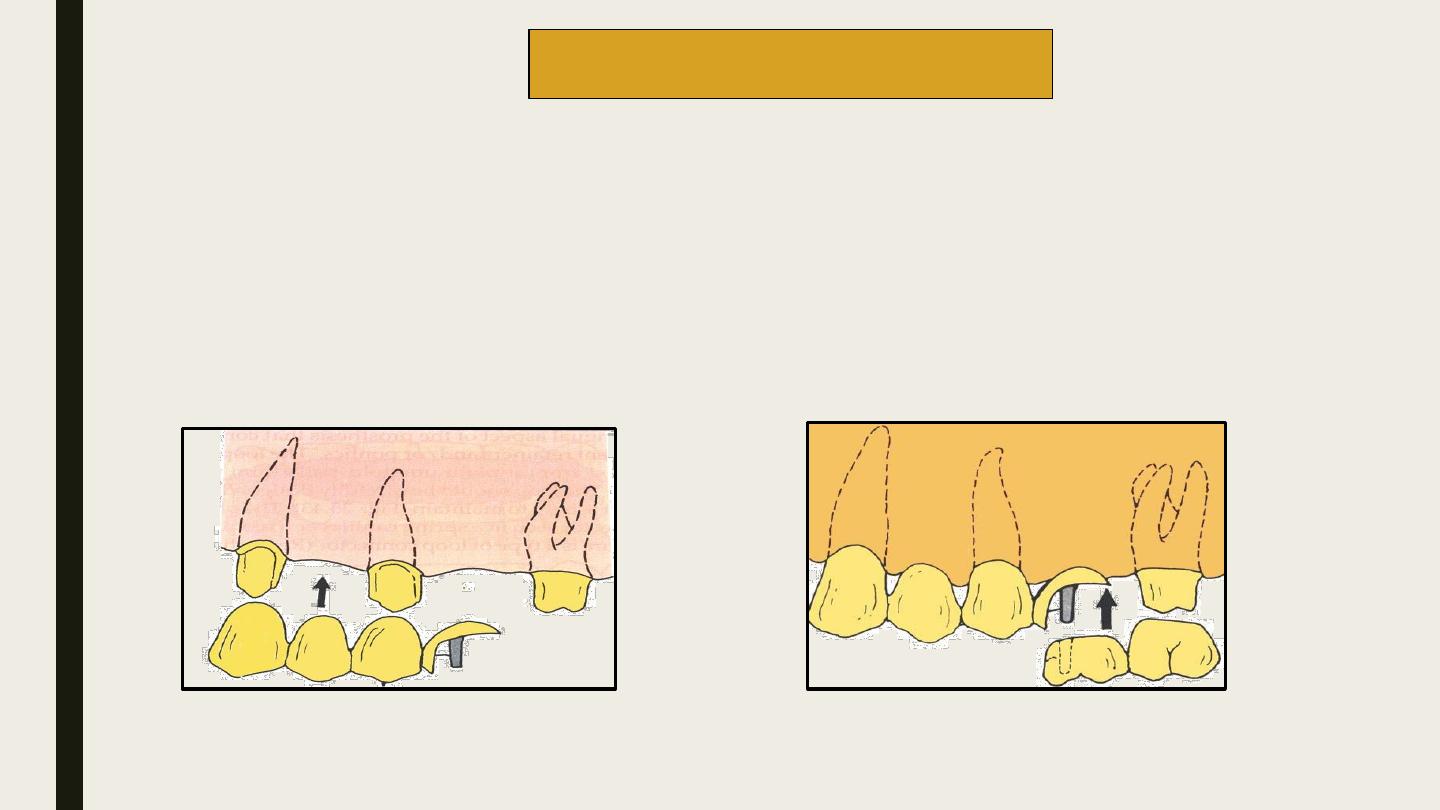
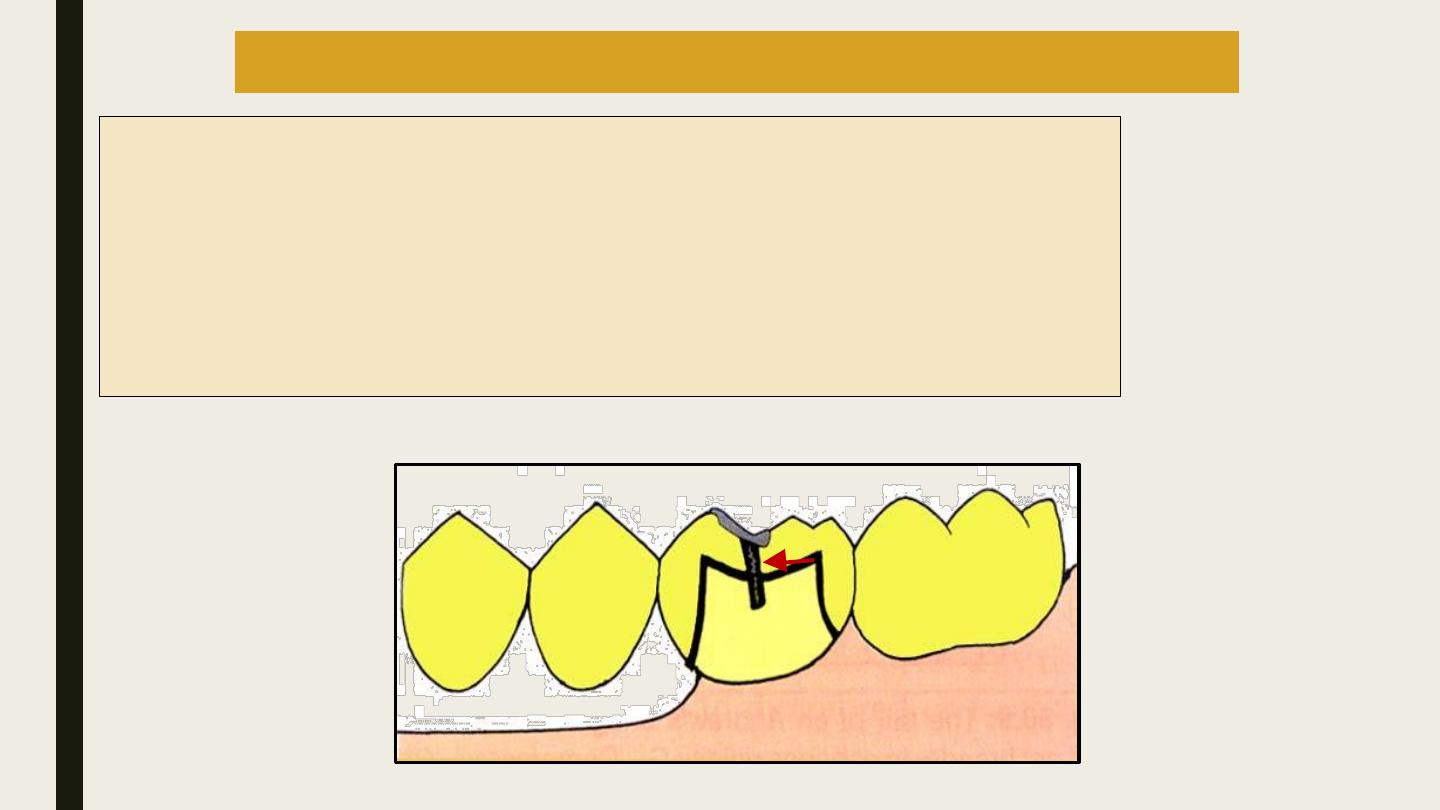
They are used only in cases with
a pier
abutment.
Here the connector is incorporated within the
pontic
.
The pontic is split into
mesial
and
distal
segments.
Each of these segments are attached to their respective retainers.
The mesial segment is fabricated with a shoe/key.
The distal segment is fabricated with a keyway to fit over the shoe.
The two components are designed by aligning in a surveyor.
Split Pontic Connectors
1
2
key
keyway
.
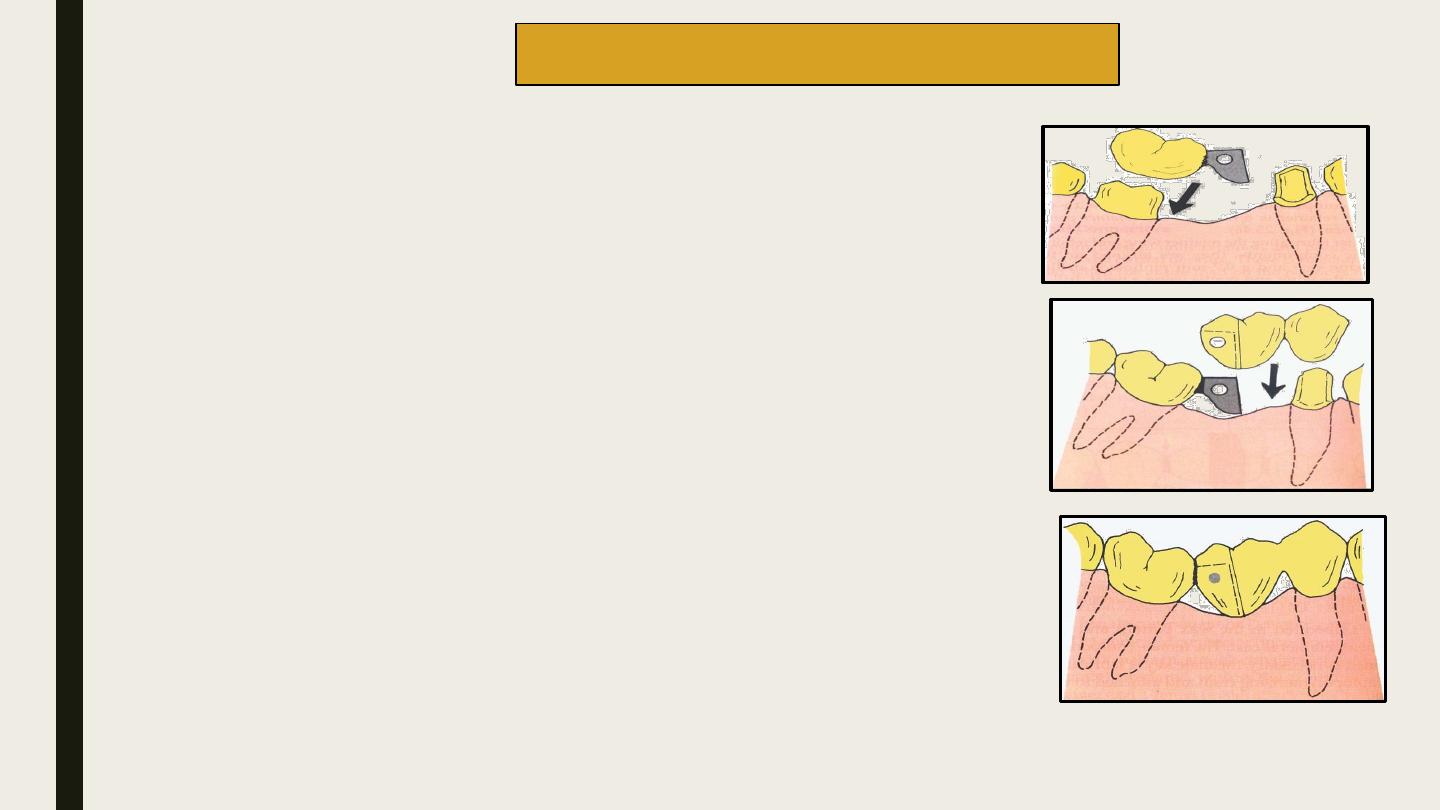
A wing is attached to the distal retainer.
The wing should be fabricated such that it aligns with the long axis of the
mesial abutment.
The wing along with the distal retainer is termed as the
retainer wing
component.
The pontic is attached to the mesial retainer and is designed to fit to the
wing in the retainer wing component.
The pontic along with the mesial retainer is termed as the
retainer pontic
component.
After fabricating the retainer wing and retainer pontic components, they are
aligned on the working cast and a 0.7-mm pinhole is drilled across the wing
and pontic using a twist drill. A rigid pin of 0.7 mm diameter should be
fabricated .
After cementing the components, the pin is seated into the hole using a
punch and mallet.
Cross-pin and Wing Connectors
1
2
retainer wing component
.
retainer pontic component
.

.
Advantages
They act like stress breakers while transmitting unwanted leverage forces.
The abutment is forced only during occlusal loading.
Improves the health of the abutment.
The tooth preparations need not be parallel to one another.
Each abutment tooth can be prepared independently according to its requirements.
Allows minor movements between the components of the prosthesis.
Parts of the prosthesis can be cemented separately.
Disadvantages
Complex design.
More space required.
Metal may show occlusally
Prefabricated connector components are very expensive.
Difficult to maintain.
Movable parts tend to wear out under constant usage.
Cannot be used for long span bridges.
Complicated laboratory procedures.
Advantages
Easy to fabricate
Preserve tooth structure.
Minimal pulp trauma.
Rebond possible
Disadvantages
Length of span is limited to one pontic only
Occlusal force on the pontic encourage tilting
of abutment tooth.
Not successful for posterior prosthesis.
3)Cantilever Bridge
A cantilever bridge is used when support can be obtained only from
one
side of the edentulous space. These dentures have compromised support.
The abutment teeth on the supporting side should be strong enough to
withstand the additional torsional forces. Support can be obtained from
more than one tooth on the same side of the edentulous space
This is a special cantilever bridge absolutely designed
for replacing maxillary incisors but these bridge can
support only a single pontic.
Support is obtained from posterior abutments (usually
a single molar or a pair of splinted premolars).
A long resilient bar connector is used to connect the
posterior retainer to the anteriorpontic. The bar is
designed to adapt closely and extend over the soft
tissues of the palate. The bar should be slightly thin
and resilient so that it distributes the masticatory
forces to the soft tissues all along its path.
4)Spring cantilever Bridges

Advantages
Can be used for diastema cases and spaced dentition.
Metal crown retainers that require minimal tooth preparation,
can be used in posterior teeth to replace missing incisors.
Disadvantages
The connector bar may interfere with speech and mastication.
Deformation of the connector bar may produce coronal
displacement of the pontic.
There may be food entrapment under the connector bar, which
may lead to tissue hyperplasia.
Fracture of metal connector.
Dislodgment of retainer.
Design
Individual cast gold copings are cemented over the abutments.
Threaded sleeves are incorporated into the copings of few abutments.
The bridge is retained over the copings by using weak cements and
screws, which pass through a hole in the retainer into the threaded
sleeves of the coping
5-Fixed removable partial bridges/ removable bridges
Fixed Component
The fixed component is fabricated completely in metal and
consists of two copings connected by a load-bearing bar. The
two copings are designed to be cemented on to the prepared
abutments on either side of the edentulous ridge.
6)Modified fixed removable partial Bridges
Design
Removable Component
The removable component consists of the artificial teeth
and a denture flange that is designed to fit or clasp the bar.
The teeth appear more natural as they arise from the
denture base instead of being suspended freely.
The denture base also serves to hide the vertical ridge
defect.
The main advantage of this system is that it is easier to
maintain without compromising the comforts of a fixed
prosthesis.
1
2
Removable Component
Fixed Component
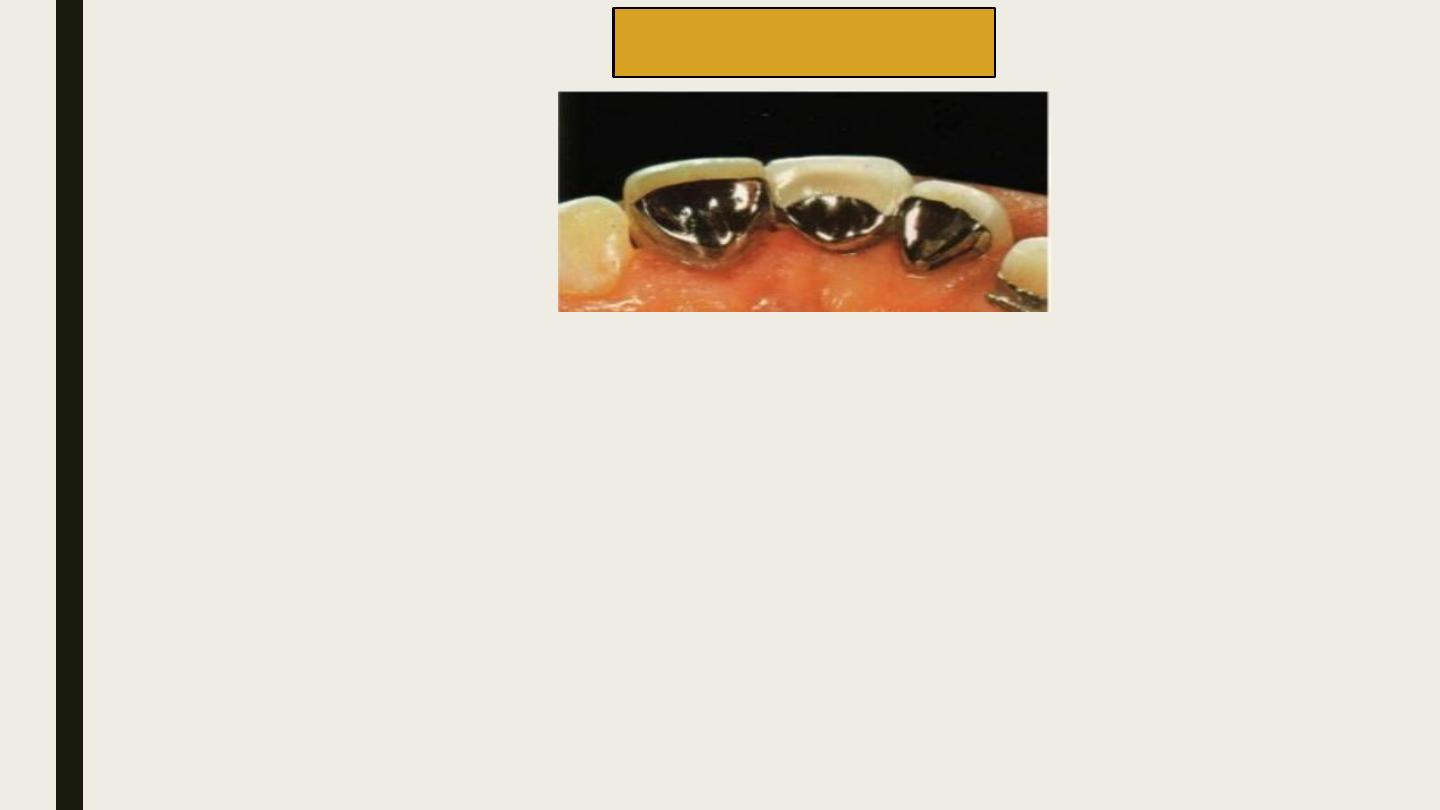
They are indicated for replacing maxillary and mandibular
posterior teeth.
They are not aesthetic.
They have the maximum strength and durability
The external surface is fabricated using ceramic.
The metal is bonded to ceramic chemically,
mechanically and ionically.
The metal is surrounded by porcelain on all the
surfaces .
The lingual and occlusal surface is formed by
metal and the labial and gingival surface is alone
formed by porcelain.
7)All metal fixed partial bridge
8)Metal-ceramic fixed partial bridge
1
2

Advantages
Aesthetically pleasing
Stronger metal substructure
Characterization possible with use of internal and external
stains.
Disadvantages
Significant tooth preparation necessary; not conservative.
To achieve better aesthetics, the facial margin of an anterior
restoration is often placed subgingivally, this increases the
potential for gingival destruction.
Slightly inferior in aesthetics compared to all ceramic
restorations.
Brittle fracture can occur due to failure at the metal ceramic
junction.
More expensive.

Advantages
Superior aesthetics.
Excellent translucency.
Requires slightly more preparation of the facial surface.
Disadvantages
Reduced strength due to lack of reinforcement with metal
It is very difficult to obtain a well-finished margin because the ceramic edges tend to
chip easily.
These crowns cannot be used on extensively damaged teeth because they cannot support
these restorations.
Due to porcelain’s brittle nature, large connectors have to be used, which usually leads to
impingement of the inter-dental papilla. This increases the potential for periodontal
disease. Wear of opposing natural teeth.
9)All ceramic fixed partial bridge
Characteristics
Only indicated for long-term temporary or interim prostheses.
Can be used for making fixed periodontal splints.
Poor wear resistance.
Easy to fabricate and adjust.
Aesthetically pleasing.
10)All acrylic fixed partial bridge
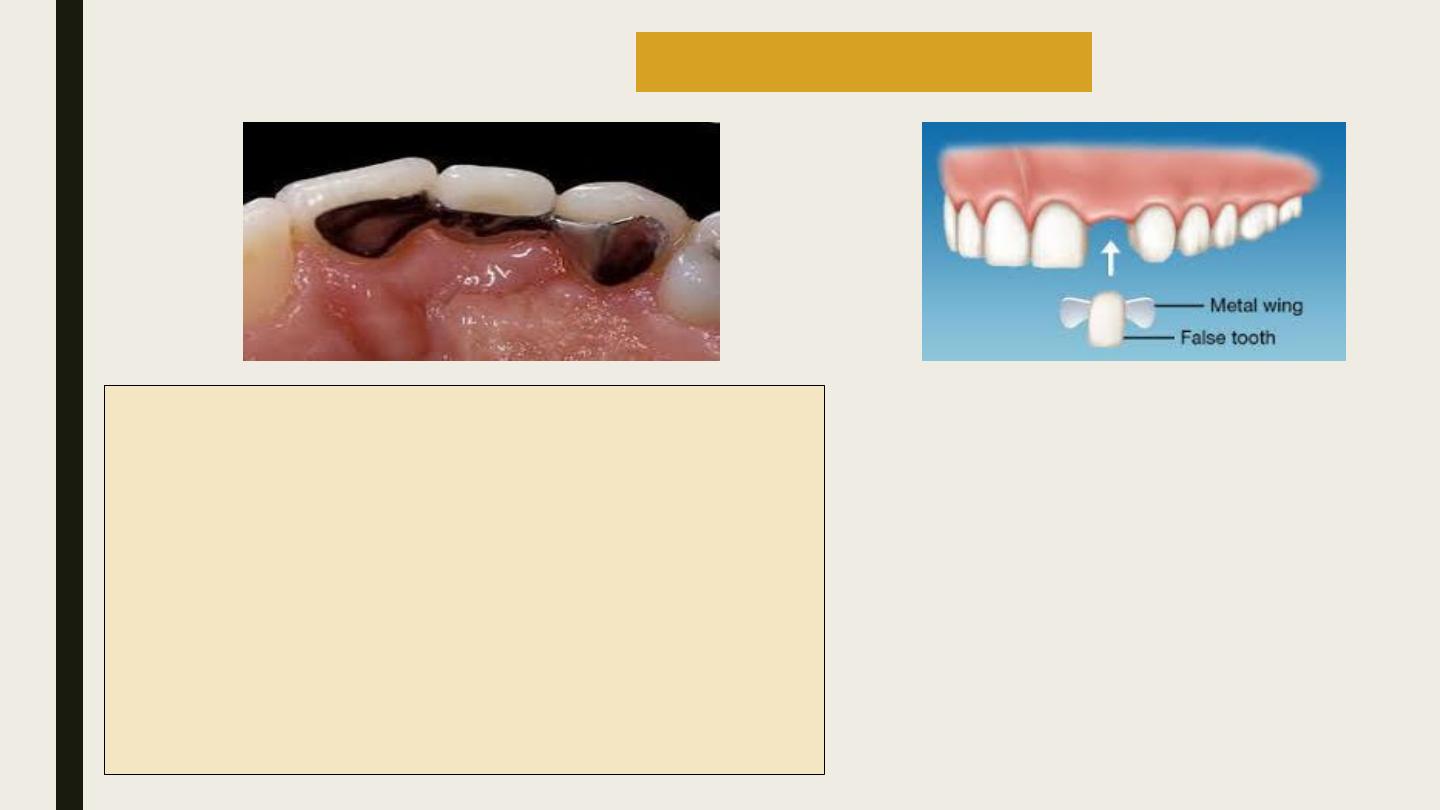
Veneer is a layer of restoration placed over the labial surface of a tooth.
They are primarily used as aesthetic aides to discolored or fractured teeth.
11)Veneers
Definition
These, basically, are bridges, which are reinforced by a bar of glass fibres over
which indirect posterior composites are built.
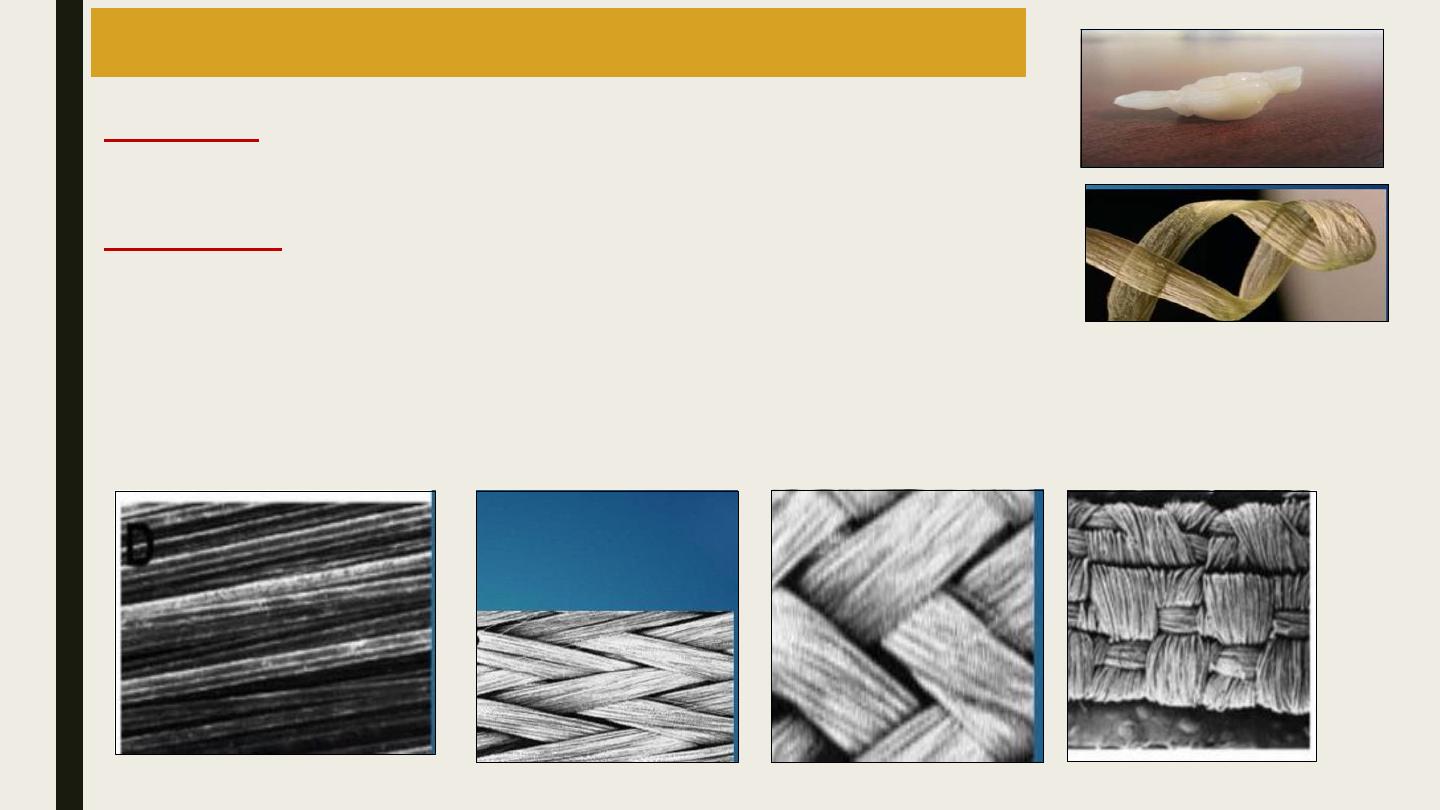
Material used
Fiber reinforced composites have two parts namely the reinforcing constituent
(provides strength and stiffness) and surrounding matrix (supports the
reinforcement and provides workability).
Commercially, polymer or resin matrices reinforced with glass, polyethylene or
carbon fibers are available. The reinforcing fibres may be unidirectional (long,
continuous and parallel), braided or
woven.
12)Fiber reinforced composite resin bridges
1
2
3
4
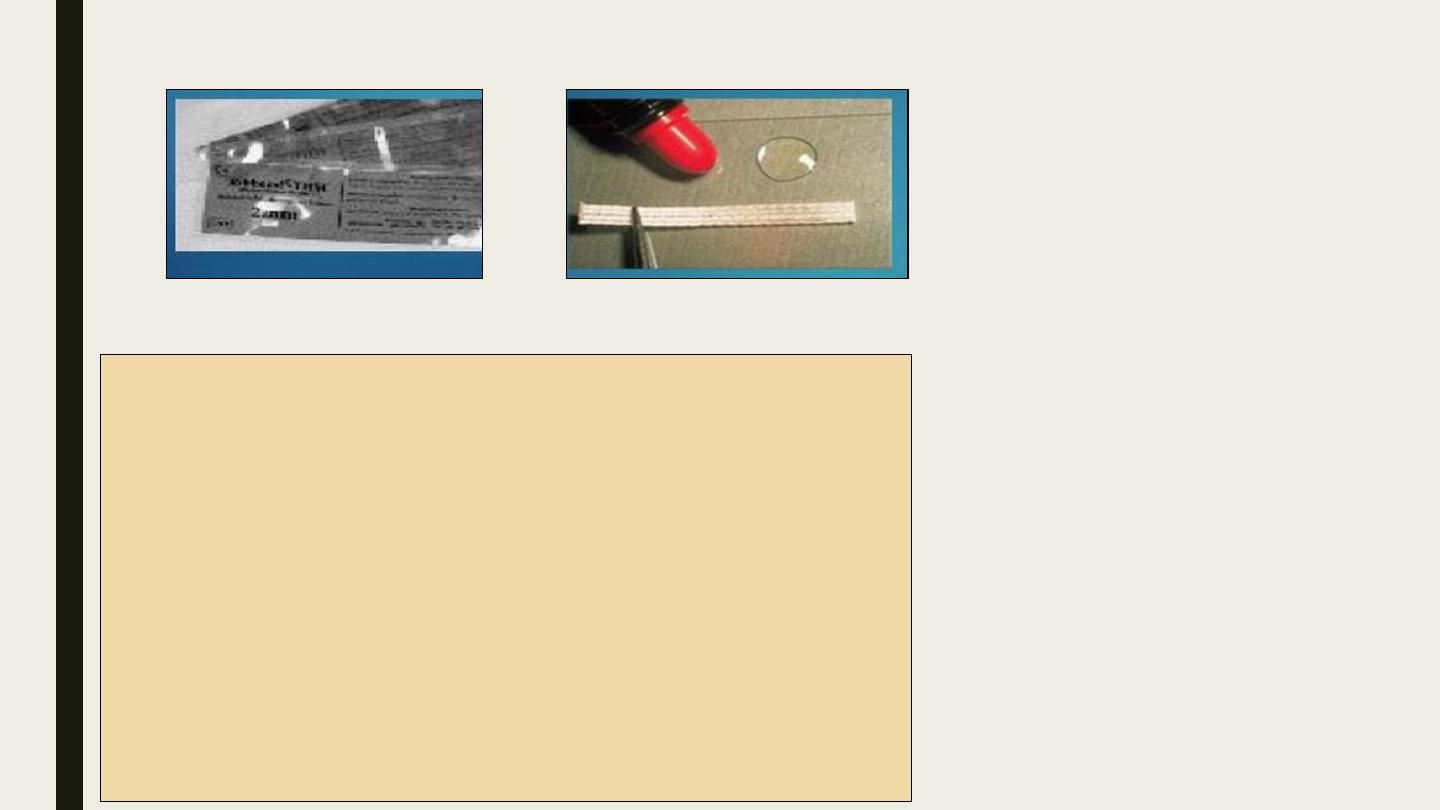
Classification
Pre-impregnated
2
1
Contraindications
It cannot be used when fluid control is not possible
Cannot be used for long span bridges.
It should be avoided in patients with parafunctional habits
It should not be used opposing unglazed porcelain teeth.
Advantages
Cost effective
Less or zero reduction in healthy tooth structure.
Takes short duration of time
Hygienic
Nonallergenic
Single tooth replacement premolar or incisor ideal indication for
lower incisors
Impregnation required
Tooth preparation is done on the lingual or palatal surface with a flat
end-tapering diamond. Additionally a thin box or a groove like
preparation is done on the palatal surface near the edentulous side on
the coronal half of enamel.
In the posterior teeth, a shallow channel (0.5 mm deep and 2-3 mm
wide) is prepared on the occlusal surface. This produces an I-beam
configuration which helps to take up load.
A shoulder or chamfer margin should be created for the remaining
part of the preparation
Tooth preparation
In this technique the wax pattern of the restoration is made on the cast.
Silicone is adapted over the pattern and is used as an index or mold.
The silicone mold is removed and the wax pattern is resinized.
During cementation, the silicone mold is used to contour the reinfored
resin used to bond the prosthesis to the tooth
.
Pre-fabricated Technique
1
2
3
After tooth preparation, an impression is made of the
prepared teeth and a cast is poured.
Special separating medium (similar to a varnish) is
applied over the cast.
The glass fibers are placed on the groove in the cast
The pontic is built in indirect composite resin.
Indirect composites are laboratory composites, which
are more viscous than clinically used (direct)
composites.
The prepared prosthesis is finished and polished.
The bridge is then cemented on to the prepared teeth.
(The glass fiber will form a projection, which fit into
the grooves on the prepared teeth)
.
Hand Fabricated Technique
Procedure
1
2
Indications
Retainers of fixed partial bridges for abutments with
sufficient enamel to etch for retention.
Splinting of periodontally compromised teeth.
Stabilizing dentitions after orthodontics (permanent
retainers).
Medically compromised, poor and adolescent patients
who cannot co-operate with long sessions of therapy.
Prolonged placement of interim prosthesis to augment
surgical procedures.
13)Resin bonded Bridge
1
2

Contraindications
Patients with an acknowledged sensitivity to base metal alloys (Ni).
When the facial esthetics of abutments require improvement.
Insufficient occlusal clearance.
Deep vertical overbite.
Inadequate enamel surfaces to bond. E.g. extensive caries, existing restorations.
Incisors with extremely thin facio-lingual dimensions.
Advantages
Non-invasive to dentin with lingual and proximal tooth preparation including occlusal rests.
Decreased pulpal irritation.
Decreased tissue irritation due to the placement of supragingival margins.
Does not require cast alterations or die preparation.
Reduced cost with less chair time.
Disadvantages
Criteria for choosing the patient are not discrete.
Demanding technique and tooth preparation.
Even minor laboratory errors cannot be corrected easily.
Plaque accumulation may occur because design is outside the dimensions of the natural tooth
Bulky contours may be intolerable in some patients.
Not ideal for replacing more than one tooth.
Graying of the incisal surfaces especially in labio-lingually thin teeth.

• Rochette bridge
• Maryland bridge
• Cast mesh fixed partial bridges
• Virginia bridge
Types of Resin Bonded Fixed Partial bridges
Based on the technique used to finish the tissue
surface of the retainer
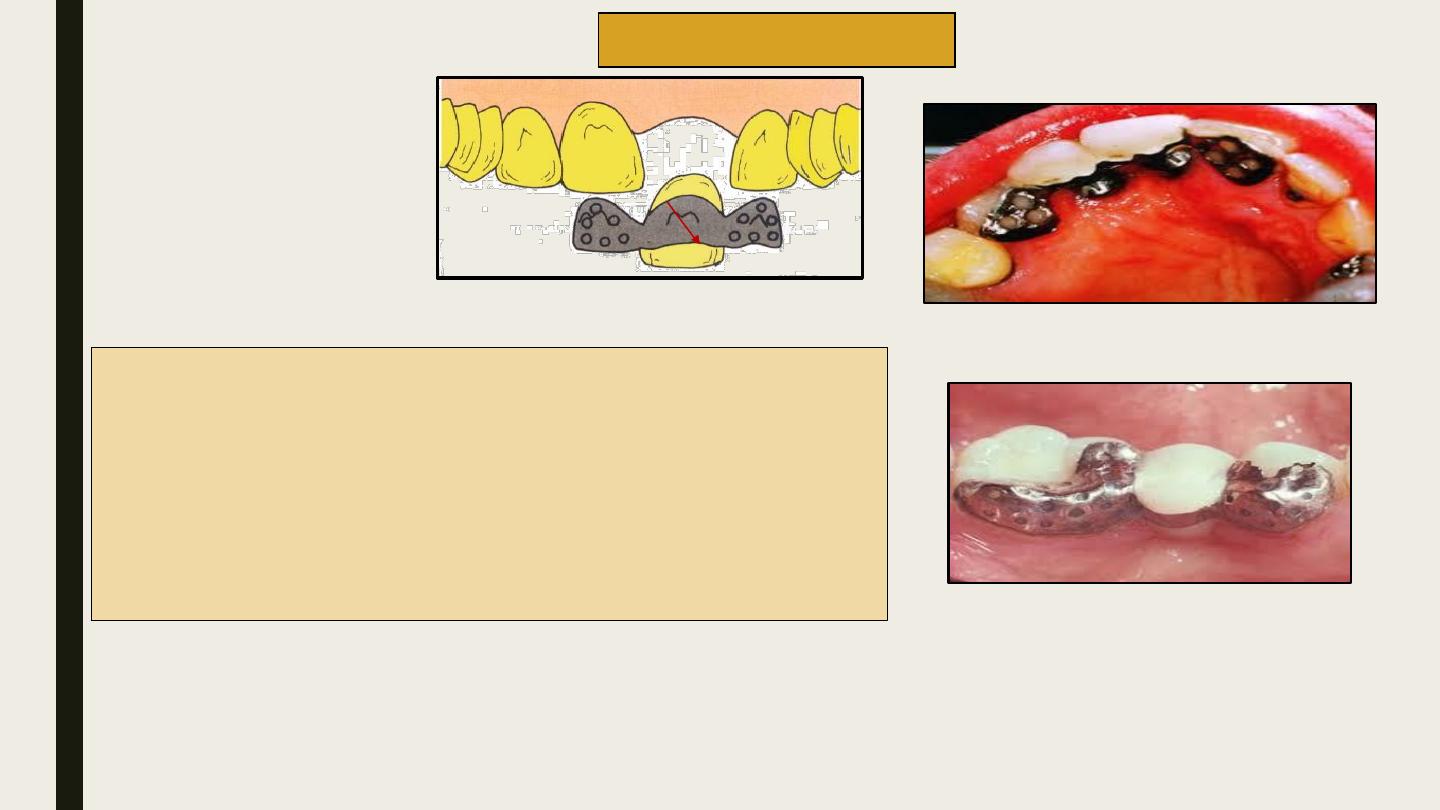
Rochette Bridge
Disadvantage
Weakening of the metal retainer by the perforations
Limited adhesion of the metal provided by the perforations
Wear of composite resin .
Thick lingual retainers.
Plaque accumulation .
50% fail in about 110 months .
The mechanical retention was developed by the micro-porosities present on the tissue
surface of the retainer. Micro-porosities are created by etching the tissue surface of the
retainer
Etching Techniques
• Electrochemical etching.
• Non-electrochemical etching.
Electrochemical etching
etching is done using a chemical electrolyte in the presence of an electrical gradient.
the retainer is coated using paraffin wax. The wax should cover the entire retainer
except for the area to be etched.
Maryland Bridge

1-Non-Beryllium Nickel Chromium alloys:
Etching is done in two stages. In the first stage, the retainer is immersed in 3.5% nitric acid
under a current of 250 mA/cm
2
for 5 minutes. Next the retainer is cleaned by immersing it in
18% HCl in an ultrasonic cleaner for 10 minutes.
2- Beryllium containing Nickel Chromium alloys:
The retainer is immersed in 10% H
2
SO4 under a current of 300 mA/cm
2
. Next the retainer is
cleaned by immersing it in 18% HCl in an ultrasonic cleaner for 10 minutes
Disadvantages
Expensive.
Very technique sensitive.
Tedious procedure, difficult to control the area to be etched.
Electrochemical etching
Two-step process
One-step technique
The alloys are etched by immersing the retainer in a beaker with a mixture of HCl and H
2
SO4 . The
beaker with the retainer is directly placed in an ultrasonic cleanser for 99 seconds under an
electrical field. This technique increases the speed of etching.

Livaditis proposed Nickel-Chromium-Beryllium alloys were successfully
etched in a etching solution placed in a water bath for one hour at 70
o
C.
Doukoudak is proposed the use of stable aqua regia gel to etch enamel
.
Advantages
Does not require special equipments.
Etching is comparable to more expensive techniques.
The prosthesis can be fabricated and bonded in two stages.
Non-electrochemical Etching(one step)
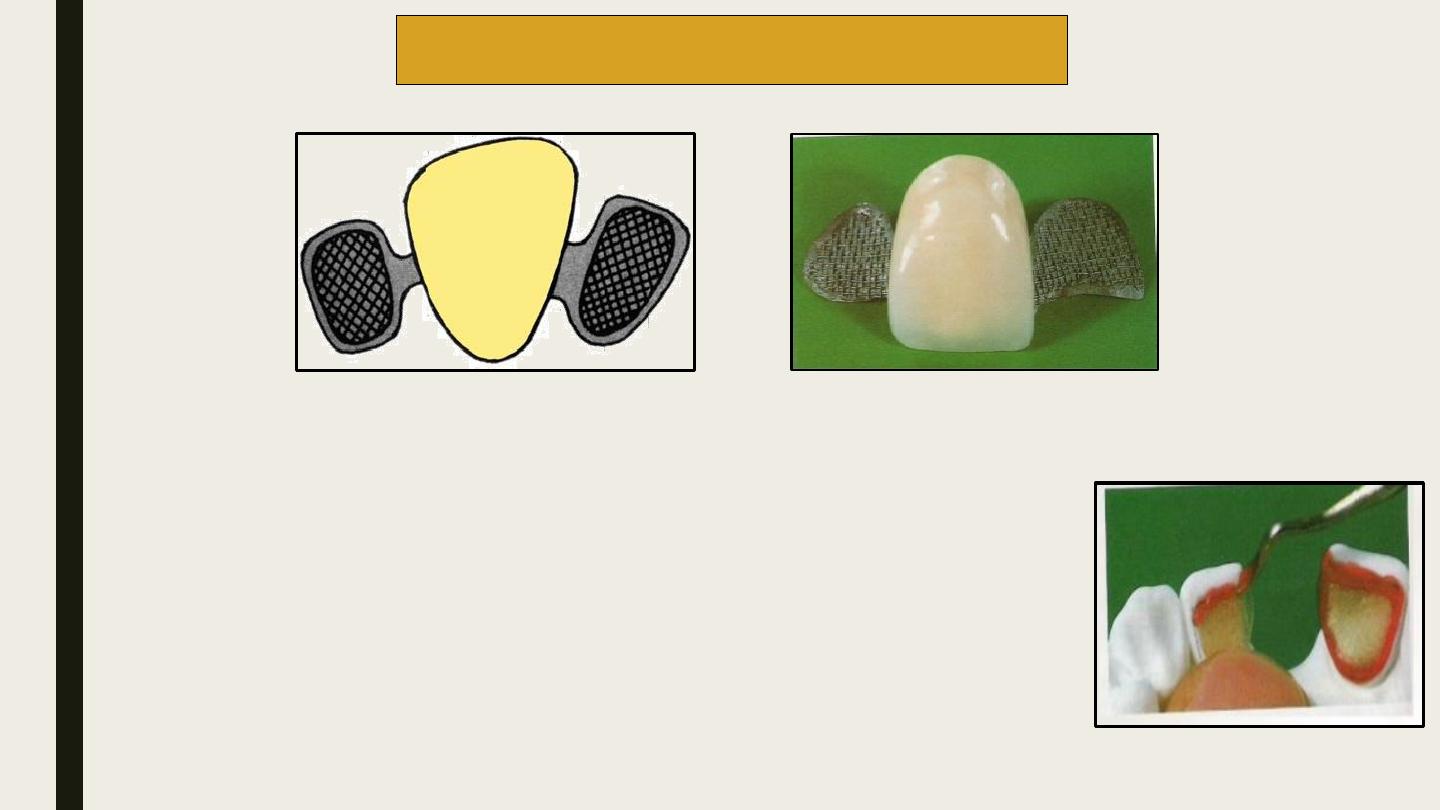
Anylon mesh is placed on the tissue surface of the retainer wax pattern. The nylon
mesh is placed on the cast before fabricating the wax pattern. These retainers do
not require acid etching.
Drawbacks of this design include:
The nylon mesh may not adapt well to the cast during pattern
fabrication
The wax may flow in between the mesh locking all the undercuts
Cast Mesh Fixed Partial bridge
1
2
3

The retainer patterns are first fabricated using resin.
The salt crystals 150-250 μm get incorporated onto the tissue surface of the resin pattern.
The salt crystals are dissolved and the resin pattern is invested and cast.
Dissolved crystals will produce voids in the resin pattern (“Lost salt technique”).
These voids will also be reproduced in the cast metal retainer and they help in mechanical
retention
No surface treatment of the retainer is necessary.
Air abrasion with Aluminium Oxide is sufficient.
The techniques to improve the bonding of this bridge:
The immersion of the retainer in Sulfuric acid for proper oxide layer formation.
Noble metal alloys, a heat-accumulated copper oxide deposition.
Air abrasion with aluminium oxide aids to improve retention.
Advantages
Even noble metal alloys can be used.
Surface treatment of the retainer is not necessary.
Virginia Bridge
Sufficient lingual clearance about 0.6 to 0.8mm (1.0mm is optimal), should be provided
for occlusion.
A cingulum rest seat should be prepared. This acts like a vertical stop against occlusal
forces
A single path of insertion should be created (usually in the inciso-gingival direction along
the proximal surface of the abutment).
There should be an identifiable supragingival finish line about 1mm above the crest of
tissue
An additional 0.2 mm relief should be provided to accommodate protrusive movements of
the mandible.
Two plane proximal facial extensions without metal display may be provided for additional
retention
Facial and lingual segment of the proximal reduction
done using a flat end tapered diamond
Design of Anterior Resin Bonded Fixed Partial bridges
1
2
3
4

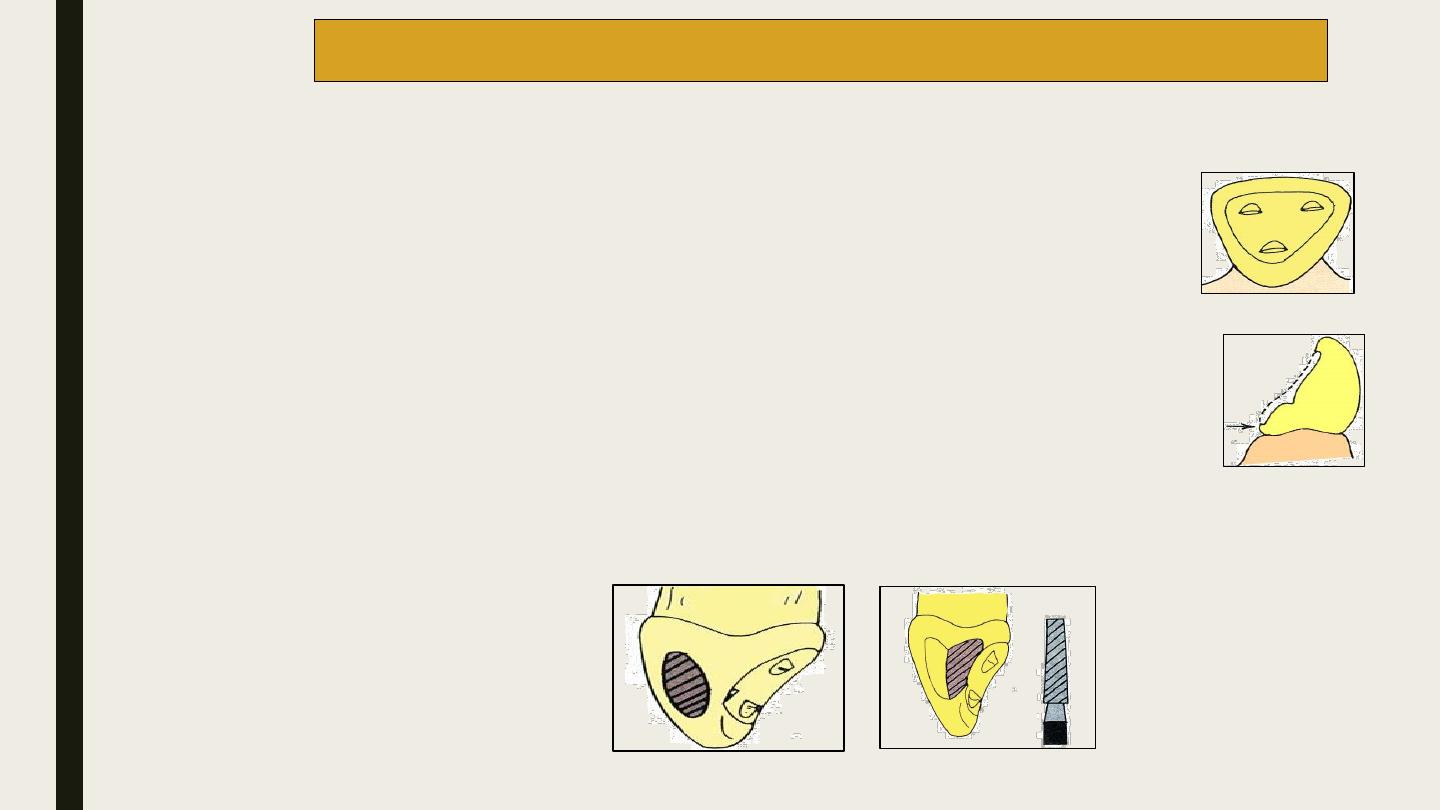
Occlusal rest Seat(for resistance to gingival displacement)
It should be spoon-shaped and placed on the proximal marginal of the abutment adjacent
to the edentulous area.
The Retentive Surface Proximal and lingual axial walls
The retentive surface (for resistance to occlusal displacement) should be reduced to
move their height of contour more cervically .
The height of contour should be about 1mm above the crest of the free gingiva. Knife-
edge type of margin is recommended.
Proximal wrap(for resistance to torquing forces)
The alloy framework should be designed to engage at least 180 degrees of tooth
structure when viewed from the occlusal surface.
The proximal reduction
should be done to move the
point of contact more
cervically (A→B
)
Design of a Posterior Resin Bonded Fixed Partial bridges
1
2

1-Chemical etching
A gel consisting of Nitric and Hydrochloric acids is applied to the internal surface of the metal
framework for approximately 25 minutes.
2-Tin plating
Tin has the ability to form organic complexes with several specific adhesive resins resulting in
significantly greater bond strengths.
3- Bonding Agents
4-Cementation
Cementation
The prepared tooth surface should be isolated (using rubber dam), etched and cleaned using
pumice and water.
37 per cent Phosphoric acid is the most accepted concentration used to etch the enamel. It is applied
for 30 to 60 seconds.
Specially formulated composite resins are available for bonding resin bonded fixed partial bridges.
E.g. Panavia®
The cement is placed on the internal surface of the prosthesis (retainer) and the restoration is slowly
inserted. Firm pressure should be applied for complete seating.
The resin is allowed to polymerize. Excess material can be removed using a hand instrument. After
polymerization is complete, the external surface of the resin is finished and polished.
Bonding of Resin Bonded Fixed Partial bridge

Most Resin bonded FPD resins are anaerobic resins. Hence, they do not set while mixing or loading but
set once the prosthesis is seated and the atmospheric contact is eliminated. But these resins fail to
polymerize at the margins of the restoration where they are exposed. Hence, a varnish like separating
material should be applied at the margins of the restoration. Commonly oxyguard® is used for this
purpose
Failure of Resin bonded fixed partial bridges
:
1.
Inappropriate patient selection:
a. Mal-alignment of teeth results in poor path of insertion.
b. Insufficient vertical length of the abutment teeth.
c. Inadequate enamel for bonding.
d. History of metal sensitivity.
e. Decreased labio-lingual dimension of abutments.
2. Incomplete tooth preparation:
a. Insufficient proximal and lingual surface reduction.
b. Incomplete or less than 180 degree extension of the retainer.
c. Lack of accommodation to mandibular protrusion.
3. Bonding failure:
a. Contamination
b. Prolonged mixing.
c. Inappropriate luting agent
.
U N I V E R S I T Y O F M O S U L
C O L L E G E O F D E N T I S T R Y
2020-2021
1-Contemporary fixed prosthodontics
2-Textbook of Prosthodontics
References:
Thank you for your nice attention