
Windows 7 - Lecture 2
Raghad Mohammad Al-Saigh
University of Mosul-Mosul Medical college
Customize Start Menu and Taskbar
-Taskbar
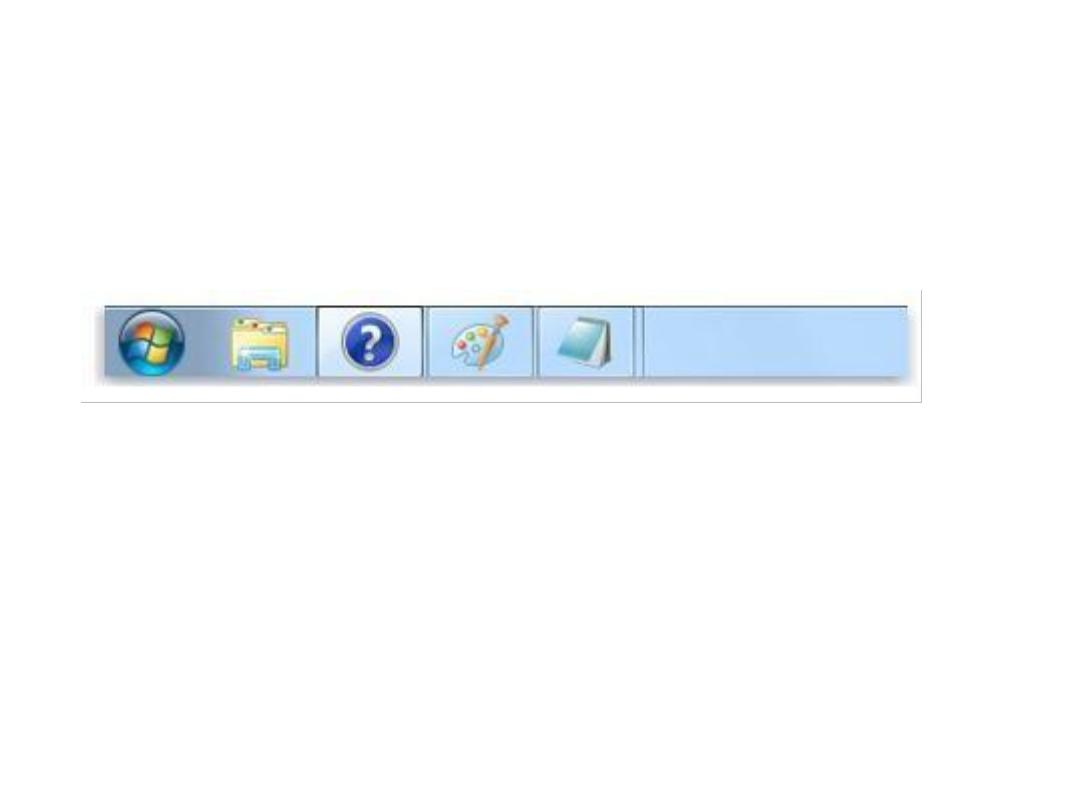
The taskbar is usually located at the bottom of the
desktop. It looks like this:
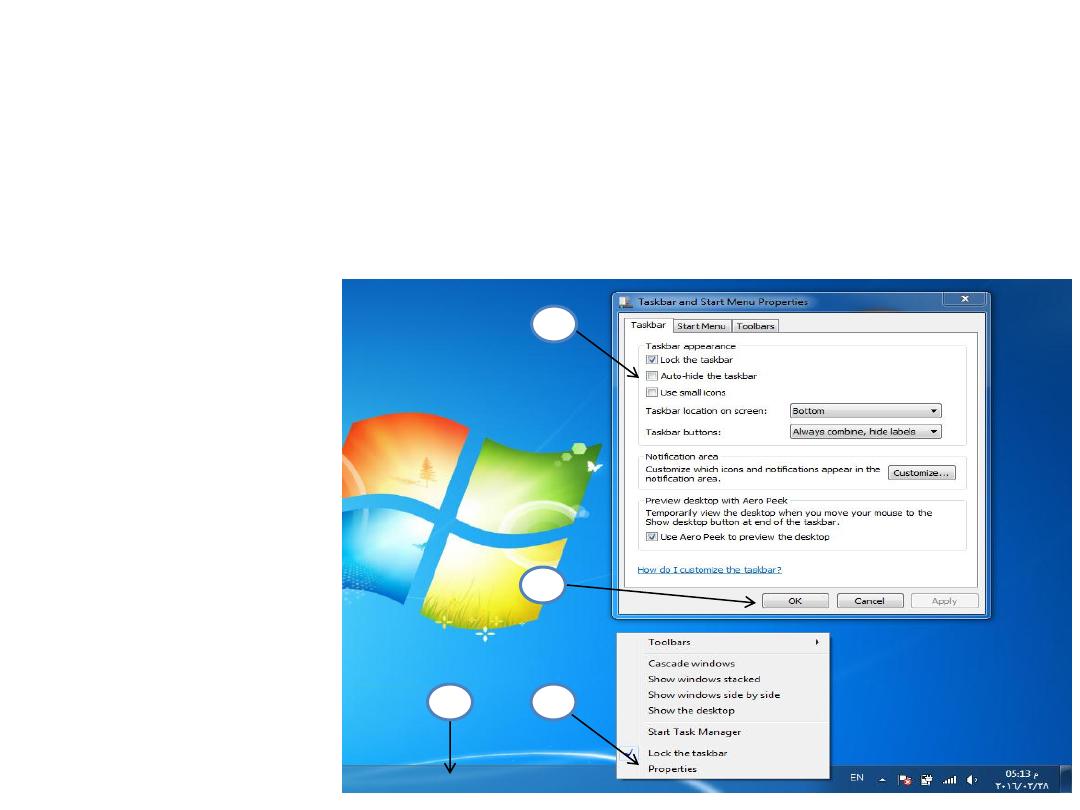
.You can keep the taskbar in one place by locking it,
which can prevent accidental moving or resizing. If you
unlock it, you can move it to the bottom, side, or top of
the desktop.
Right-click an empty space on the taskbar, and if Lock
the Taskbar has a check mark next to it, the taskbar is
locked. If it does not have a check mark, click Lock the
Taskbar.
1
• You can hide the taskbar to create more space. If you don't see the taskbar
anywhere on the screen, it might be hidden.
1- right click on empty space on the taskbar.
2- select properties.
3- from the taskbar appearance, select the Auto-hide the taskbar check box.
4- press ok.
1
2
3
4
2
• To resize icons in the taskbar:
On the Taskbar tab, under Taskbar appearance, select the Use Small
Icons check box, and then click OK
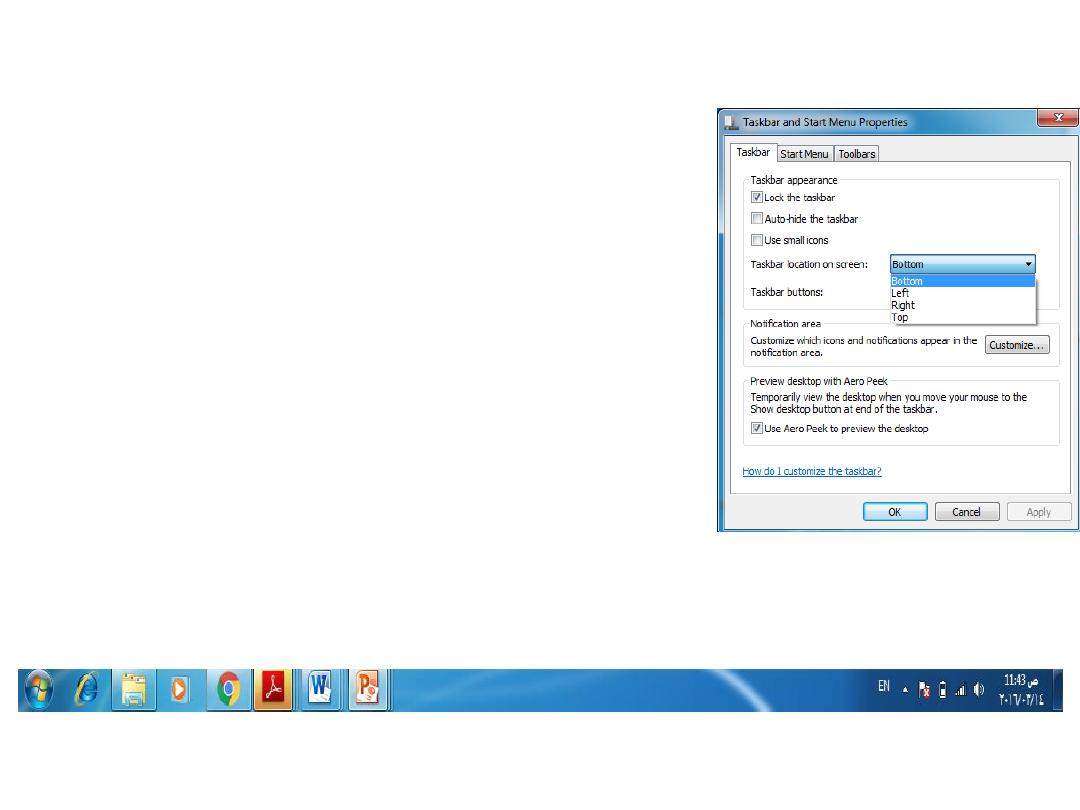
• To change location of the taskbar:
On the Taskbar tab, in Taskbar location on screen menu,
select Left, Right, Top or Bottom, and then click OK.
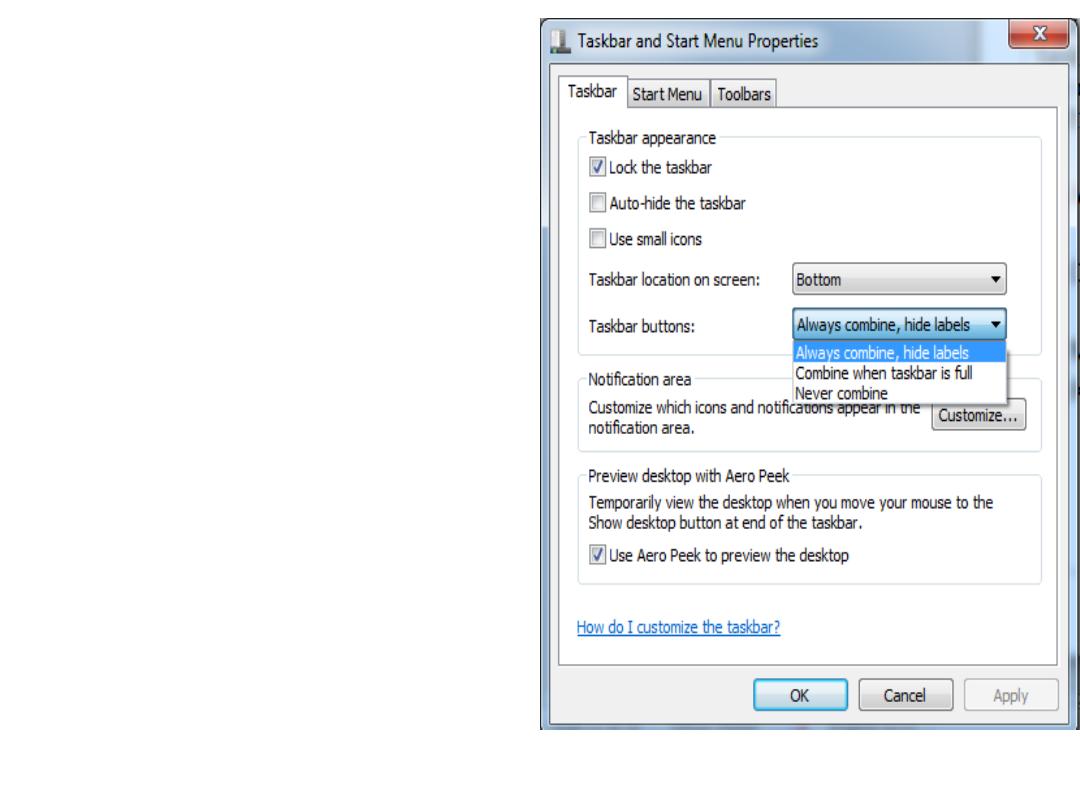
• Change how icons appear on the taskbar:
You can customize the taskbar, including the appearance of
icons and how they group together when you have multiple
items open. Here are your choices:
• Always combine, hide labels
This is the default setting. Each program appears as a single, unlabeled icon,
even when multiple items for a program are open.
A single icon represents both a program and open items
3
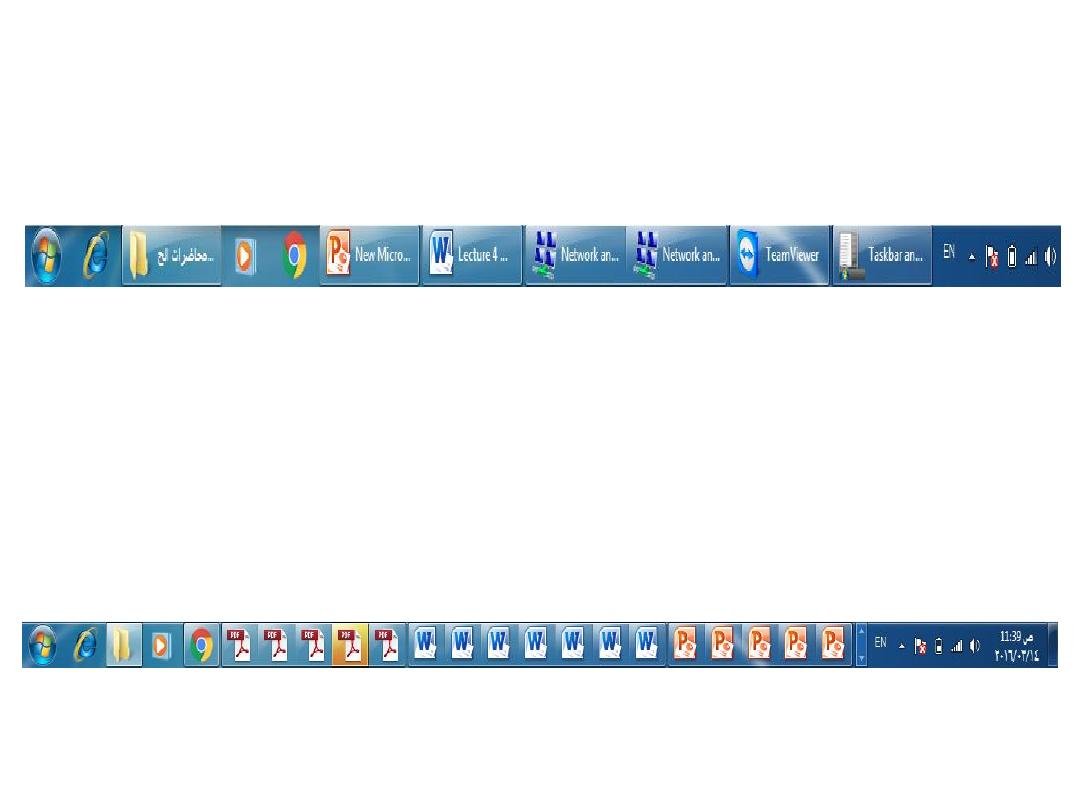
• Combine when taskbar is full
This setting shows each item as an individual, labeled icon. When the taskbar
becomes crowded, programs with multiple open items collapse into a single
program icon. Clicking the icon displays a list of the items that are open.
Individually labeled icons combine when the taskbar is full
• Never combine
This setting is similar to Combine when taskbar is full, except icons never
collapse into a single icon, regardless of how many windows are open. As more
programs and windows open, icons decrease in size and eventually scroll within
the taskbar.
4
• To change how programs and
buttons appear on the taskbar
Right click on any empty space of
taskbar, select properties, Under
Taskbar appearance, select one of
the options from the Taskbar
buttons list:
• Always combine, hide labels
• Combine when taskbar is full
• Never combine
Click OK.
5

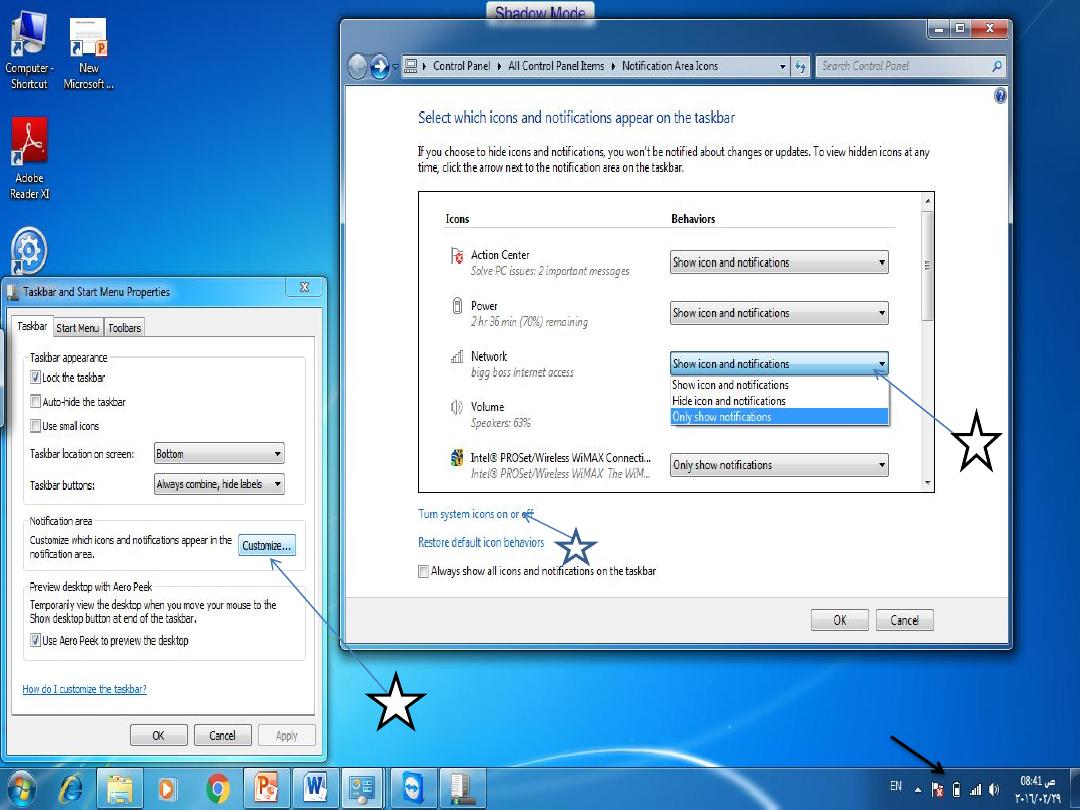
•
To change how icons and notifications appear in the notification area:
1. Right-click an empty area on the taskbar, and then click Properties.
2. Under Notification area, click Customize.
3. For each icon, select one of the following options in the list:
- Show icon and notifications. The icon always remains visible on the taskbar in the
notification area and any notifications are displayed.
- Hide icon and notifications. The icon is hidden and notifications aren't displayed.
- Only show notifications. The icon is hidden, but if the program triggers a notification
balloon, it's displayed on the taskbar.
4. Click OK.
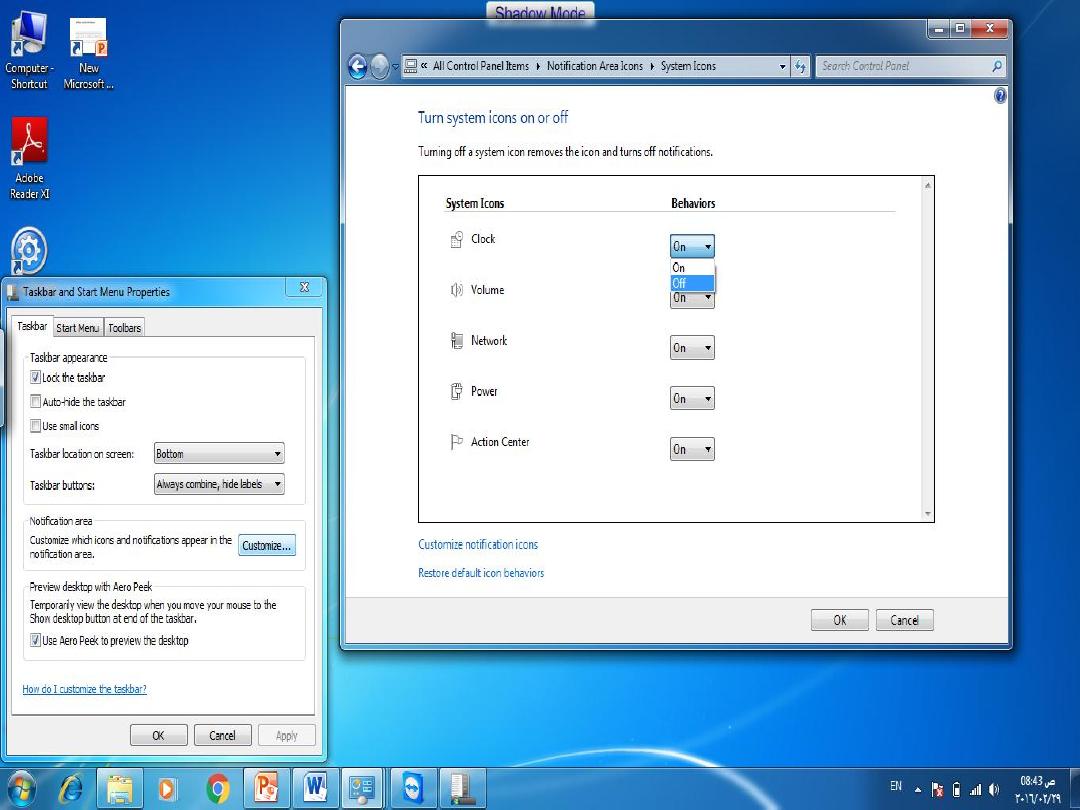
•
To turn system icons on or off:
1. Right-click an empty area on the taskbar, and then click Properties.
2. Under Notification area, click Customize.
3. Click Turn system icons on or off.
4. For each system icon, click On in the list to show the icon in the notification area, or click
Off to completely remove the icon from the notification area.
5. Click OK, and then click OK again.
•
To turn off desktop previews:
1. Right-click an empty area on the taskbar, and then click Properties.
2. Under Preview desktop with Aero Peek, clear the Use Aero Peek to preview the desktop
check box.
3. Click OK.
6
1
2
Notification area
7
8
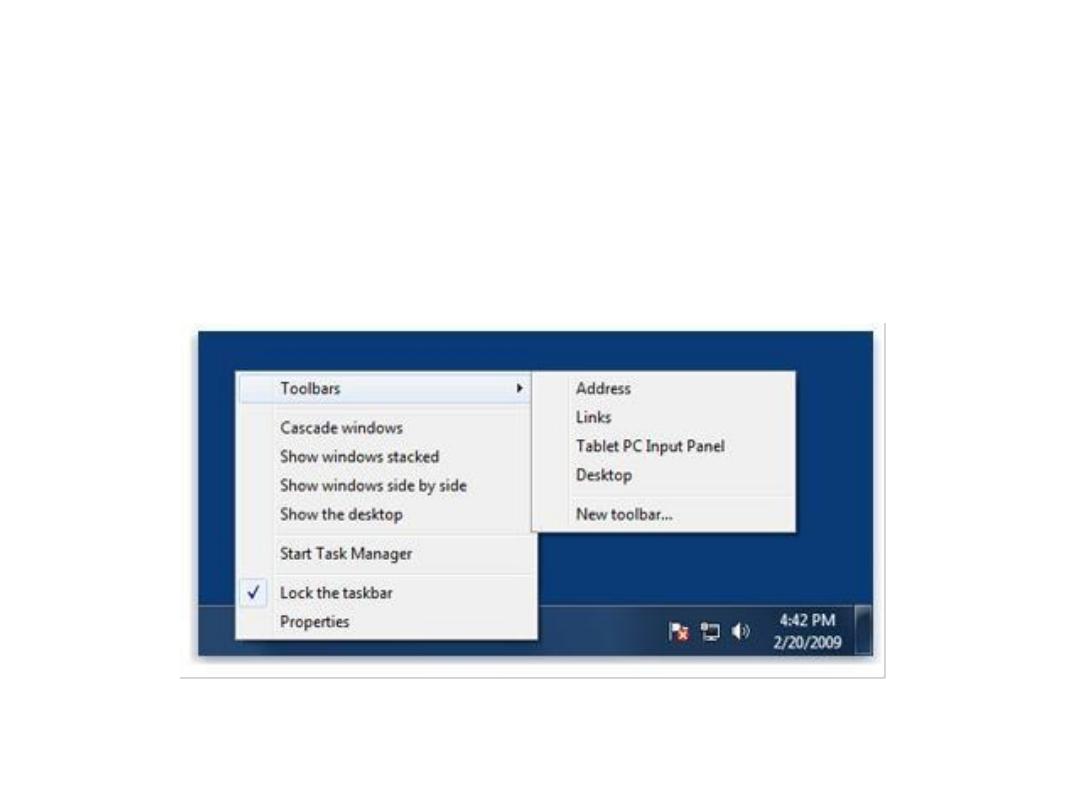
• Add a toolbar to the taskbar:
1. Right-click an empty area on the taskbar, and then point to Toolbars.
2. Click any item in the list to add or remove it. The toolbar names with
check marks beside them are already on the taskbar.
9
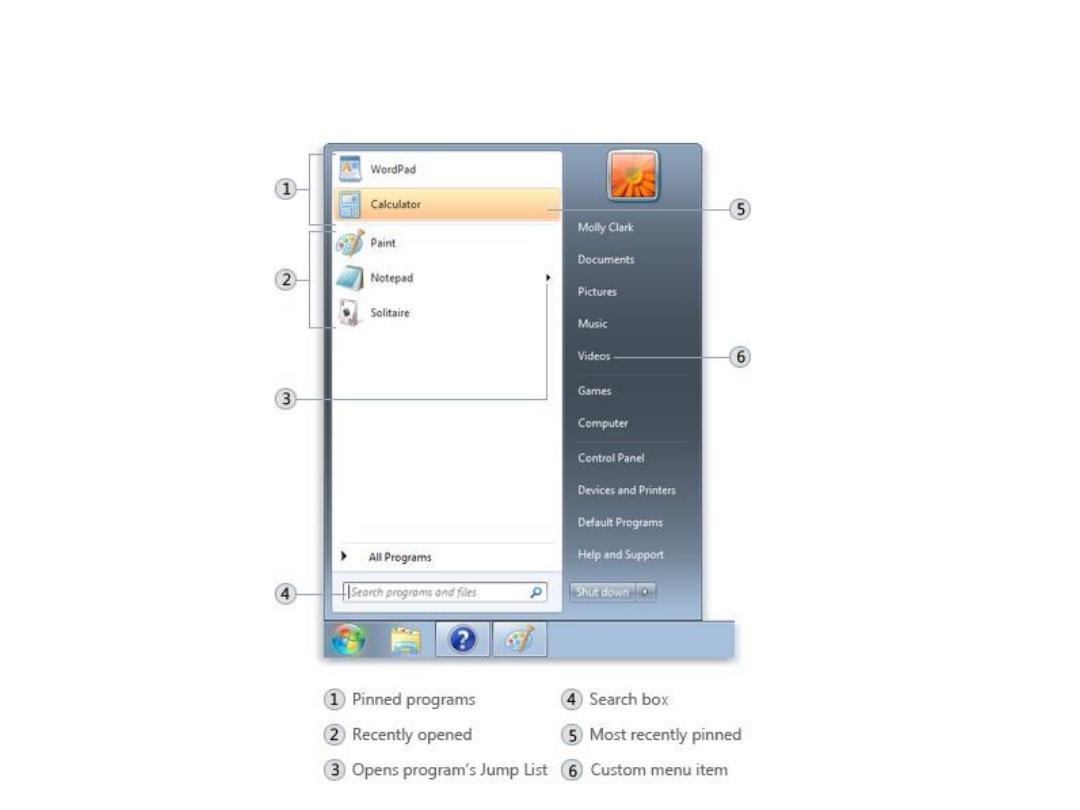
• Start Menu:
The The Start menu is the main gateway to your computer's programs, folders, and
settings. It's called a menu because it provides a list of choices, just as a restaurant menu does.
And as "start" implies, it's often the place that you'll go to start or open things
Raghad M. Al-Saigh
10

Use the Start menu to do these common activities:
- Start programs
-
Open commonly used folders
-
Search for files, folders, and programs
-
Adjust computer settings
-
Get help with the Windows operating system
-
Turn off the computer
-
Log off from Windows or switch to a different user account
-
To open the Start menu, click the Start button in the lower-left corner of
your screen. Or, press the Windows logo key on your keyboard
The Start menu has three basic parts:
• The large left pane shows a short list of programs on your computer.
• At the bottom of the left pane is the search box, which allows you to look
for programs and files on your computer by typing in search terms.
• The right pane provides access to commonly used folders, files, settings,
and features. It's also where you go to log off from Windows or turn off
your computer.
- To pin a program to the start menu:
Click Start, browse to the program, right-click the program, and then click Pin
to Start Menu. The program's icon appears at the top of the Start menu.
11
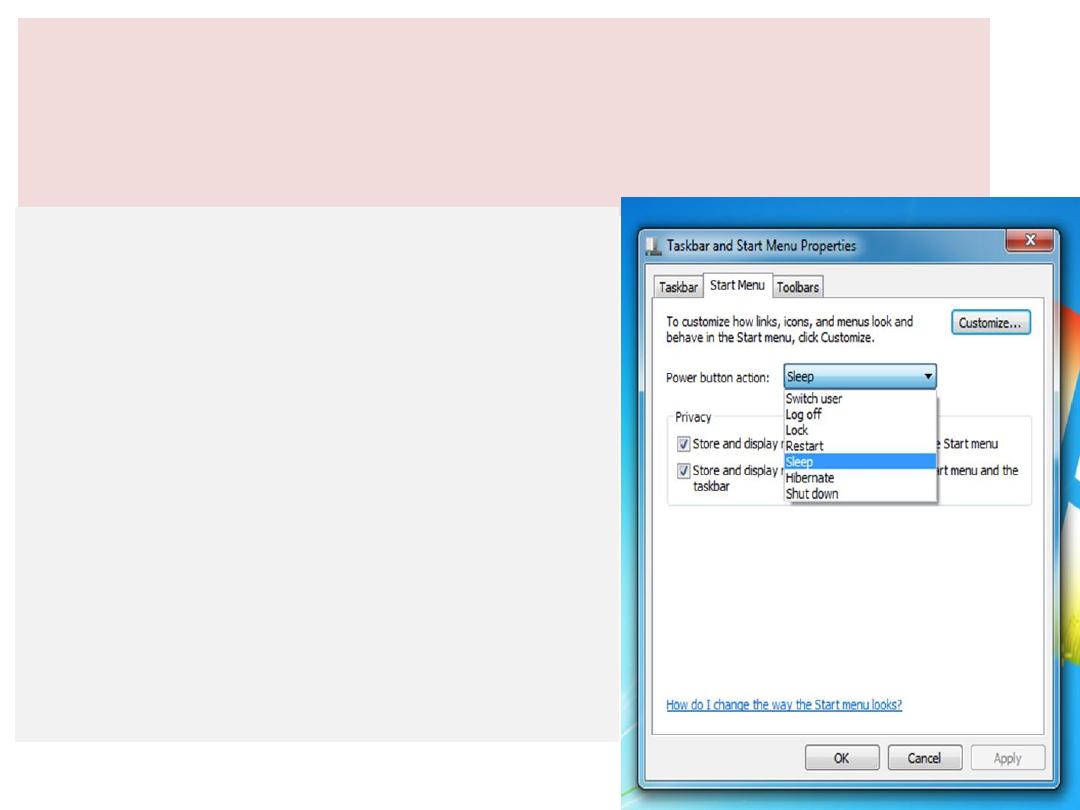
To change power button action:
1. Right-click an empty area on the taskbar, and then click Properties.
2. Under Start Menu tab, change power button action to any of the list actions such as Sleep,
Lock, Restart and so on.
When you click the pop-up button to the immediate right of the Power button, Windows displays
a menu with the following items:
•
Switch User: Switches to another user account on the
computer without closing your open programs and
Windows processes.
•
Log Off: Switches to another user account on the
computer after closing all of your open programs and
Windows processes.
•
Lock: Locks up the computer while you're away from it
(same as clicking the Lock button).
•
Restart: Reboots the computer. (This option is often
required as part of installing new software programs or
Windows updates.)
•
Sleep Mode: is a power-saving state that is similar to
pausing a DVD movie. All actions on the computer are
stopped and any open documents and applications are
put in memory. You can quickly resume normal, full-
power operation within a few seconds. Sleep mode is
basically the same thing as “Standby” mode.
12

The Sleep mode is useful if you want to stop
working for a short period of time. The computer
doesn’t use much power in Sleep mode.
• Hibernate: The Hibernate mode saves your open
documents and running applications to your hard
disk and shuts down the computer, which means
once your computer is in Hibernate mode, it uses
zero power. Once the computer is powered back on,
it will resume everything where you left off. Use this
mode if you won’t be using the laptop for an
extended period of time, and you don’t want to close
your documents.
13
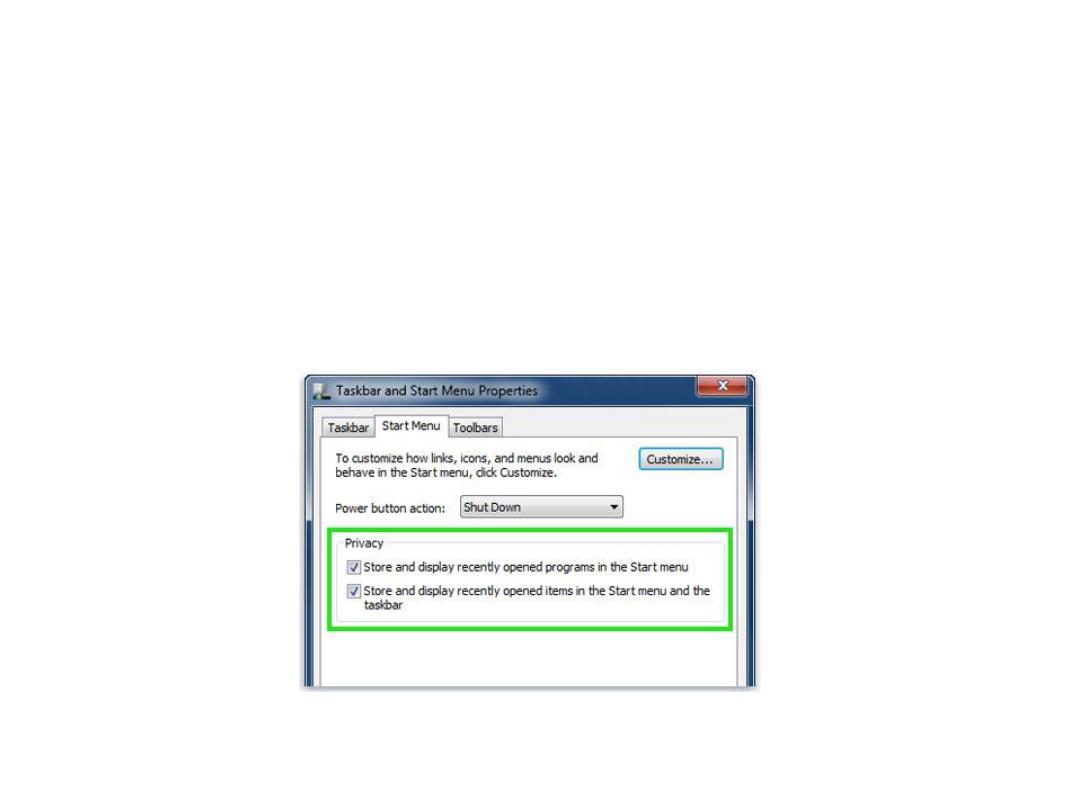
Clear lists on the Start menu and taskbar
• Windows saves a history of the programs, files, folders, and websites you open,
and displays them in the Start menu and in the Jump Lists on both the Start
menu and the taskbar.
• You might choose to clear this history periodically if, for example, you use a
shared or public computer. Clearing items from the Start menu and Jump Lists
doesn’t delete the items from your computer, and any pinned items remain
pinned.
You can clear lists of recently-used programs and
recently-opened items.
14

• To clear lists
• Open Taskbar and Start Menu Properties by clicking the Start button ,
clicking Control Panel, clicking Appearance and Personalization, and then
clicking Taskbar and Start Menu.
• Click the Start Menu tab, and then do one of the following:
– To prevent recently opened programs from appearing in the Start
menu, clear the Store and display recently opened programs in the
Start menu check box.
– To clear recently opened files in the Jump Lists on the taskbar and
Start menu, clear the Store and display recently opened items in the
Start menu and the taskbar check box.
• Click OK.
• To begin displaying recently opened programs and files again, select the
check boxes, and then click OK.
15

• To adjust the number of shortcuts for frequently used programs:
1. Right-click an empty area on the taskbar, and then click Properties.
2. Click the Start Menu tab, and then click Customize.
3. In the Customize Start Menu dialog box, in the Number of recent programs
to display box, enter the number of programs you want to display on the Start
menu, click OK, and then click OK again.
•
To restore Start menu default settings:
1. Right-click an empty area on the taskbar, and then click Properties.
2. Click the Start Menu tab, and then click Customize.
3. In the Customize Start Menu dialog box, click Use Default Settings, click
OK, and then click OK again.
16