Windows 7 - Lecture 3
University of Mosul-Mosul Medical college
Raghad Mohammad Al-Saigh
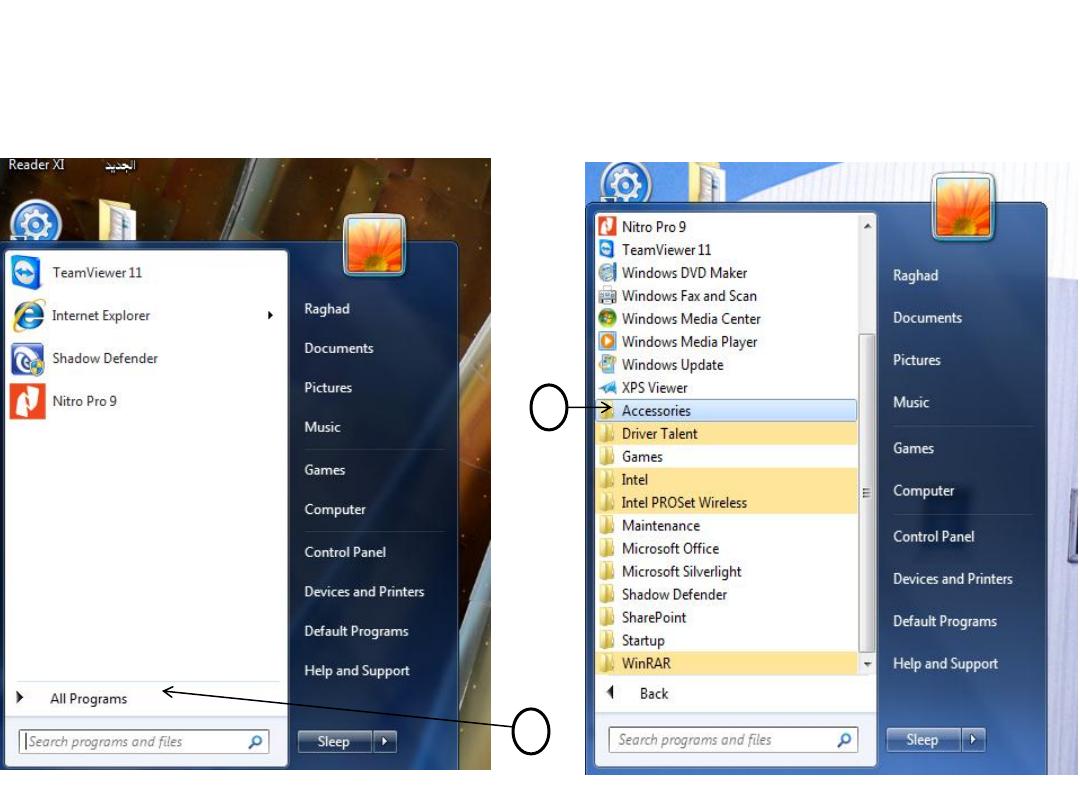
Some programs accessory with
windows 7
•
Calculator
1
2
1
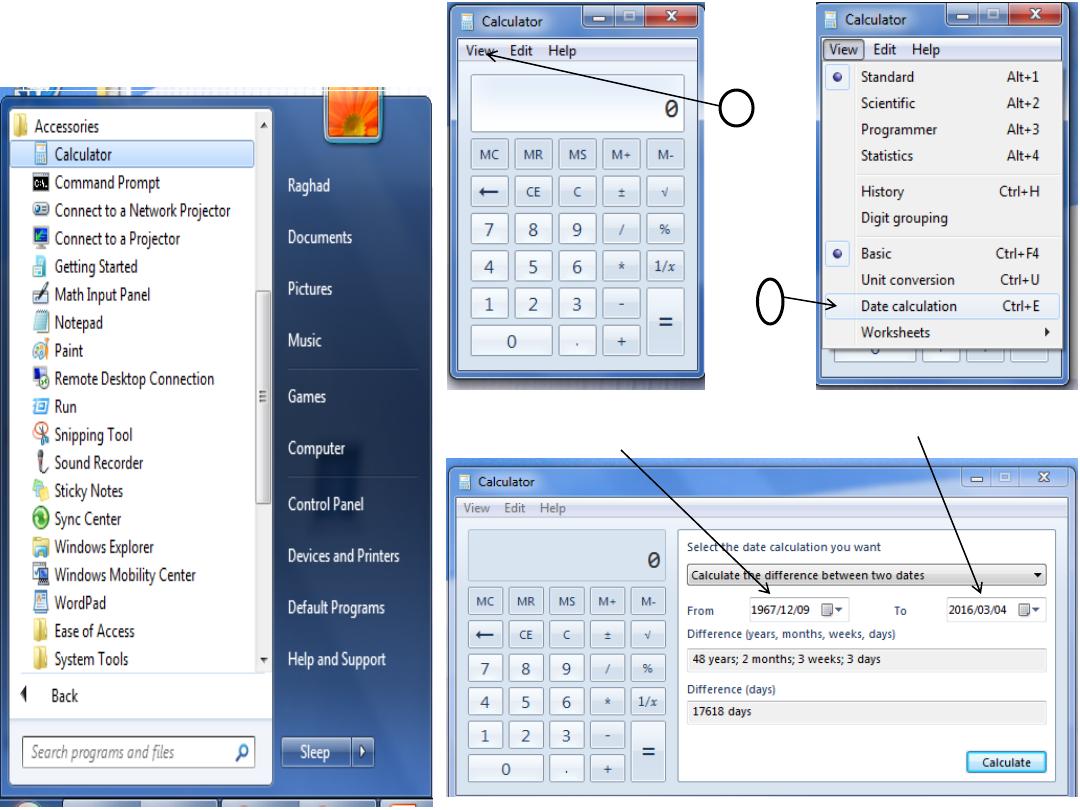
From accessory menu select
calculator
1
3
Write your date of birth
Set the date of
PC
2

•
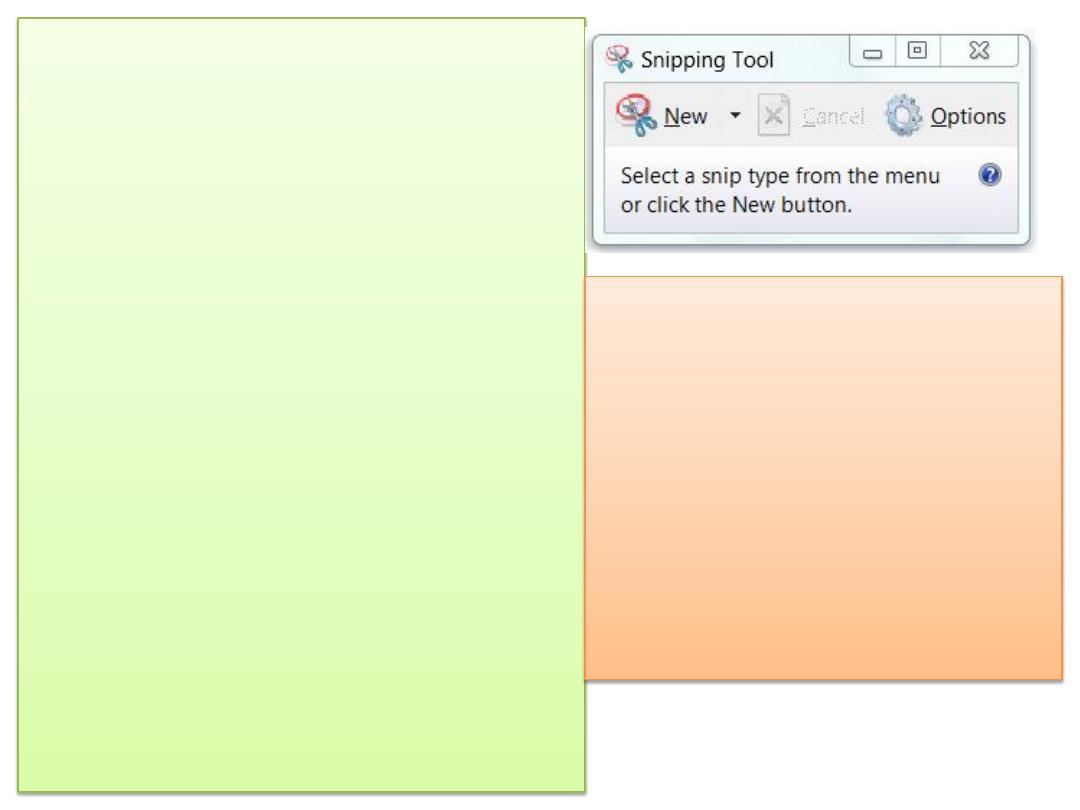
Snipping tools
1
The mouse pointer will changed to + , select the
place of the screen to cut
Snipping tools
3
•
You can use Snipping Tool to capture a screen
shot, or snip, of any object on your screen,
and then annotate, save, or share the image.
•
You can capture any of the following types of
snips:
- Free-form Snip. Draw a free-form shape around
an object.
- Rectangular Snip. Drag the cursor around an
object to form a rectangle.
- Window Snip. Select a window, such as a
browser window or dialog box, that you want to
capture.
- Full-screen Snip. Capture the entire screen.
•
After you capture a snip, it's automatically
copied to the Clipboard and the mark-up
window. From the mark-up window, you can
annotate, save, or share the snip. The
following procedures explain how to use
Snipping Tool.
To capture a snip
Open Snipping Tool by clicking the Start
button. In the search box, type Snipping
Tool, and then, in the list of results, click
Snipping Tool.
Click the arrow next to the New button,
select Free-form Snip, Rectangular Snip,
Window Snip, or Full-screen Snip from
the list, and then select the area of your
screen that you want to capture.
4
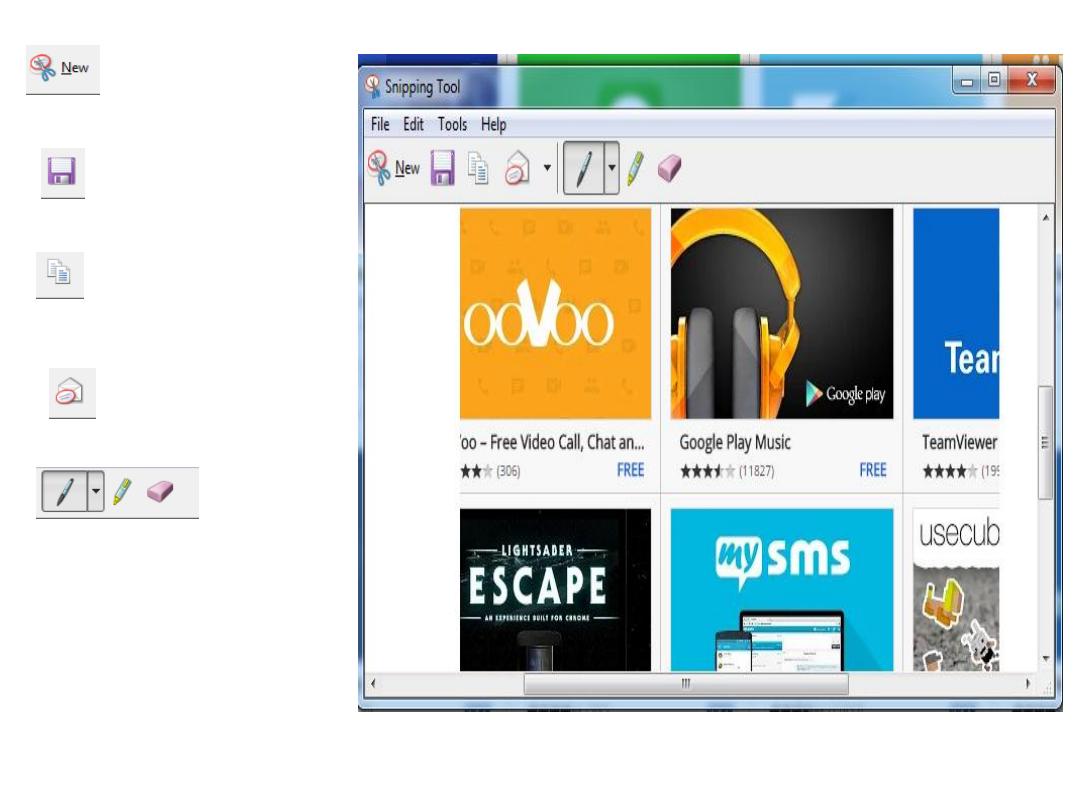
To capture new
snip
To save as an
image file
To copy the
captured snip
To write notes
or highlight on
the snip
To share the
snip
5
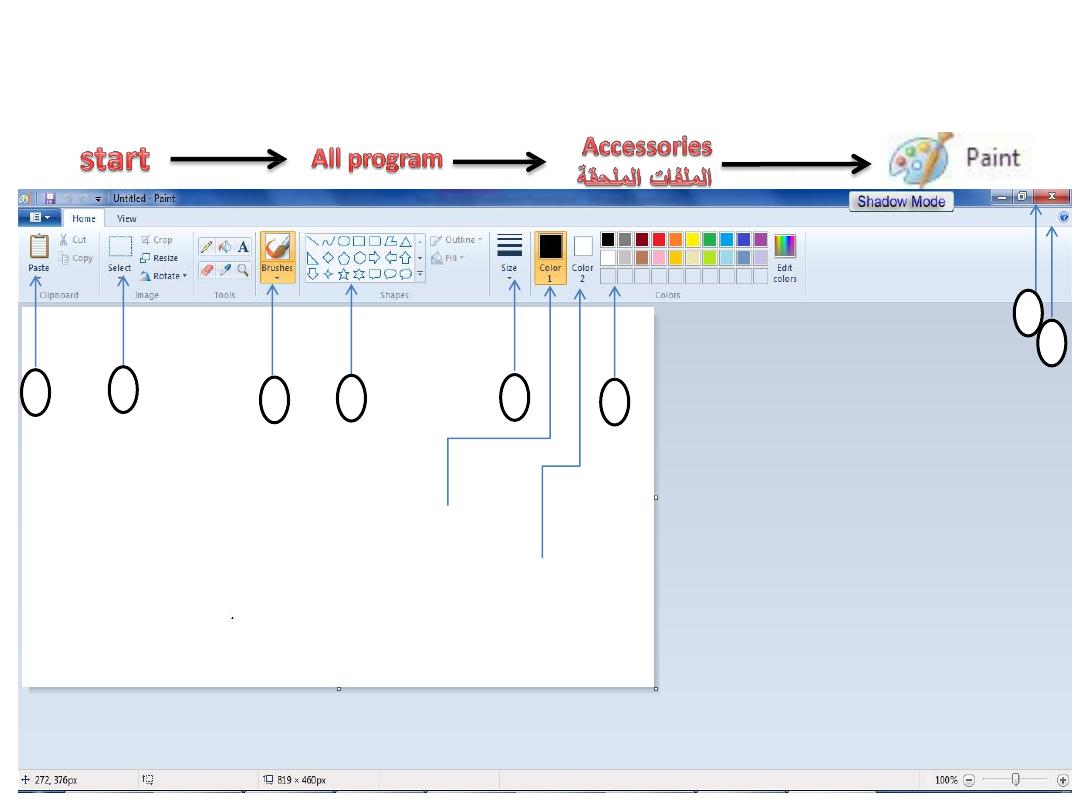
• Paint Program
: It is a drawing program you can use to create drawings or edit
digital pictures. You can also use Paint to save picture files using different file
formats.
1- paste the temporary
clipboard
2- select apart from photo
3-typies of brush
4- insert shapes
5- size of brush
6- color of brush
7- help
8- quit the program
1
2
3
4
5
6
7
8
Foreground
color
background
color
6
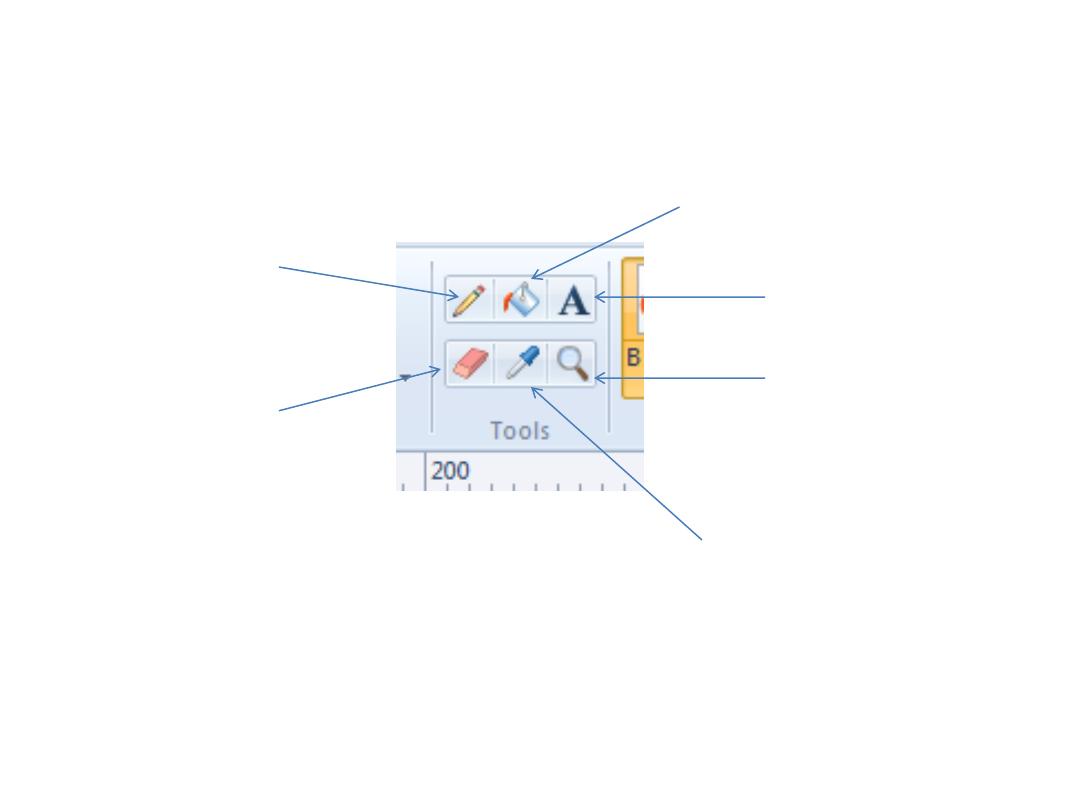
Erase part of the
picture and replace
it with background
color
To fill the area with
foreground color or
right-click to fill it
with background
color
Insert text in to a
picture
Pick a color from the
picture and use it for
drawing
Change the
magnification for a
part of the picture
Draw a free-form
with the selected
line width
Important Note
: To use a tool, you need to click on it first to activate it.
7

Crop the picture
so its only
contains the
current selection
Past the contents
of the clipboard
Resize the
picture
Copy the
selection part
from the pic and
save it in
clipboard
Select part of the
picture
Click here to
print, save ,open
and see every
think you can do
with your pic
Rotate or flip the
picture
Cut the selection part from
the pic and save it in
clipboard
8

How the Tools function :
1. The Select tool allows you to choose a rectangular area of the image so you can
copy it, delete, move, rotate or fill it with color. It's very useful for modifying part
of the drawing without affecting the rest of it.
2. The Eraser tool works like a pencil eraser. Hold down the left mouse button and
drag the pointer over the area you want to erase.
3. The Fill with Color tool, or paint bucket, is for filling an enclosed shape with
color. First you need to choose a color from the palette, and then click inside the
area you want to fill with that color.
4. The Eye Dropper tool is used for grabbing a color from the image. Just click on
any color in the image and it will become the color that you paint with.
5. The Magnifier tool is your friend and you'll use it a lot. For example, if you want
to set exactly where a line begins and ends, you zoom in to mark the beginning
and to mark the end. Then you easily draw the line between the two marks.
9

6. The Pencil tool is used for drawing freehand. Select a color from the
palette, hold down the left mouse button and drag the pointer over the
drawing area. A line will be drawn until you release the mouse button.
7. The Paintbrush also works for drawing freehand, but the result is a thicker
line or shape. You can select from different shapes to draw with. Then drag
the pointer over the drawing area.
8. The Text tool is for adding text to the drawing. It's good for adding your
aircraft registration N-numbers to the fuselage. You can try using different
fonts and font sizes as well as formatted text.
9. With the Line tool you can easily draw a straight line without messing up. It
will be a straight line, not squiggly like when using the pencil. Select a color
and line thickness then drag the pointer.
10. The Curve tool is for drawing curves. Select a color and line thickness,
then draw a straight line. Now click on the line where you want it to bend and
drag the pointer perpendicular to the line. A curve is drawn.
10

Create a new pic
Send a copy of the current pic by e-mail as
an attachment
Open an existing pic
Change the properties of the pic
Save the current pic
Save the current pic as a new file
Close the paint program
Print the current pic
Set the current pic as your desktop
background
11
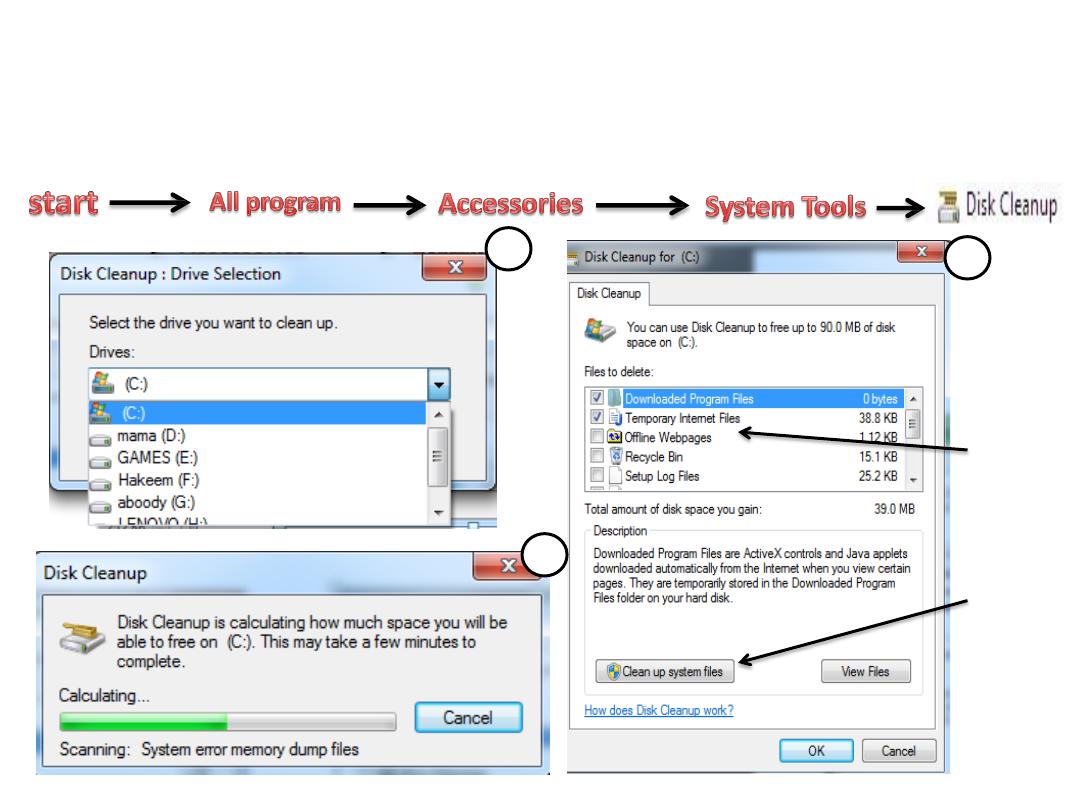
Disk Cleanup Program:
If you want to reduce the number of unnecessary
files on your hard disk to free up disk space and help your computer run faster,
use Disk Cleanup. It removes temporary files, empties the Recycle Bin, and
removes a variety of system files and other items that you no longer need.
1
3
2
Select
files to
delete
Start to
delet
12

• Fragmentation
In order to understand why defragging works, it is important to understand how data
is stored on your hard drive. When data, such as a file, is stored on a hard drive the
operating system attempts to store that file in one section of contiguous, locations
that are connecting without a break, space. When you have a new hard drive, storing
data in contiguous spaces is not a problem. As you use the hard drive, though, files will
be deleted from it and small pockets of space will be created on your hard drive. These
small pockets of space on your hard drive is called fragmentation.
When a hard drive is fragmented, and the operating system wants to store a file on the
hard drive, it attempts to store it in a section of contiguous space that will be large
enough to accommodate the file. If the hard drive is heavily fragmented, there is the
possibility that there will not be enough contiguous space available to store the file,
and therefore the file will be broken up and stored in multiple locations on the hard
drive. This causes the file to become fragmented. This is especially bad when installing
new software on your computer because the program will now be installed over
multiple locations on your hard drive. Now when you run this particular application its
performance will be degraded because it has to be loaded from multiple locations on
the hard drive.
Disk Defragmentation program
13

• Defragmentation
To solve this problem, software developers developed a
type of program called a Disk Defragmenter. A
defragmenter is an application that reorganizes the data
on your hard drive's partitions in such a manner that the
files are stored in as much contiguous space as possible.
The defragmenter will search your hard drive partition
and move data from one location to another location, so
that the files stored there are one contiguous piece,
instead of being spread throughout multiple locations on
the hard drive's partition. This allows the programs and
data to run more efficiently and quickly as the operating
system does not have to read from multiple locations.
14
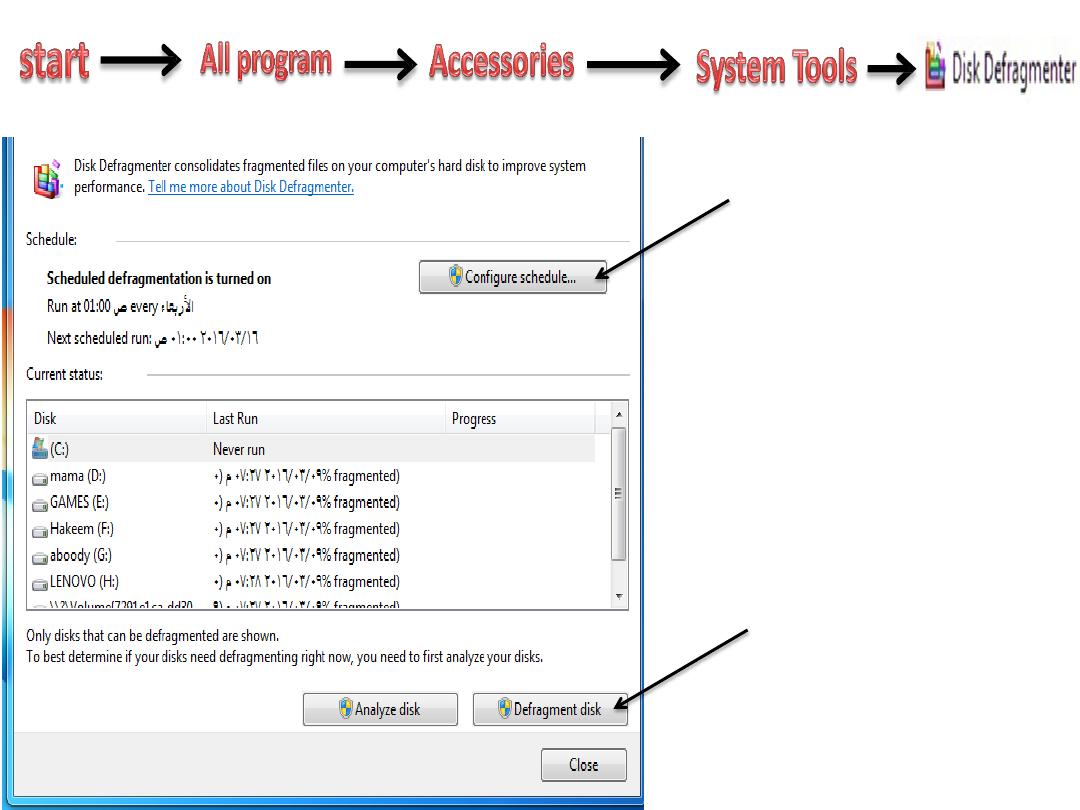
To automatically
defrag
To manually
defrag
15
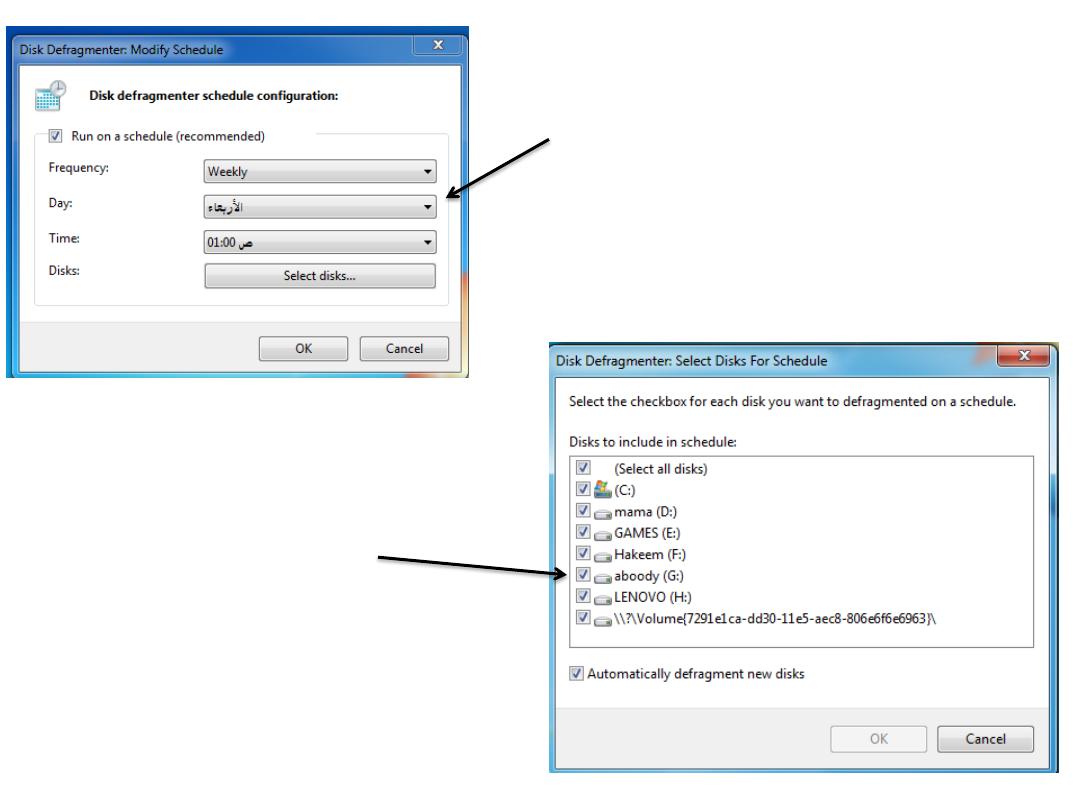
Determine the day and time
frequency defrag operation
Determine which partition
drive disk will defrag
frequently according to
the schedule
16
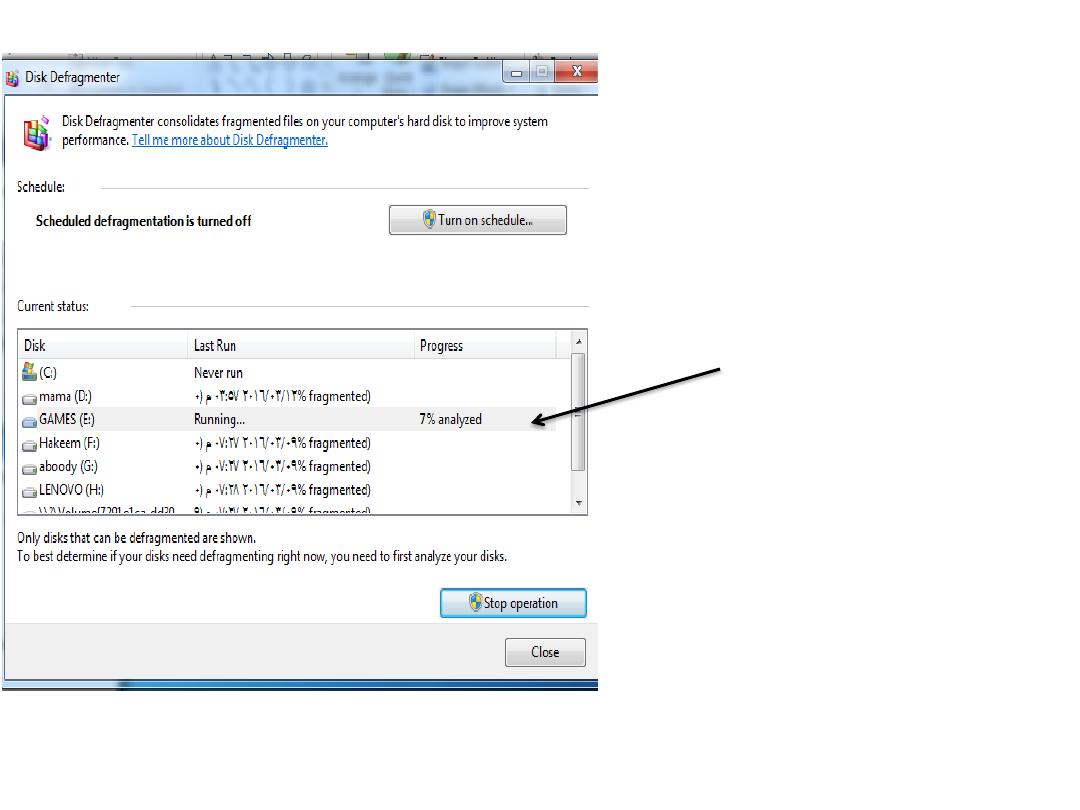
This figure show
the process of
partition E:
defragmentation
17
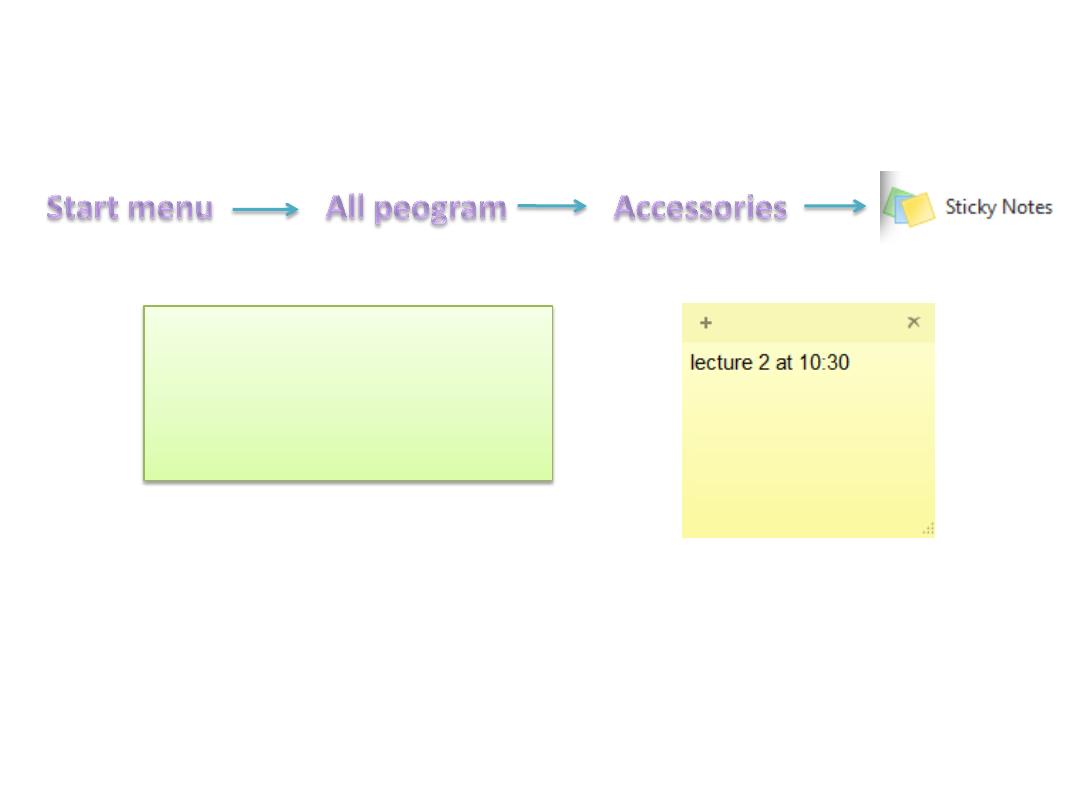
• Sticky notes
A small sticky note will appear to
write on it
Press on + to add new sticky
X to exit sticky note
18