First stage – College of Medicine – University of Mosul\ Nineveh
Computer-Lecture 10 / 2015-2016
maha al ani
1
12. Creating a Chart
Charts can be a useful way to communicate data. When you insert a chart in Excel,
it appears in the selected worksheet with the source data, by default.
12.1. To Create a Chart:
a. Select the worksheet you want to work with. In this example, we use the
Summary worksheet.
b. Select the cells that you want to chart, including the column titles and the row
labels.
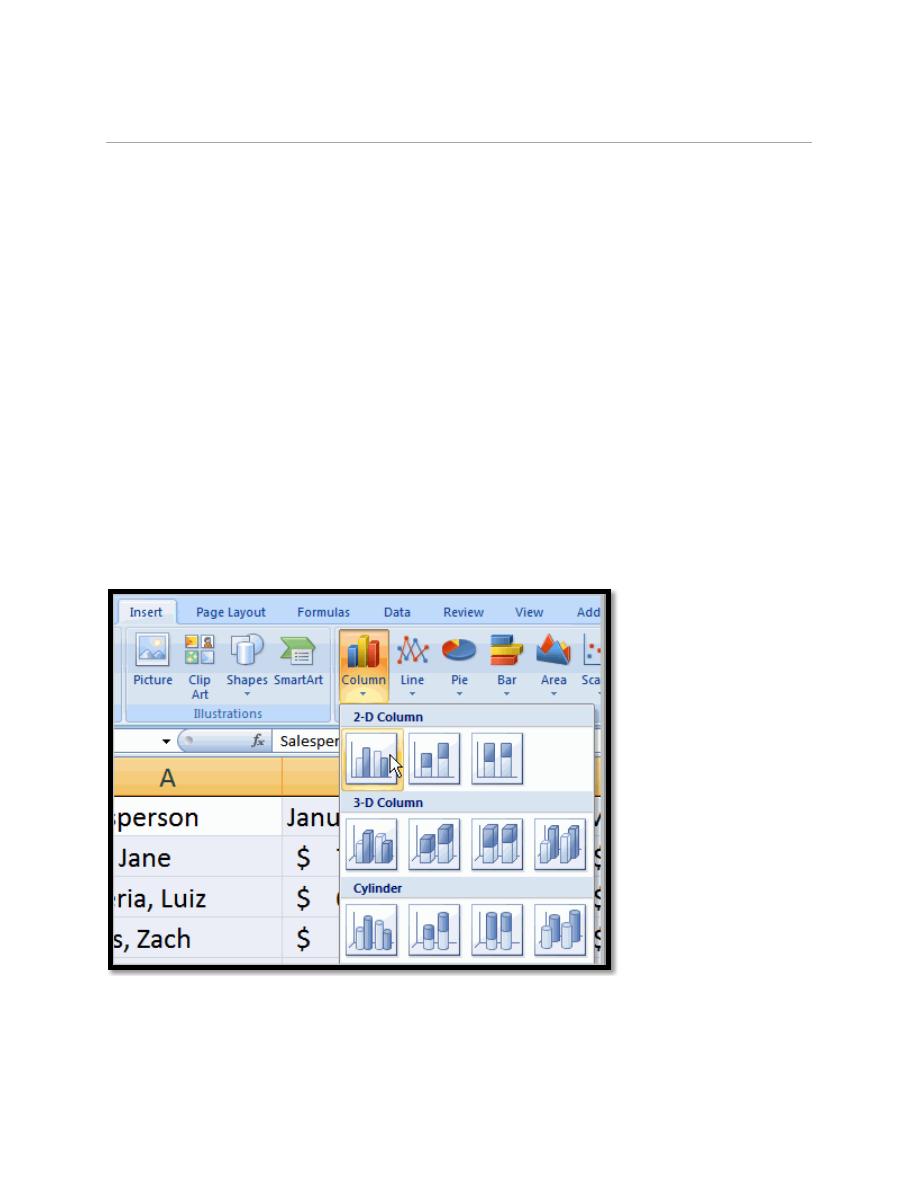
c. Click the Insert tab.
d. Hover over each Chart option in the Charts group to learn more about it.
e. Select one of the Chart options. In this example, we use the Columns
command.
f. Select a type of chart from the list that appears. For this example, we use a 2-D
Clustered Column. The chart appears in the worksheet.
First stage – College of Medicine – University of Mosul\ Nineveh
Computer-Lecture 10 / 2015-2016
maha al ani
2
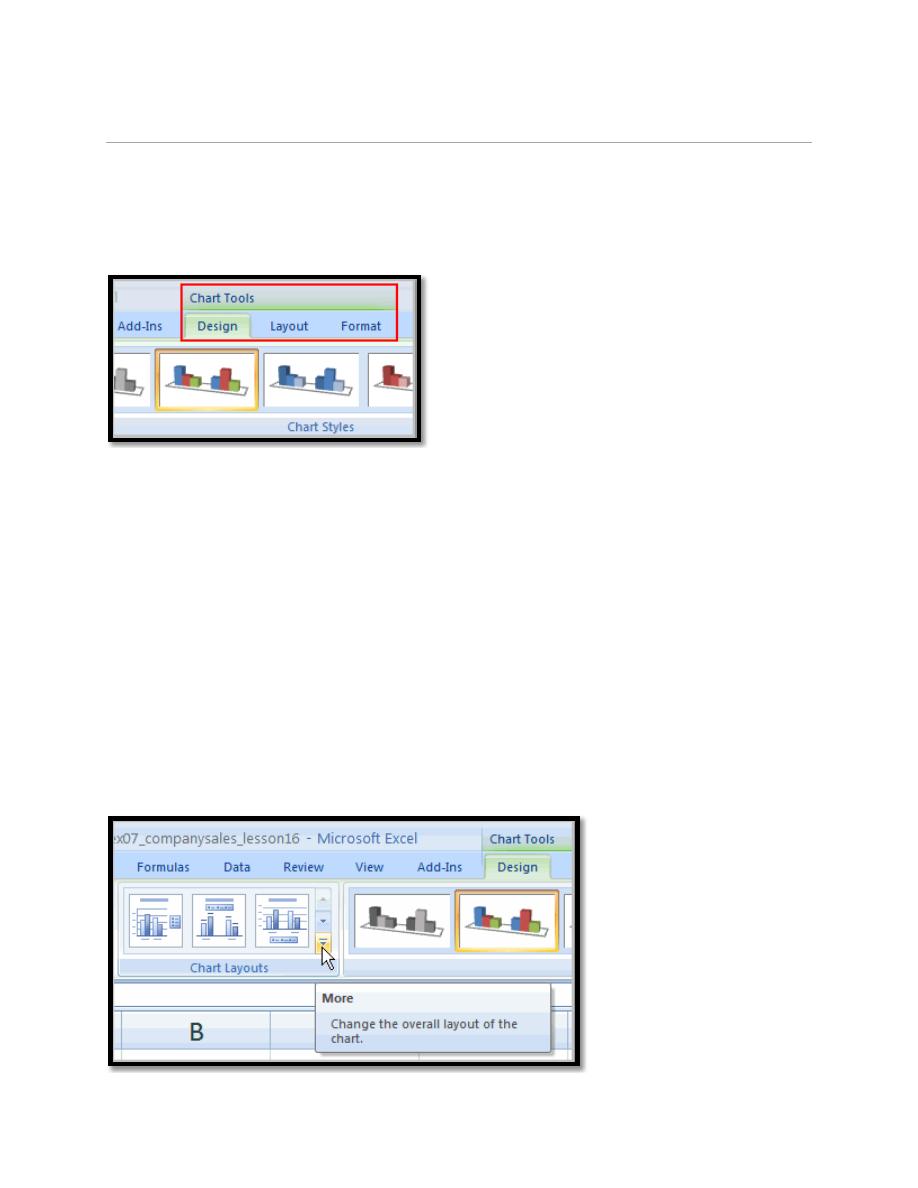
12.2. Chart Tools:
Once you insert a chart, a new set of Chart Tools, arranged into 3 tabs, will appear
above the Ribbon. These are only visible when the chart is selected.
a. To Change the Chart Type:
(1) Select the Design tab.
(2) Click the Change Chart Type command. A dialog box appears.
(3) Select another chart type.
(4) Click OK.
b. To Change Chart Layout:
(1) Select the Design tab.
(2) Locate the Chart Layouts group.
(3) Click the More arrows to view all your layout options.
(4) Left-click a layout to select it.
First stage – College of Medicine – University of Mosul\ Nineveh
Computer-Lecture 10 / 2015-2016
maha al ani
3
c. To Change Chart Style:
(1) Select the Design tab.
(2) Locate the Chart Style group.
(3) Click the More arrows to view all your style options.
(4) Left-click a style to select it.
13. Preparing to Print and Printing
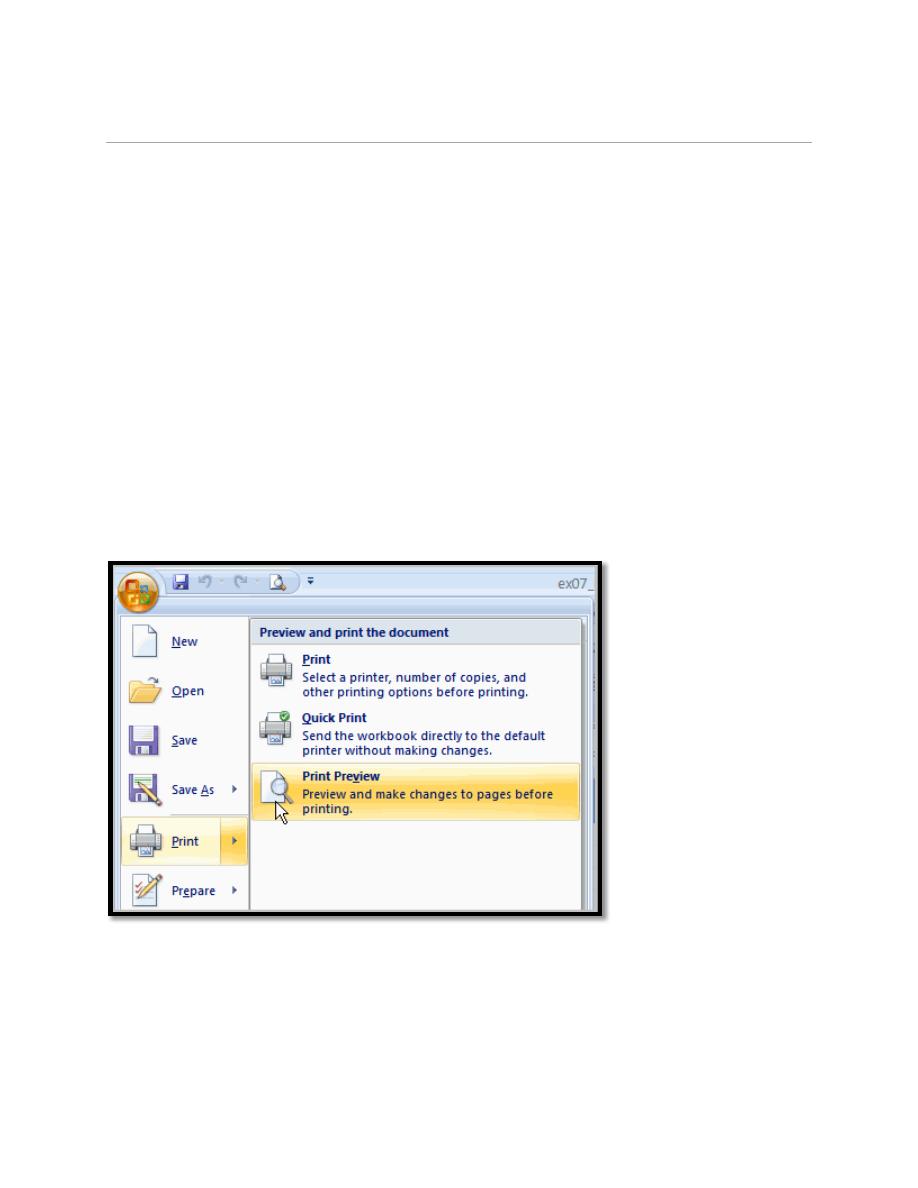
13.1. To View the Spreadsheet in Print Preview:
a. Left-click the Microsoft Office Button.
b. Select Print.
c. Select Print Preview. The spreadsheet will appear in Print Preview view.
d. Click the Close Print Preview button to return to the Normal View.
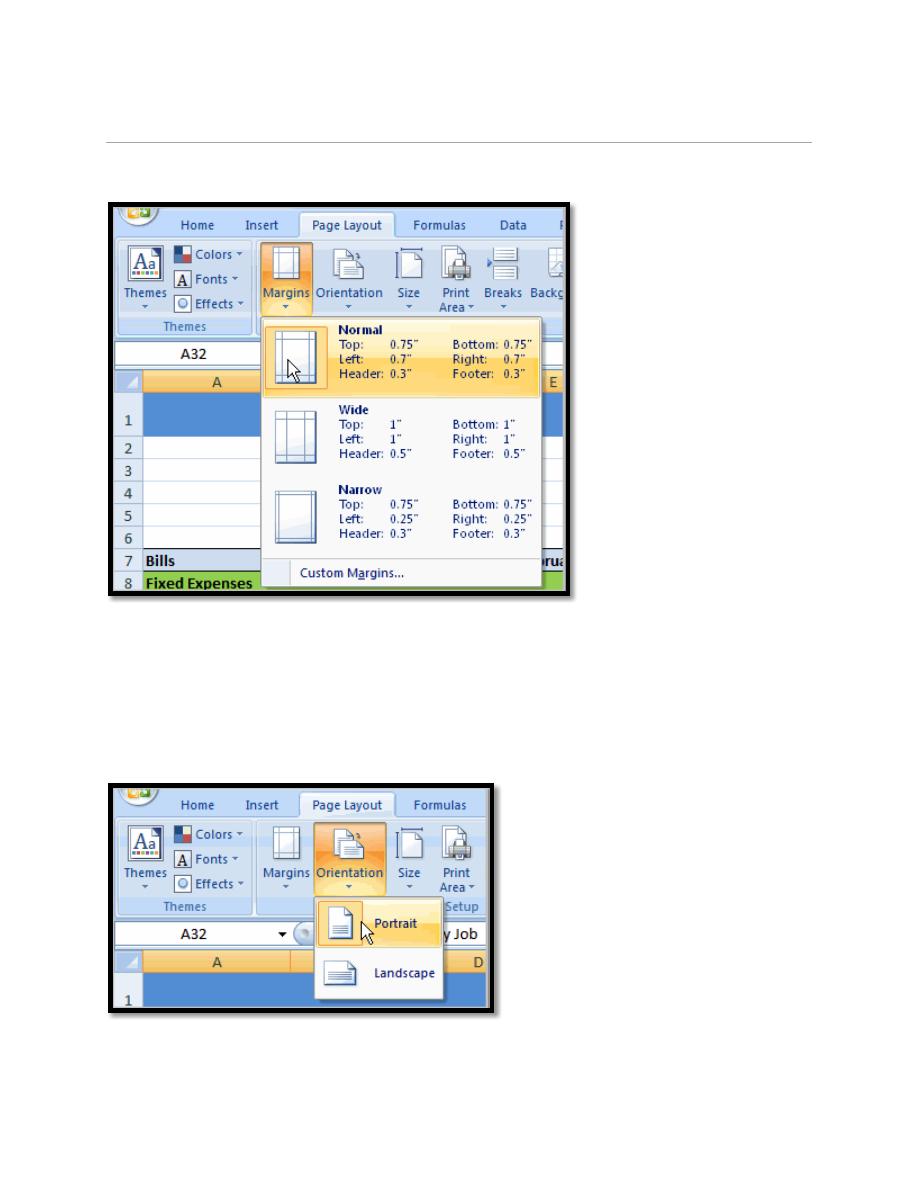
13.2. To Modify Margins:
a. Select the Page Layout tab.
b. Left-click the Margins command.
First stage – College of Medicine – University of Mosul\ Nineveh
Computer-Lecture 10 / 2015-2016
maha al ani
4
c. Choose one of the predefined settings or enter custom margins.
13.3. To Change Page Orientation:
a. Select the Page Layout tab.
b. Left-click the Orientation command.
c. Select either Portrait or Landscape.

First stage – College of Medicine – University of Mosul\ Nineveh
Computer-Lecture 10 / 2015-2016
maha al ani
5
13.4. To Define a Print Area:
a. Left-click and drag your mouse to select the cells you wish to print.
b. Click the Print Area command.
c. Choose Set Print Area.
d. Now, only the selected cells will print. You can confirm this by viewing the
spreadsheet in Print Preview.
13.5. To Print from the Microsoft Office Button:
a. Left-click the Microsoft Office Button.
b. Select Print. The Print dialog box appears.
c. Select a printer if you wish to use a printer other than the default setting.
d. Click Properties to change any necessary settings.
e. Choose whether you want to print specific pages, all of the worksheet, a selected
area, the active sheet, or the entire workbook.
f. Select the number of copies you'd like to print.
g. Click OK.
13.6. To Rename a Sheet:
Right-click on the name of the sheet that you wish to rename. In this
example, we want to rename Sheet1.
Then select Rename from the popup menu.

First stage – College of Medicine – University of Mosul\ Nineveh
Computer-Lecture 10 / 2015-2016
maha al ani
6
Enter the new name for the sheet and press the enter key on the keyboard
when finished. In this example, we've renamed Sheet1 to Example.